
Posts in Category: woodwork
A study in interlacing.
A combination of work and family life has made visits to the shop a rare thing for a while. Â A combination of exhaustion and boredom made posts to the blog even rarer. Â Such is life.
Got a little carving done the last couple of weekends, working on some new stuff to mix it up a bit.  I call the post a “Study in Interlacing” because each of the three panels I am working on is some kind of over-under type pattern.
On a lark I tried your standard “celtic knotwork” pattern, the kind you bang out on graph paper for fun.  It’s a lot of repetition of cuts, and it’s easy to miss one line if you are not methodical about it.  Layout took the most time, and once that was done, I was able to carve it pretty quickly.  The majority of the work is V-tool work, with a small shallow gouge to take care of under cutting. I used one of my background texture punches to finish it out on the “dots”.

Knotwork and Basket Weave carving
After that I looked a different type of “weave” that I have seen  before in a book on Japanese carving.  It looks like a basket weave, and nearly wrecked by brain trying to lay it out.  The secret is that its NOT a square grid layout.  It’s a two x three layout, almost like a herringbone pattern. Once I got that, I was able to lay in the lines, and get to work.  This one is a lot of flat wide chisel work, and a larger shallow chisel to handle the over under work.  I think it looks great in a raking light.
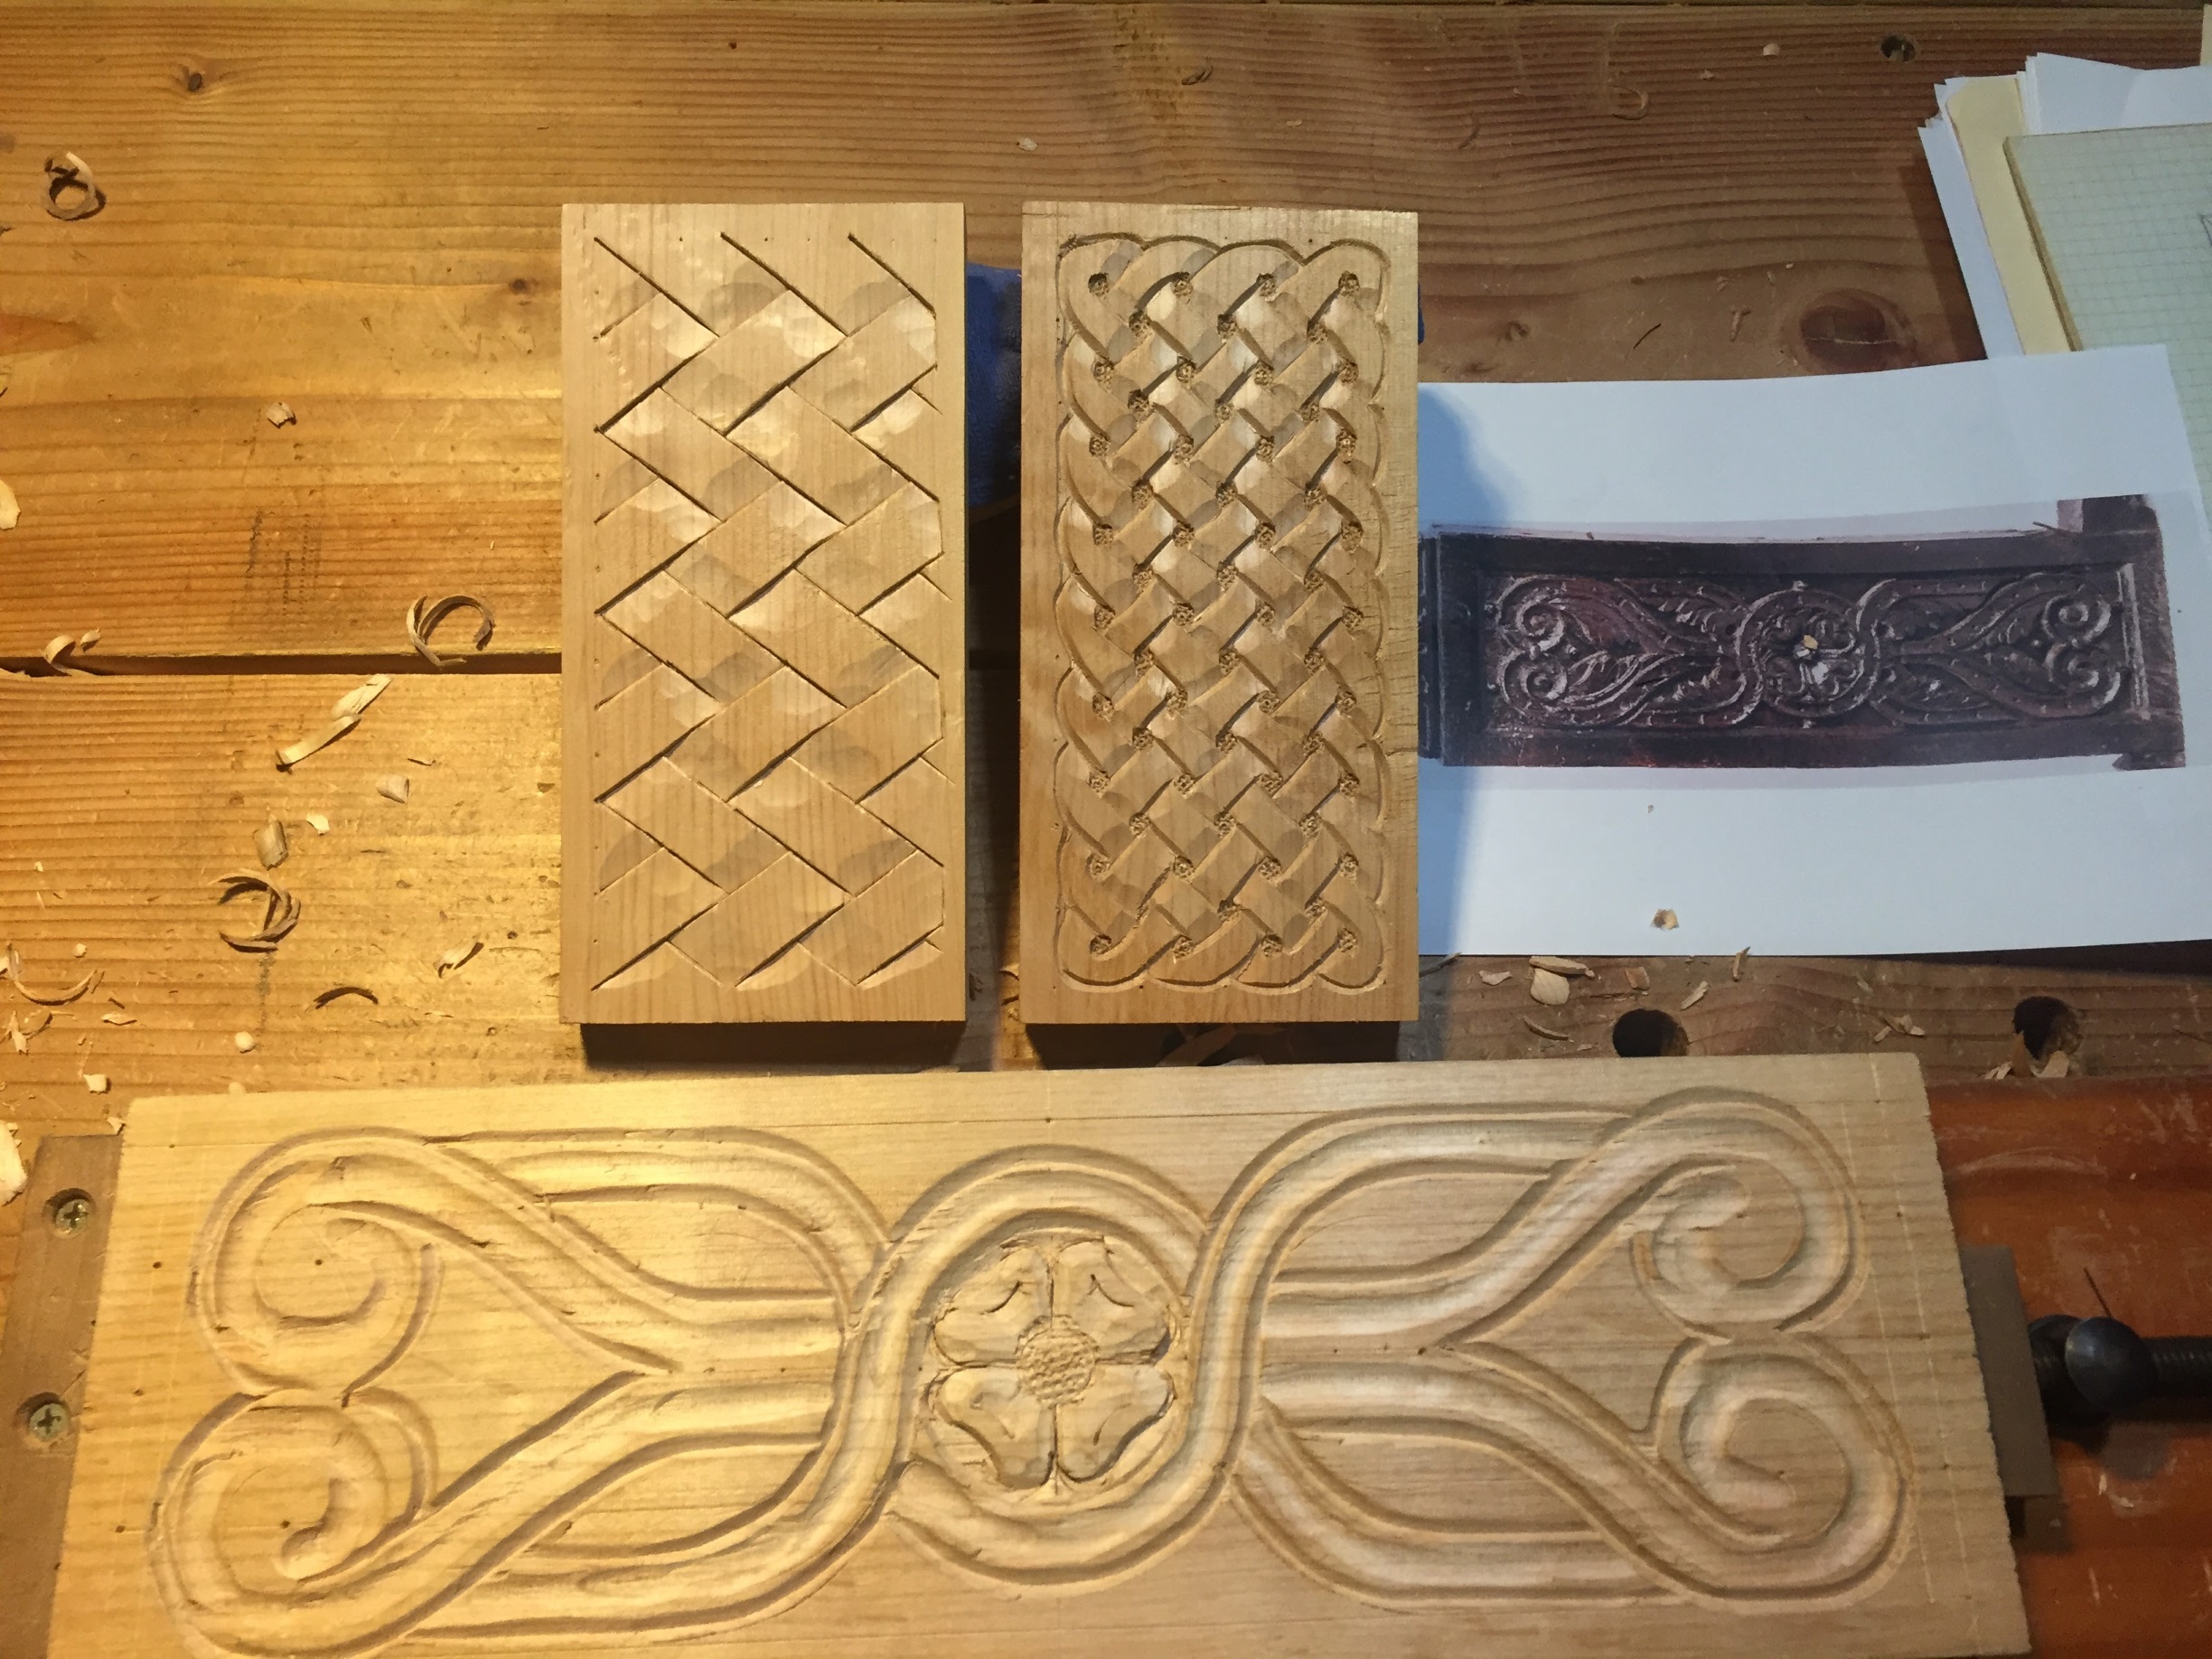
Sides and front of the “Study in Interlace” Box.
Continuing the theme, I drew inspiration from a “pew end” carving that I spotted at Marhamchurch Antiques, a massively great site for medieval carving enthusiasts.  One of the set of four Pew Ends recently sold there had this great over under theme that I wanted to try.  Layout was fairly straight forward if you’ve done a bunch of S-Scroll carving, so I started with the center circle using a pair of dividers and just eyeballing the width of the ring. I used the same line width all throughout to maintain a consistent look.  The two ends are laid out like half of an S-Scroll pattern with the two circles, and then I just connected all the lines and figured out over-under pattern.
Started with a V-Tool I outlined the whole thing, and started in with medium deep gouge to dish out the center of all the lines. Â This is where is started to go astray unfortunately. Â This is Alder, which fairly soft, and the tight corners chipped out like crazy. Â I did the best I could to clean it up with slightly shallower gouge, but I wasn’t able to totally clean it up. Â I’m not super pleased, but I’m going to finish it up anyway to get the practice.
The top will likely be Pine or Poplar depending on what I have in the shop. Â If I have a big wide poplar piece, I might carve that as well, we shall see.
Badger
Travel box
I’m going to be travelling east in a week to take a carving class from Peter Follansbee!  It was pretty much a spur of the moment thing, and my family is coming with to visit some of the sites and hit New York for a day on the way back.  I needed to take some of my tools with me so I thought I’d whip together a box.  And of course I can’t NOT carve it… especially if I’m going to a carving class.  Gotta show off ya know.

Carved Travel Box
The box is made from Poplar because that’s what I had in the shop at the time. Â I wish I’d gotten some Alder or Walnut but IÂ didn’t have the money handy or the time. Â Luckily this was some harder Poplar that usual, and was consistent for the most part. Â It was also a nice wide board, so I was able to carve the top which I don’t typically do.
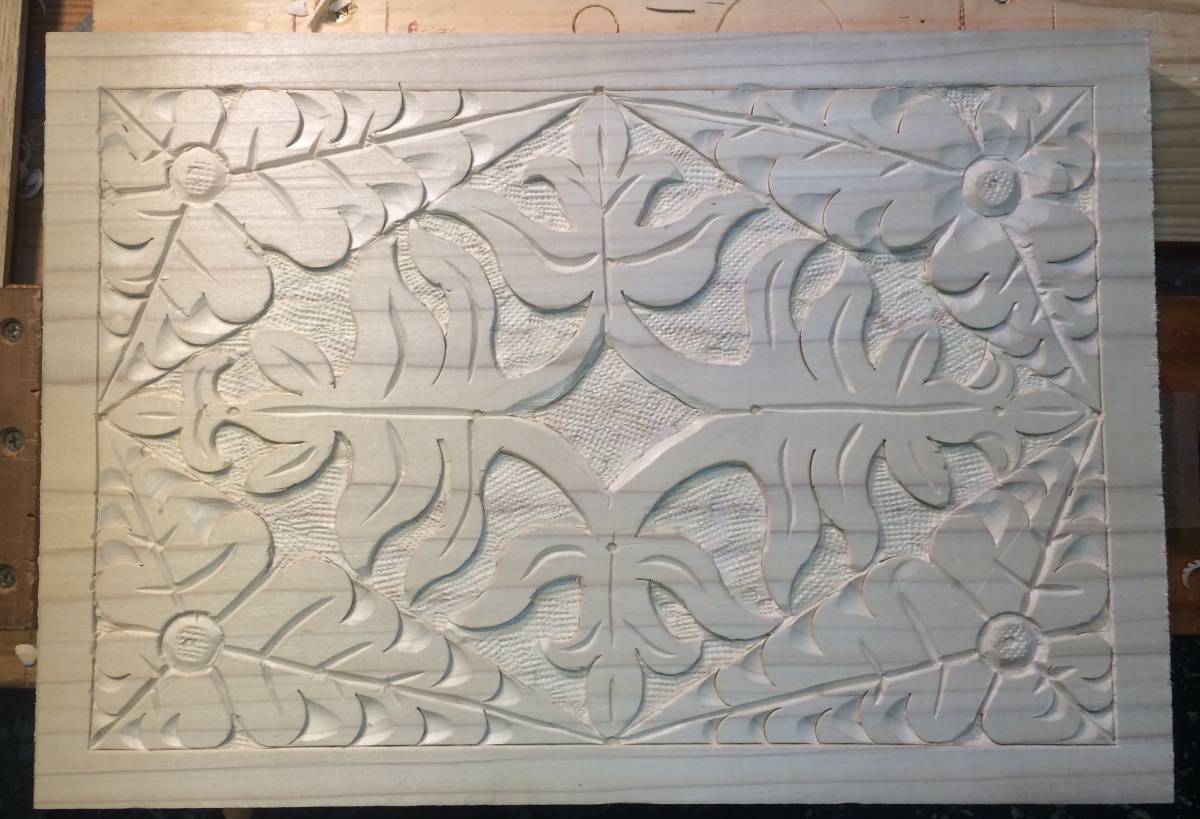
Top design for the Travel Box.
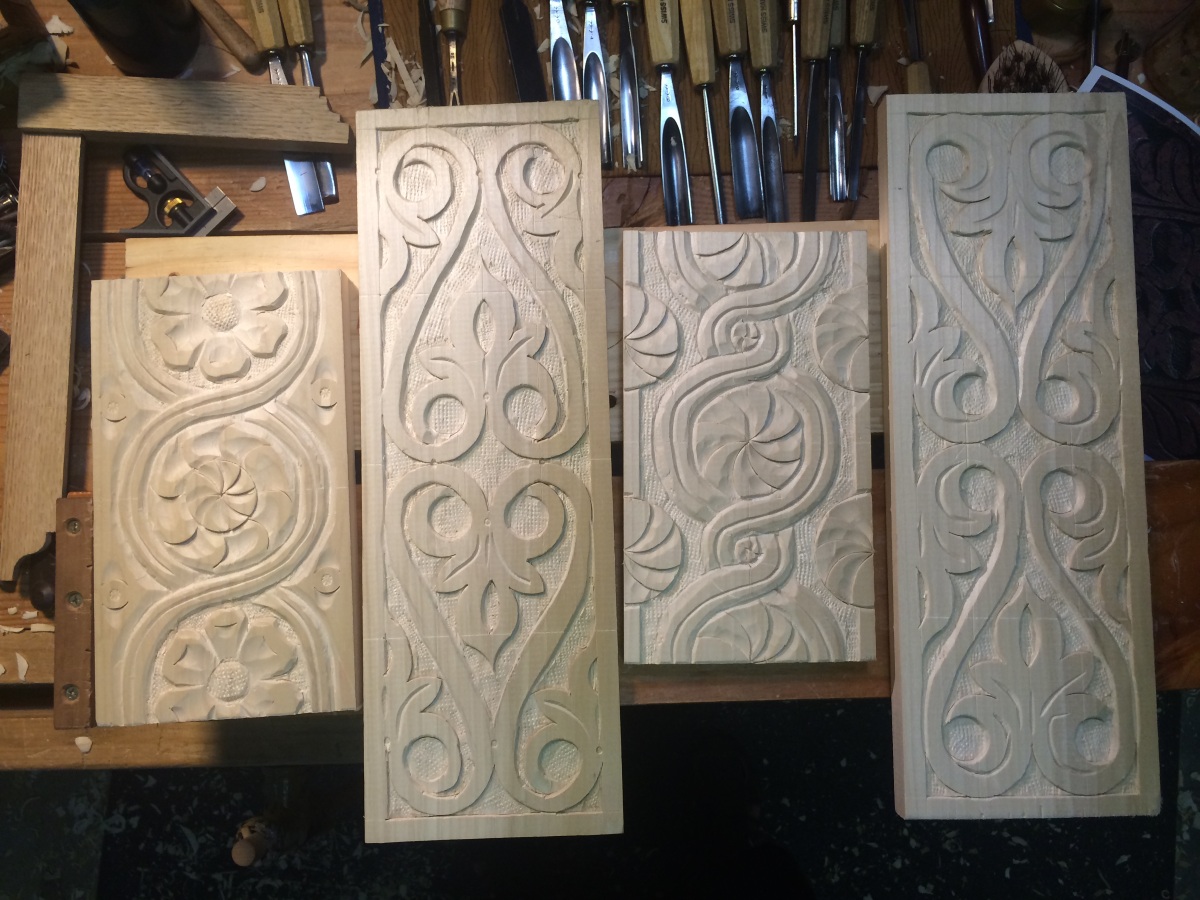
Carved box sides for the Travel Box.
For the front and back panels, I used S-Scrolls which I consider to be the swiss army knife of designs, and the sides were variations on the interlaced circles motif. Â Typically a box of the period would only have the front, and maybe the sides carved but I like to practice layout and carving so I did all surfaces.
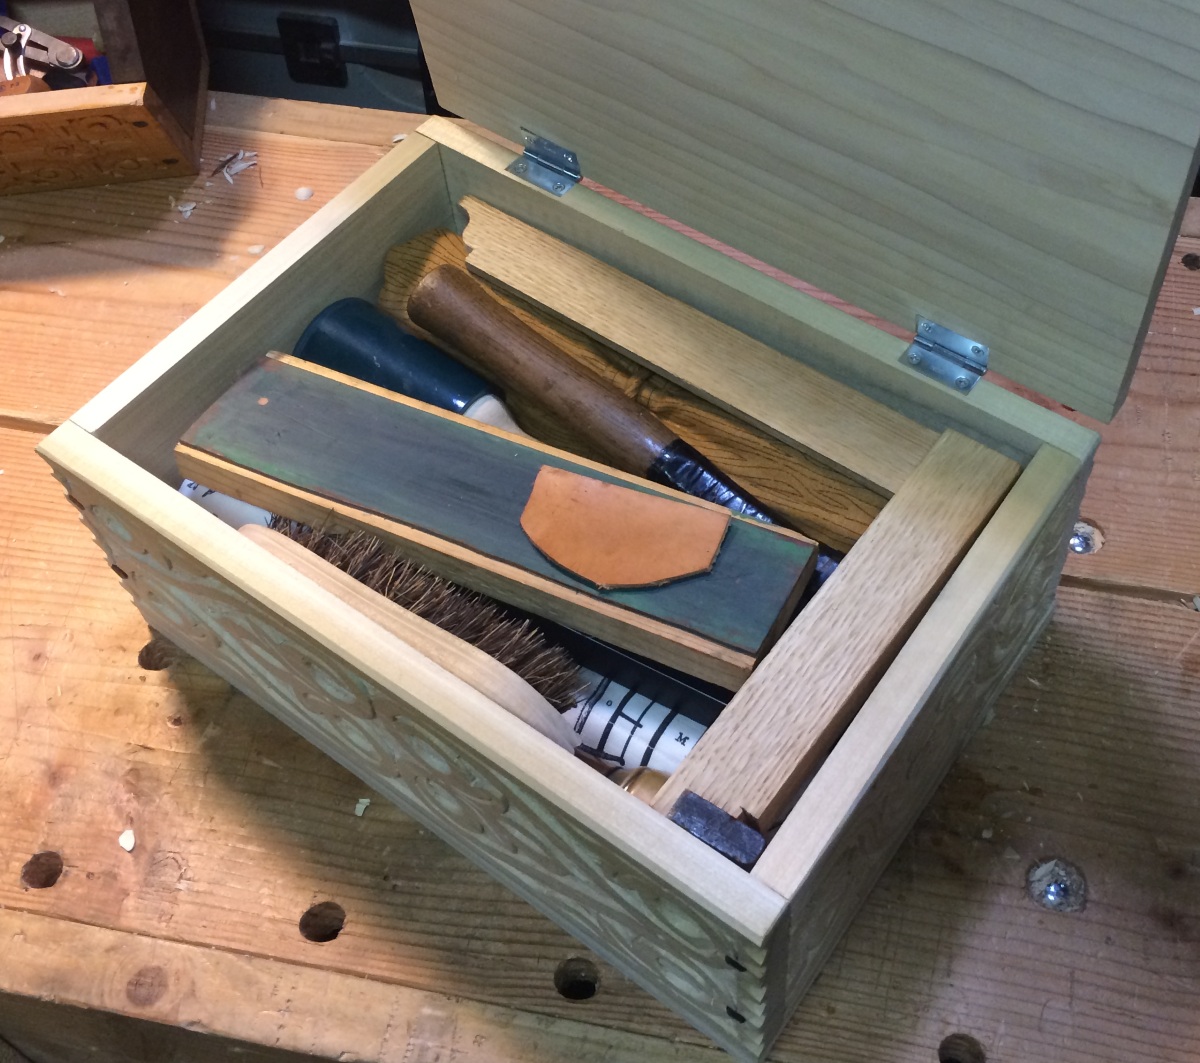
The Travel Box – Packed.

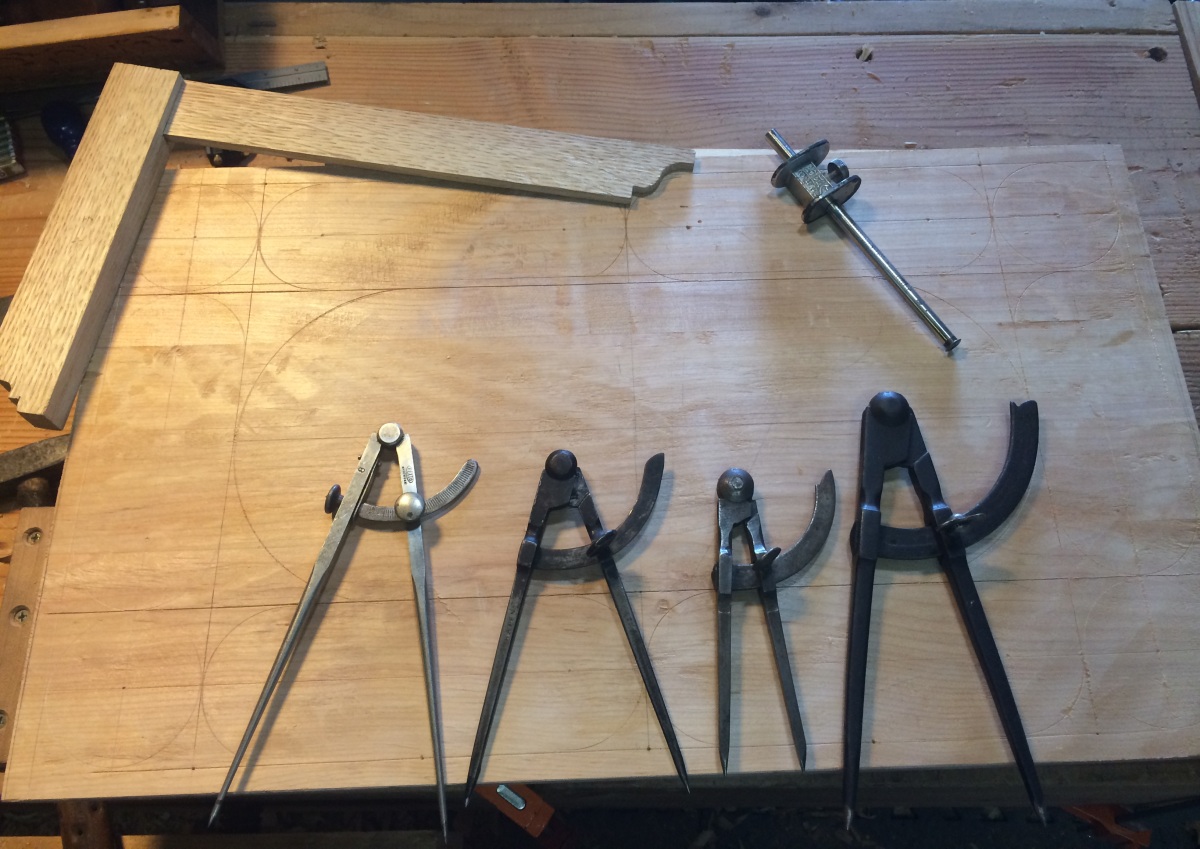
The tools!
I designed the size of the box to fit in my big suitcase, and to fit my tool rolls full of chisels.
I was able to cram the following in the box:
- 18 carving chisels
- 1/4″, 1/2″, 3/4″, 1″, 1 1/2″ bench chisels
- 5/16″ Mortise Chisel
- 2 carving mallets
- 3 compass
- Awl
- Marking knife
- 2 marking gauges
- metal hammer
- decorative punches (in the mint tin)
- 2Â squares
- Folding rules
- Pens/Pencils
- Stropping block
- Block Plane
- Carving Brush
I’m going to have borrow some tools when I get there, but I should be ok. Â The whole kit weighs 27 lbs.
I’m pleased with it, especially the top design because that’s a new layout for me.  The central design is based on a Thomas Dennis chest panel, and the outside edges I lifted from another panel of the period.  My only complaint is the wood, with that awful coloring. I can’t use my normal Shellac top coat without adjusting the color or bleaching the wood.  Which will have to wait till I get back.
Badger
Back to work on the Tool Chest
After quite a long hiatus on this project because of Life, Work, and various and sundry things I am back to working on my Anarchist Tool Chest. Â It sucks that I had to put this down for so long, but it just had to be on the back burner for a while.
Last weekend I picked the project back up again and actually made some progress.  With the lid being done, the next step was to mount the lid on the shell.  Which means hinges.  I personally hate hinges.  I suck at them.  I just do.  So it was part of why I was putting this off for so long.  I took a deep breath and tightened my belt and other euphemisms as well and just got to it.
Except I didn’t.
Turns out the wood had moved quite a bit since the last time.  The lip where the lid rested on had swelled horizontally somehow, and was no longer straight.  I suspect the wood we used wasn’t totally dried (if you were in the class you can hear the dripping sarcasm from here).  I planed off a bit on each front and back lip until my lid and back edge lined up again.
Now it was time for hinges.

Hinge!
Which actually went just fine despite all my whining and wailing. Â I followed the directions in the ATC book fairly faithfully, and took my time. Â The lid ended up every so slightly askew, which I cleaned up with a few passes of the plane.
So, now I have a functioning lid that fits well and opens smoothly.
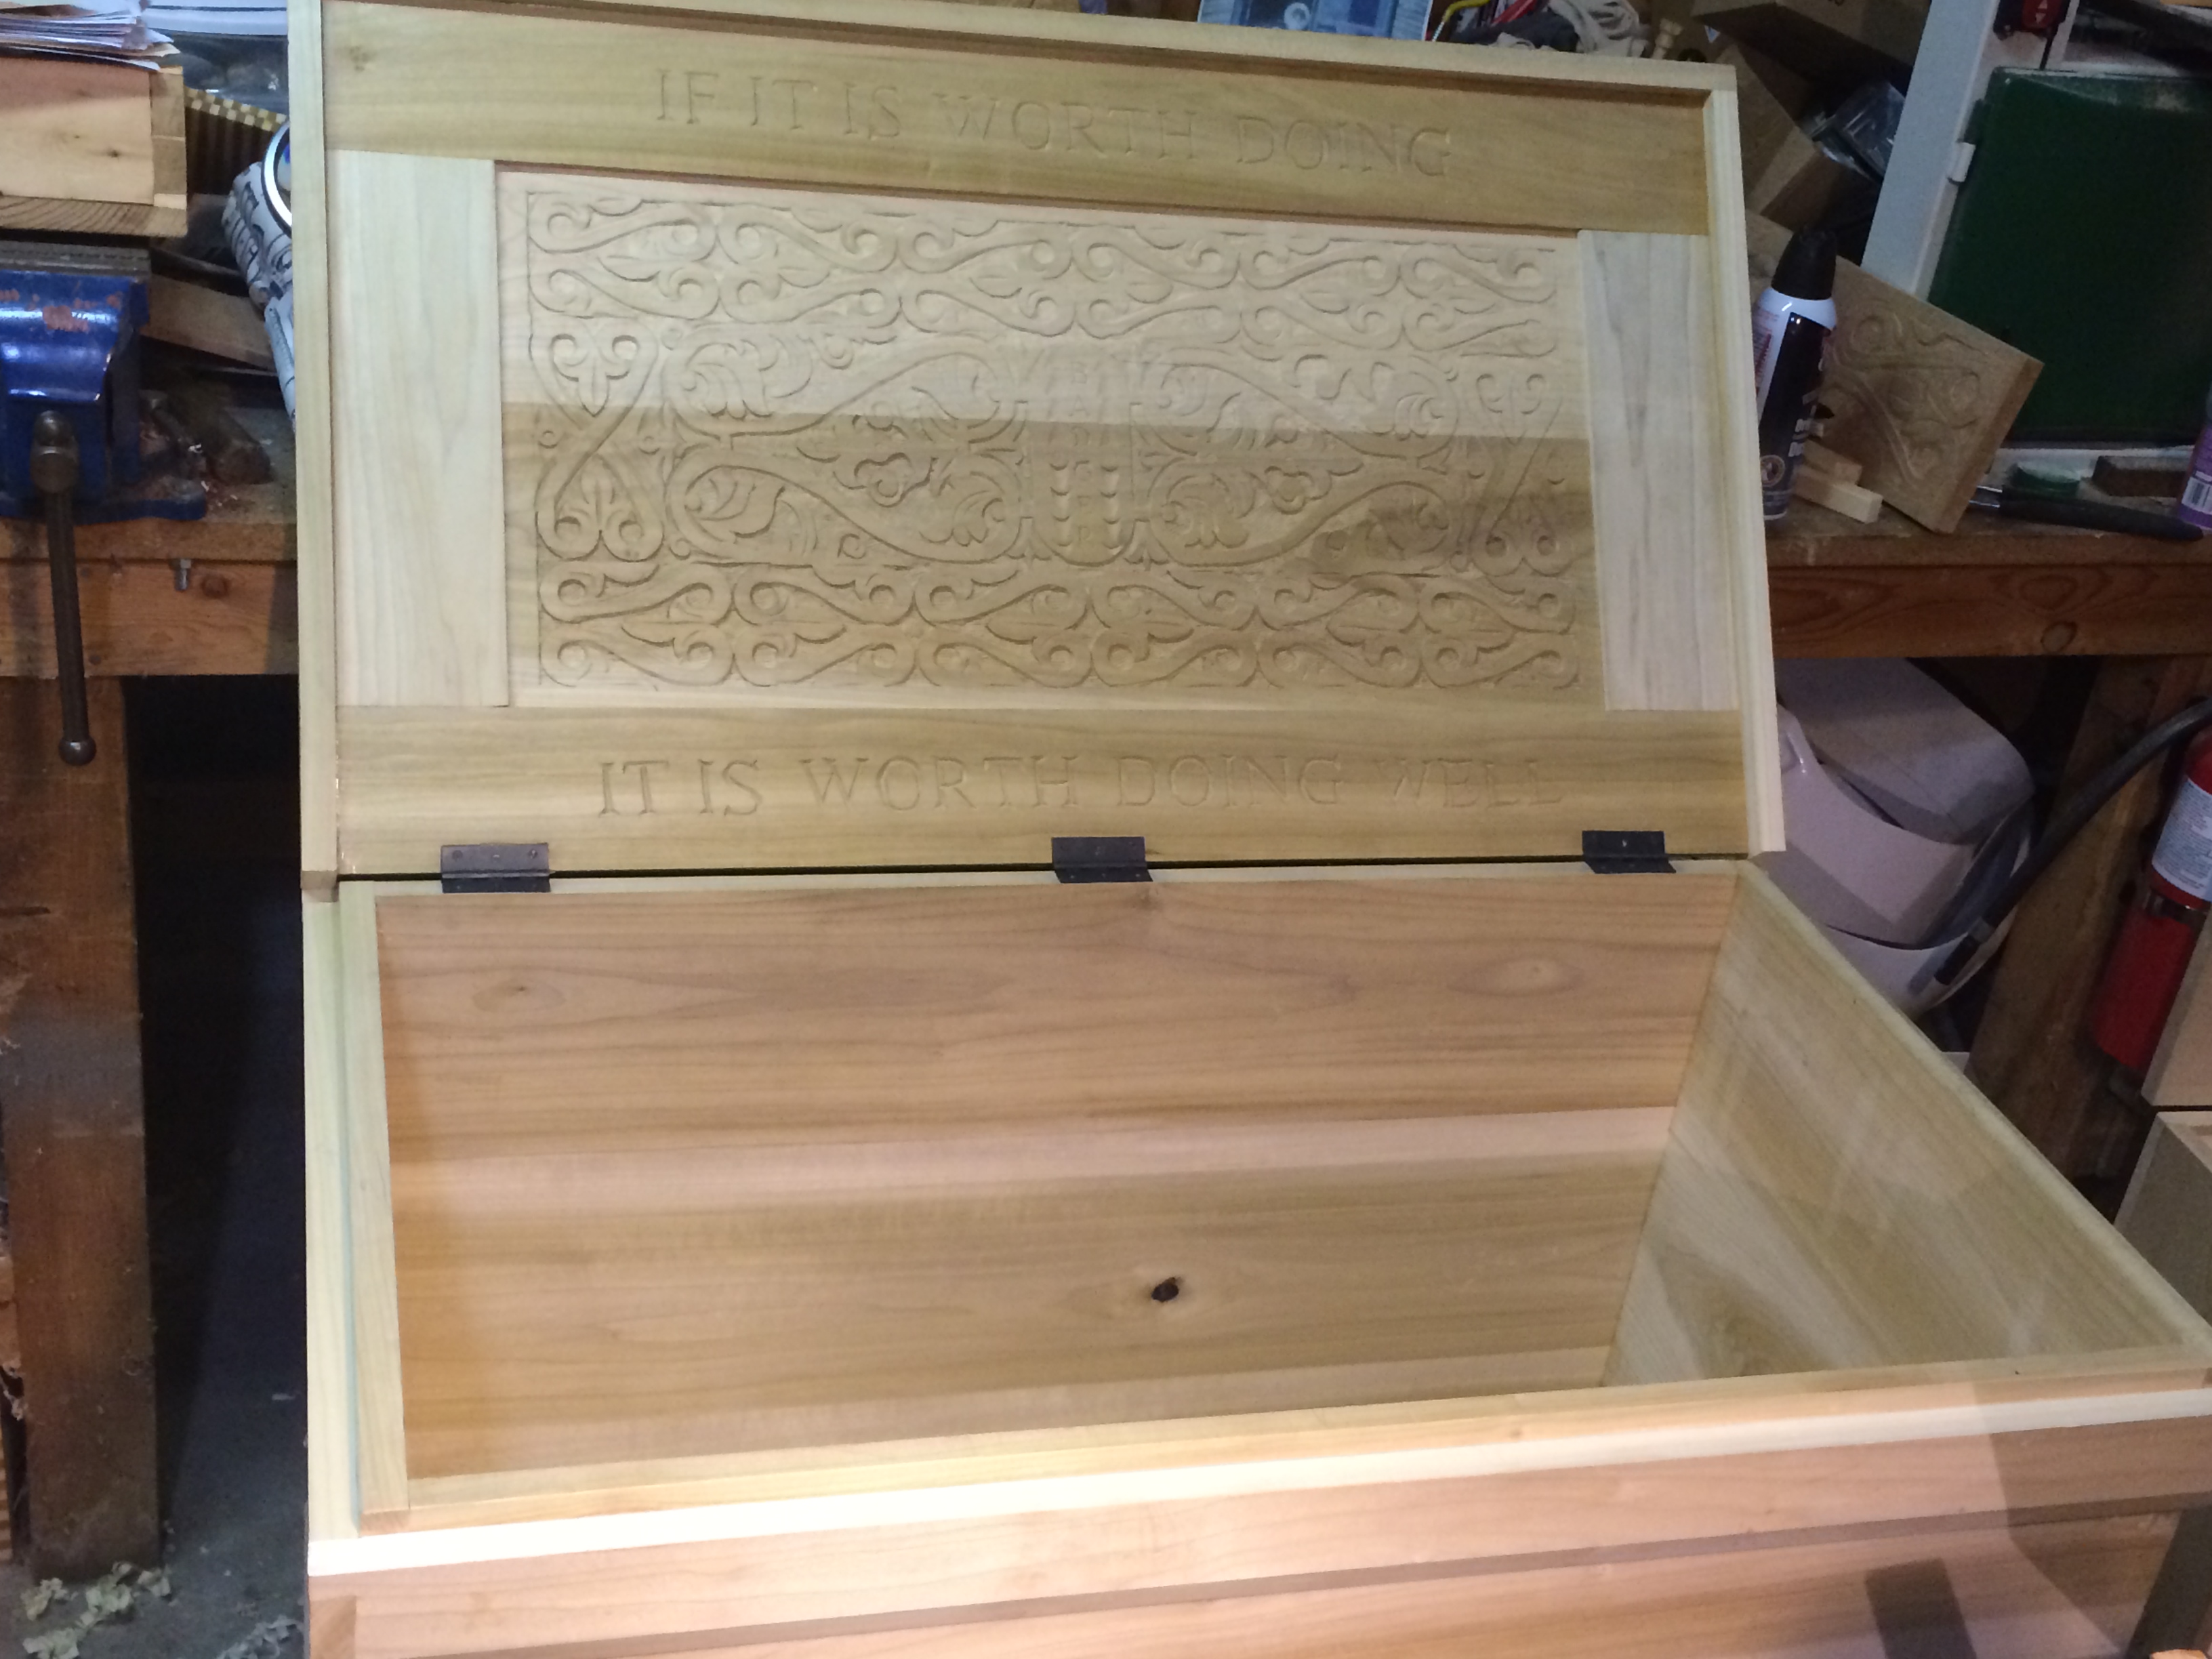
Lid Open!
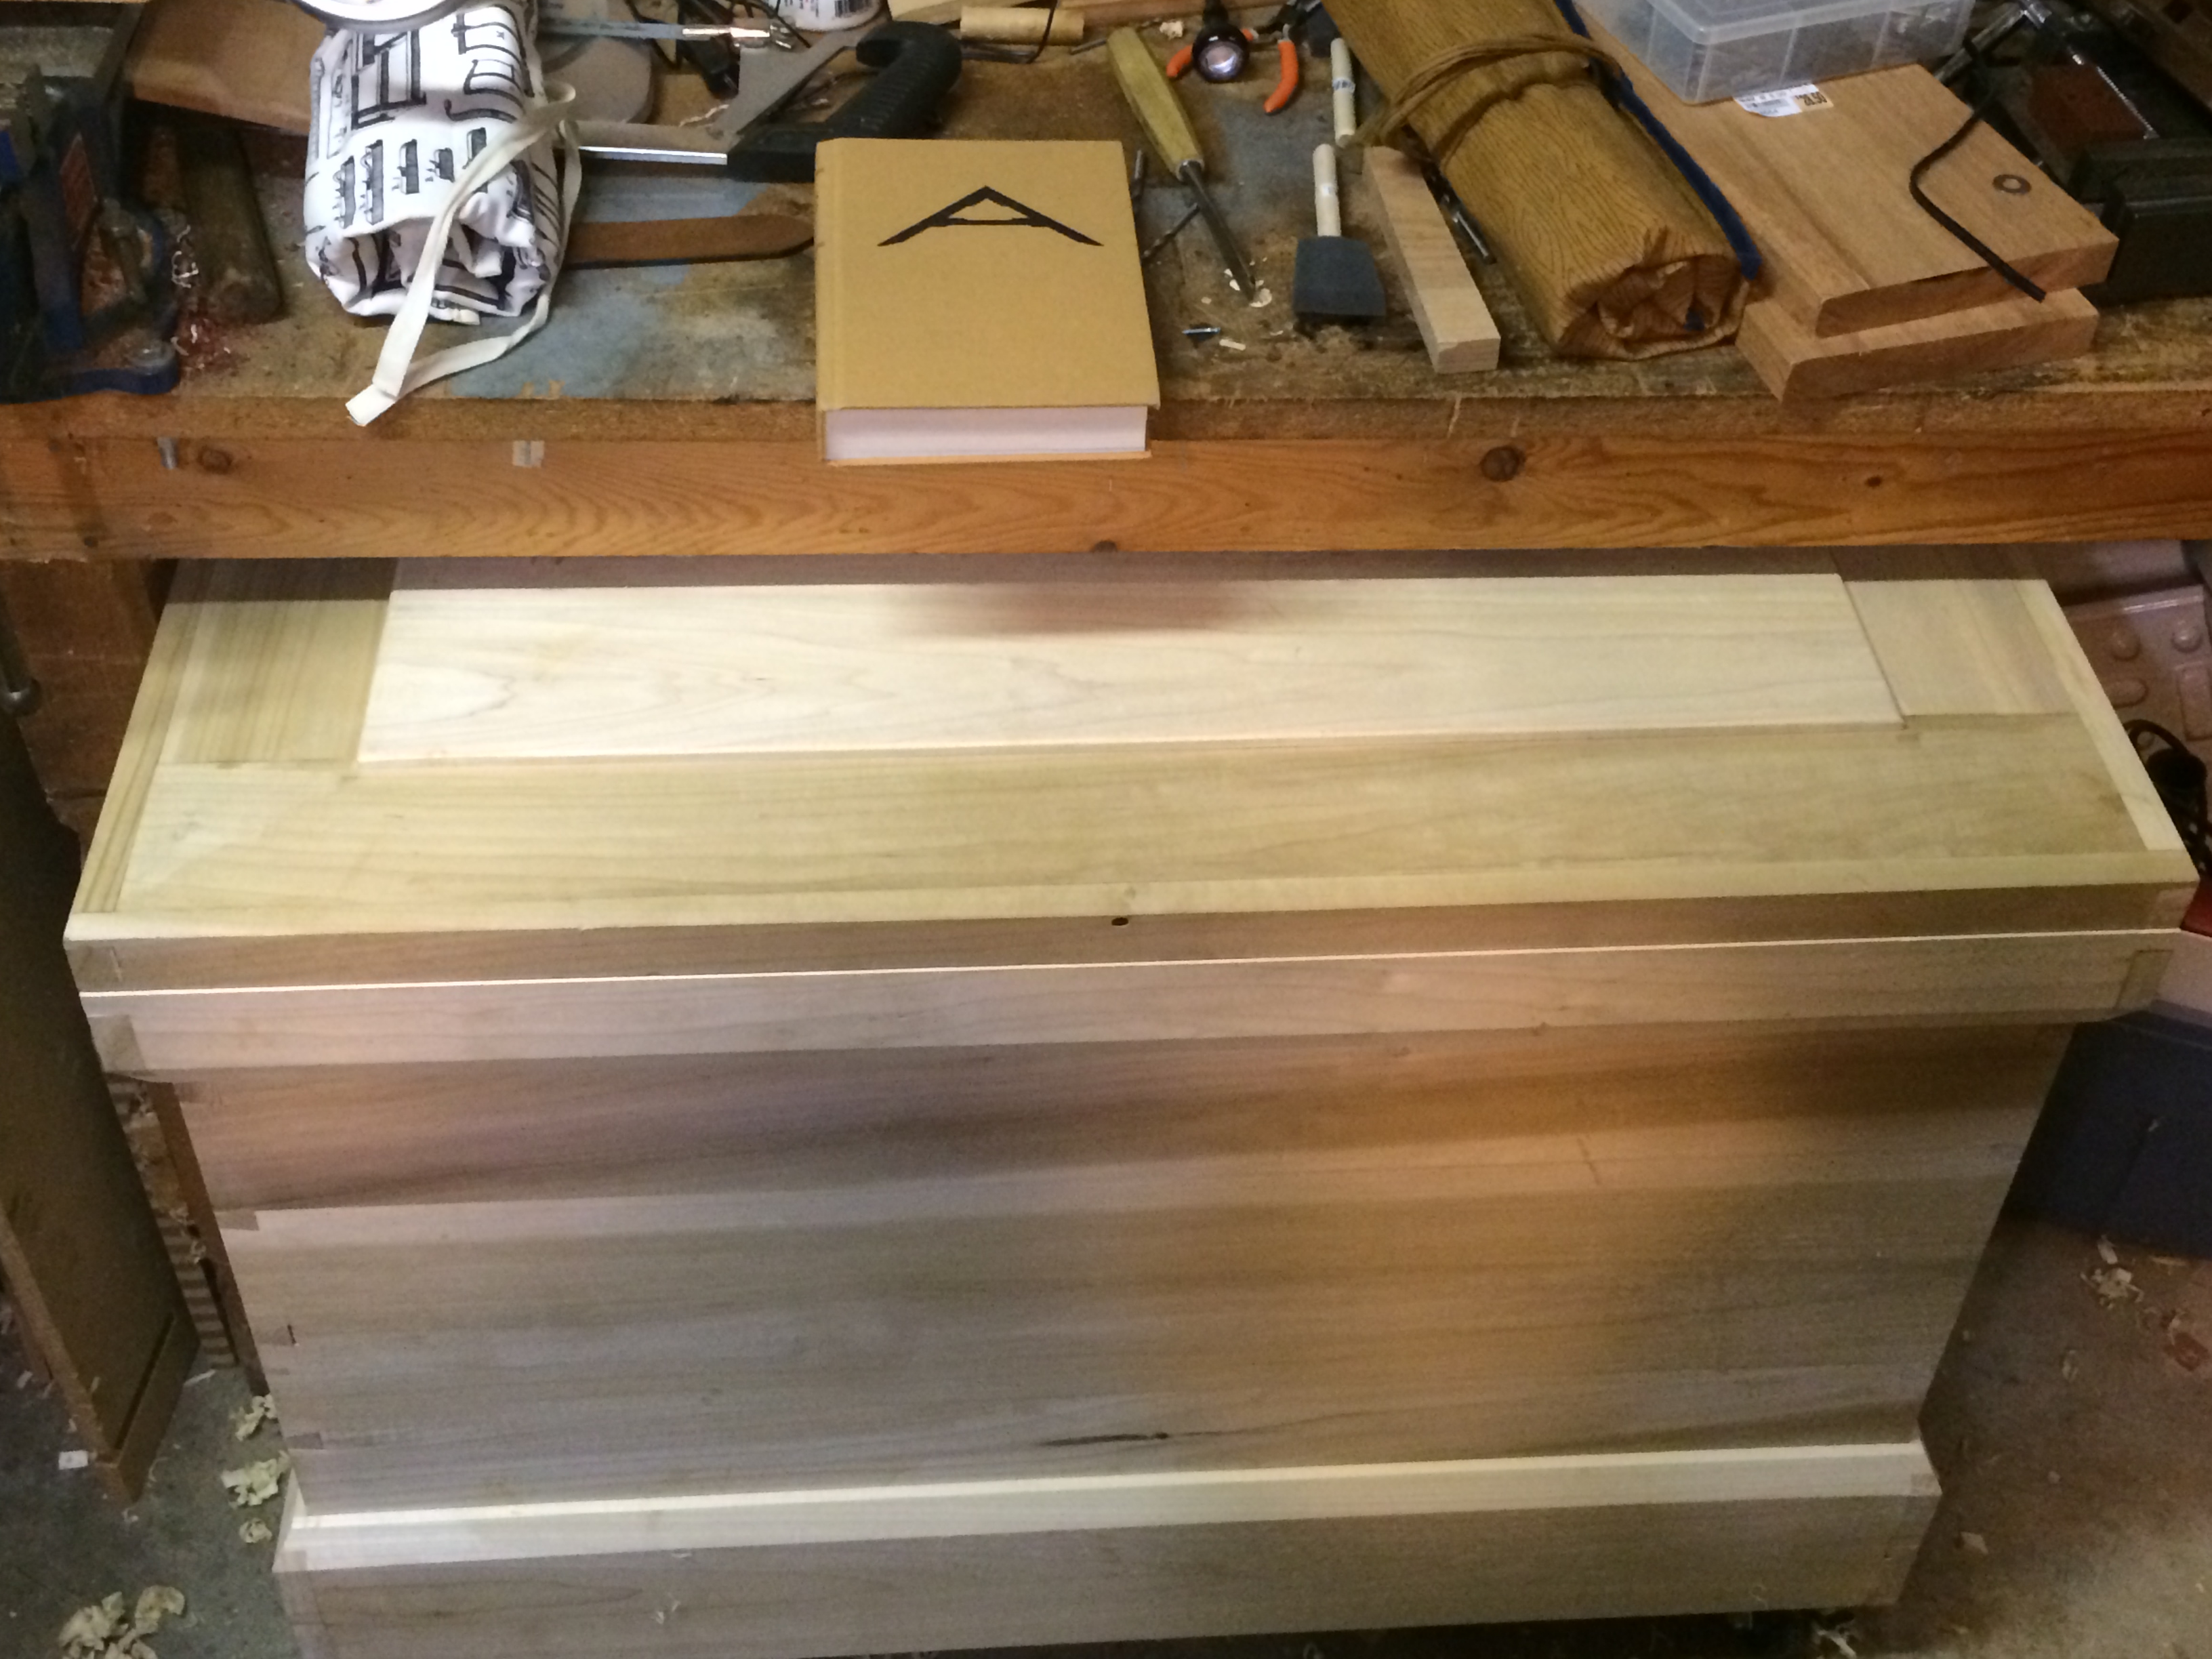
Lid closed! (and tucked under my secondary bench.
This completes the outside woodwork. Â I’ll paint it black with milk paint, and then start in on the inside. Â I might actually get to start putting TOOLS in it soon. Â That is pretty exciting.
Badger
Shop Sign progress part 2
See previous post here: Part 1
Before I talk about the sign, I want to mention that I think there are still a couple open slots in my wood carving class this Saturday April 12, 2014 at Rockler Woodworking Store in Northgate (Seattle, WA). Â Â It’s a two day class, and I start with the basics and work up to more complex stuff.
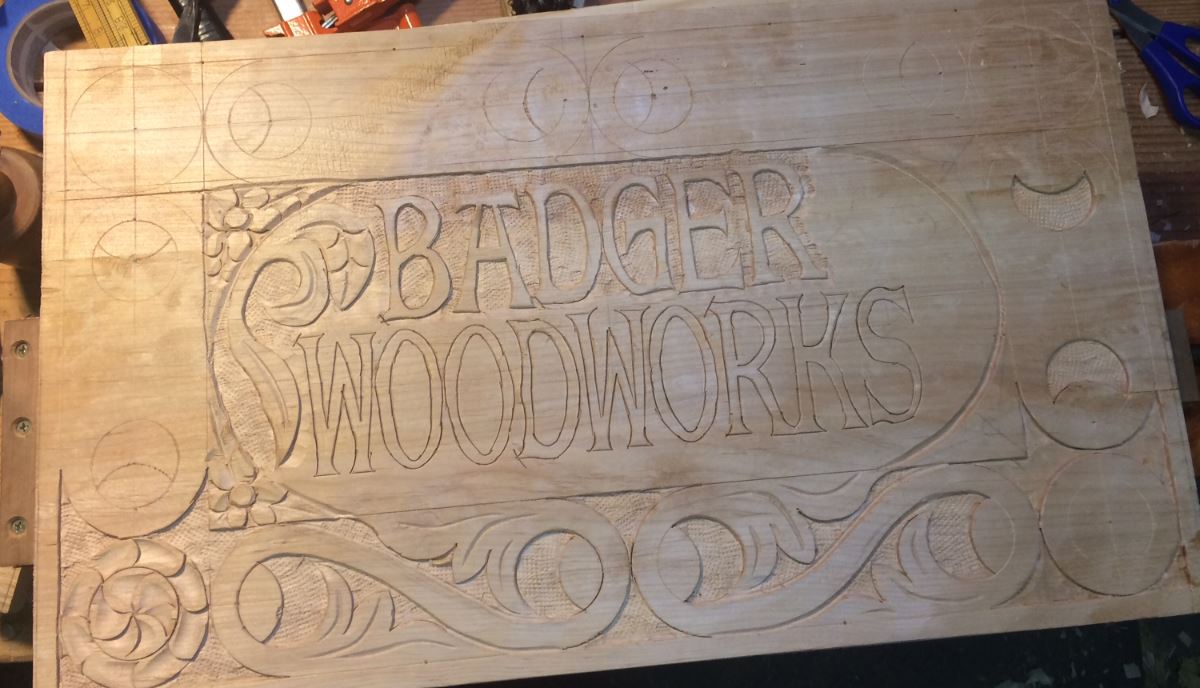
Letters outlined
Tonight I finished outlining the letters, and finished most of the major detail carving for the center area. Â Things I learned… Â Super glue is handy to have on hand, and thin letters in soft-ish wood is not necessarily a good idea. Â And yes those things are related.
The Alder is nice to carve, but it’s a bit soft and the thin legs on the letter had occasional problems when I slipped or pried even slightly off course. Â I had to replace four different chunks, and the S could not totally be repaired. Â Regardless I’m pretty happy with the result, and I’m going to be calling this a “Prototype” anyway.
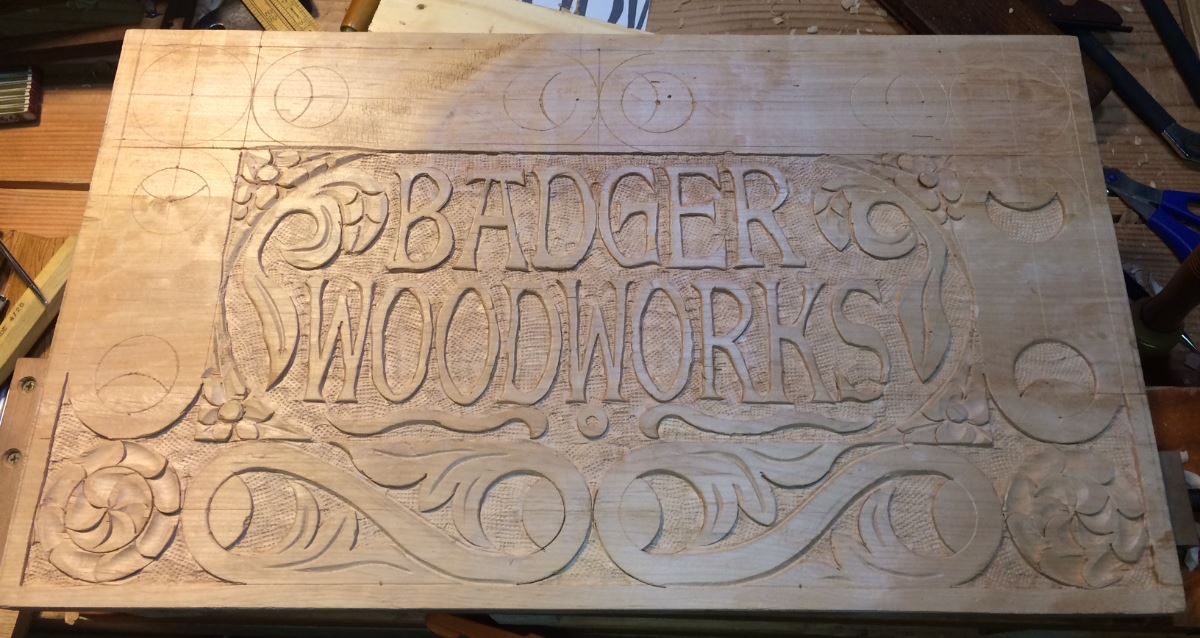
Majority of the letter work done.
I just need to finish up two of the round bits, and four S scrolls around the out side. Â A coat of Shellac should make it pop a bit, but over all it’s been a fun experiment. I definitely need to pay more attention to the general widths of the letter parts.
The outline of the letters was actually easier than I anticipated, and I did the bulk of the work with three chisels.
Flat chisel for straight areas.
Small medium curved gouge for the finials and bases on the letters, and some of the tighter inside curves.
Small flat-ish gouge (probably a #3) for outline the gentler curves.
I ended up using a fair number of other chisels because I had them, but I think I could have done almost everything with those three. Â It’s a case of using what you have to fit the outline you want.
I’m actually considering offering a one day class on letters both V-chisel incised Times New Roman, and a bolder font done like my sign above for bigger stuff. Â After I get through the relief carving class, I’ll see what Rockler wants to do in that area.
Badger
Shop Sign progress part 1
As I was preparing to teach my upcoming carving class, I realized I didn’t have a sign. Â So, I thought I’d warm up my carving muscles for my class and demo, and make a sign for Badger Woodworks at the same time.
I started with some the Alder I’ve posted about before which I’m running a little low on, and glued three sections together to make a larger panel. Â I used Hide Glue and a bunch of clamps, and it worked like a charm. Â The wood has some funky grain in a few spots, but otherwise seems carve-able.
Staring the Layout
For this layout I started with a border around the edge, and set circles in the corners. I played around with proportions until I got something where I could put two S scrolls along the bottom, and a single one up the sides. Â Putting the roundel or circle in the corner made it easier to layout, and gives me lots of options for designs. Â I tried to do some strapwork based on the circles on a previous design and nearly drove myself mad trying to make it work with the proportions so I skipped that this time.
Since I knew I was going to put my shop name in the middle, I sub-divided my remaining space and used the center line to create two half circles at the ends to bound the middle space. I’ve seen a bunch of corner/triangular space filling designs in other chests and I thought this might be a good place to experiment with those.
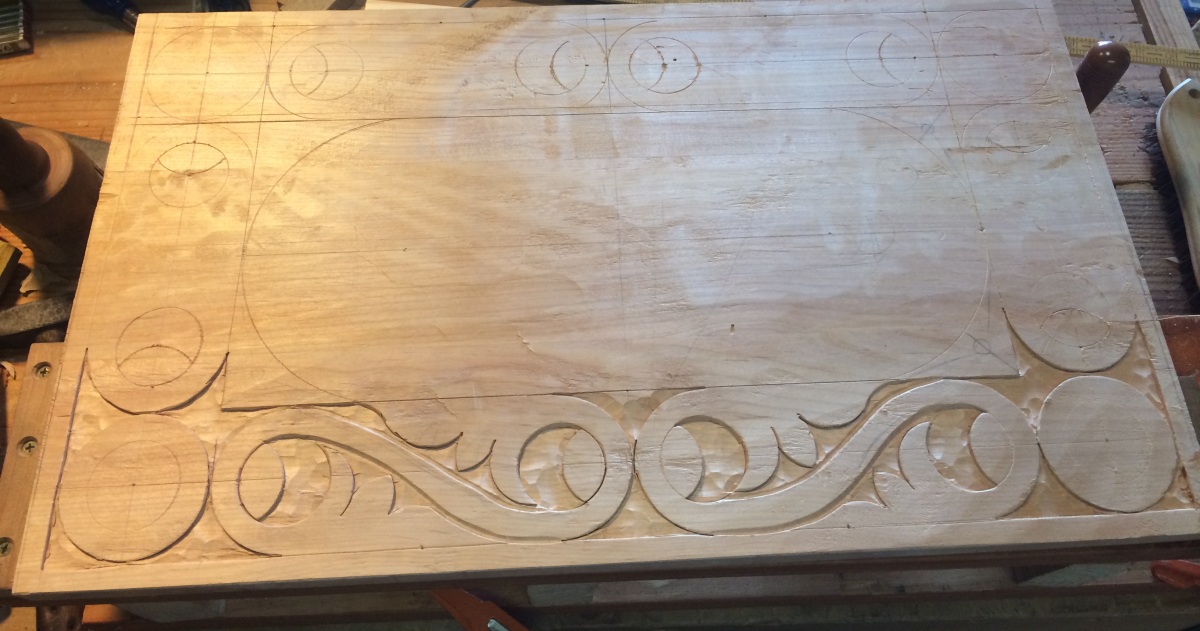
Carving the Scroll work
With the layout basically done, I started setting the scroll work, and relieving the background. Â I knew I had the carving demo coming up so I deliberately didn’t finish the outside edge so I could use it for examples in my demo. Â I experimented with a half button inside the loops, but I’m still not sure the design element works here.
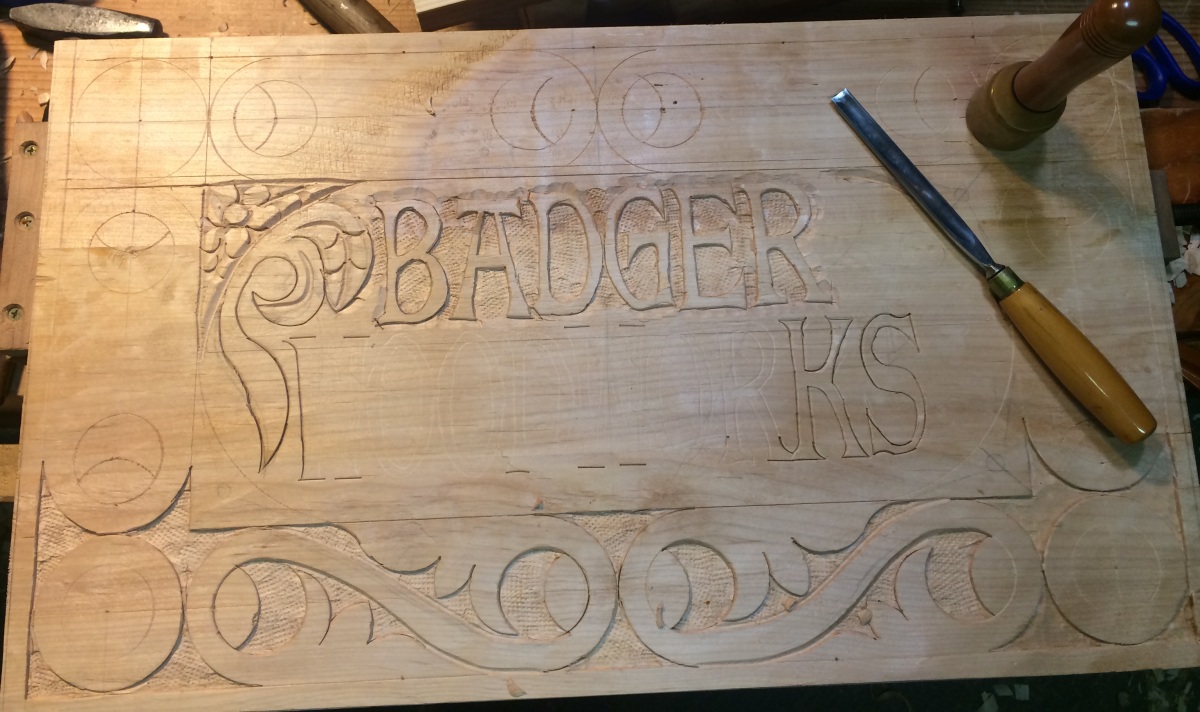
Outline of the text and filling some space
For the text I went to my trusty word processor, picked a good font and started playing with layout. Â Once I felt I had something good, I started printing out samples and laying them on the wood. Â It took four tries to find the right spacing and layout. Â Once I had that I taped it down with blue tape, and went over the outlines with a pen directly on the paper pressing down HARD to make a dent in the wood below. Â This left a nice impression that I was able to follow later to make the letters.
I knew that “Woodworks would be much longer than “Badger” so I had to fill in some space as well. Â I tried free handing the design but I’m not sure it works as well as I was hoping, something I will need to practice some more.
To outline the letters I set in outline with 3 different chisels, a small medium curve gouge, a slight larger gentle curved gouge, and a straight/flat chisel. Â I was able to do almost every single curve with these two gouges. Â I had to be very careful on the thinner legs of the letters and already chipped one out which I had to glue the wood back in. Â Then it’s just a matter of relieving the outside, and texture punching the background.
More to come later as I finish the project.
Tool chest progress, finishing the lid.
Previous post on tool chest here.
Made some progress on my tool chest this weekend. Â I’ve been plugging away at it slowly since I brought it home from my class in Port Townsend.
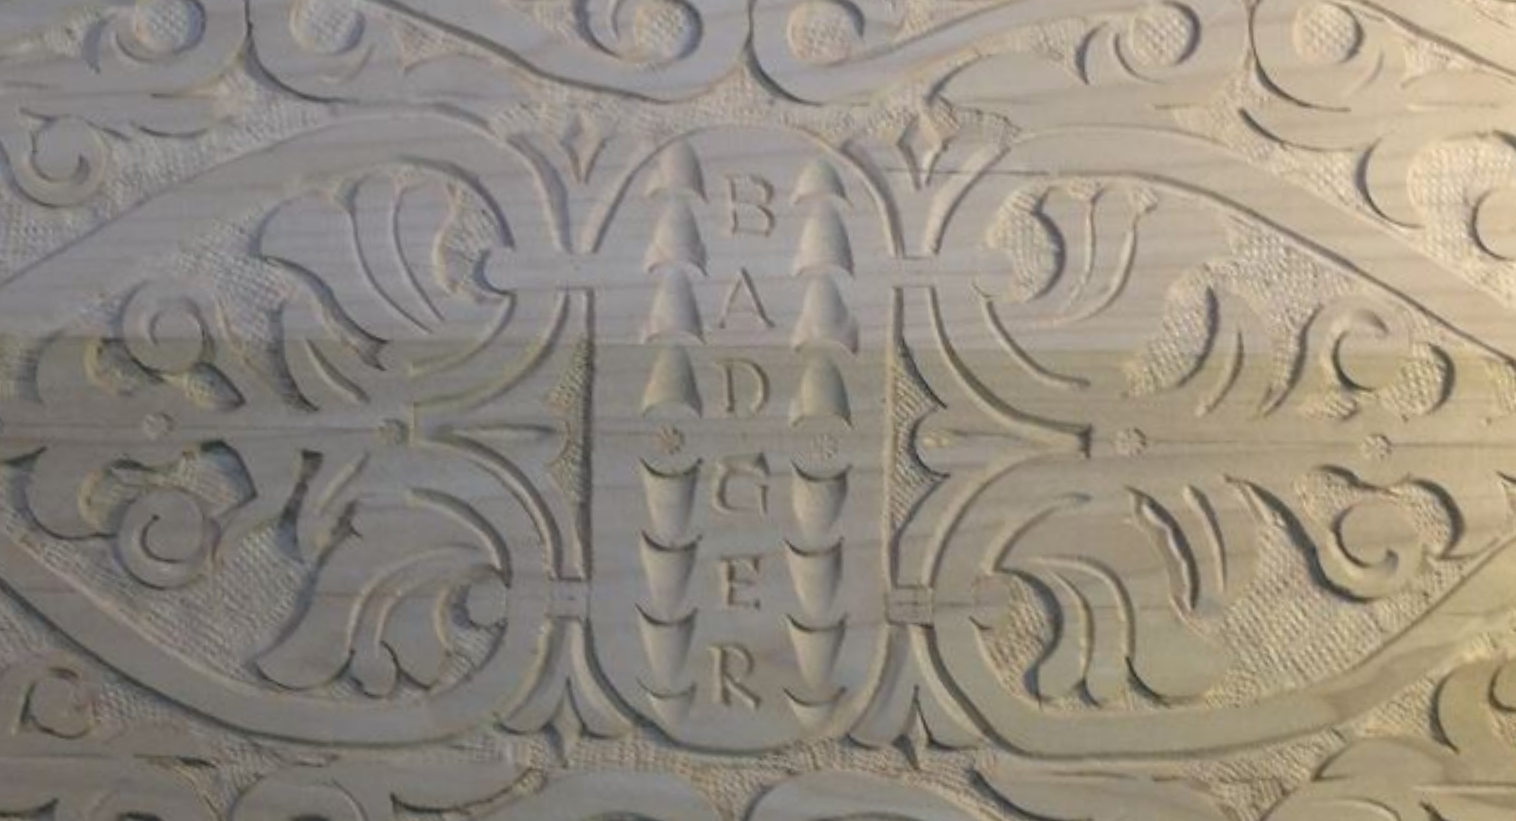
Detail shot of the carved lid.
First challenge was fitting the beast into my small shop, which is really just the back end of a two car garage that is full of boxes of stuff. Â I was worried that it wouldn’t fit, and I’d have to dance around it to get anything done until I totally re-arranged everything.
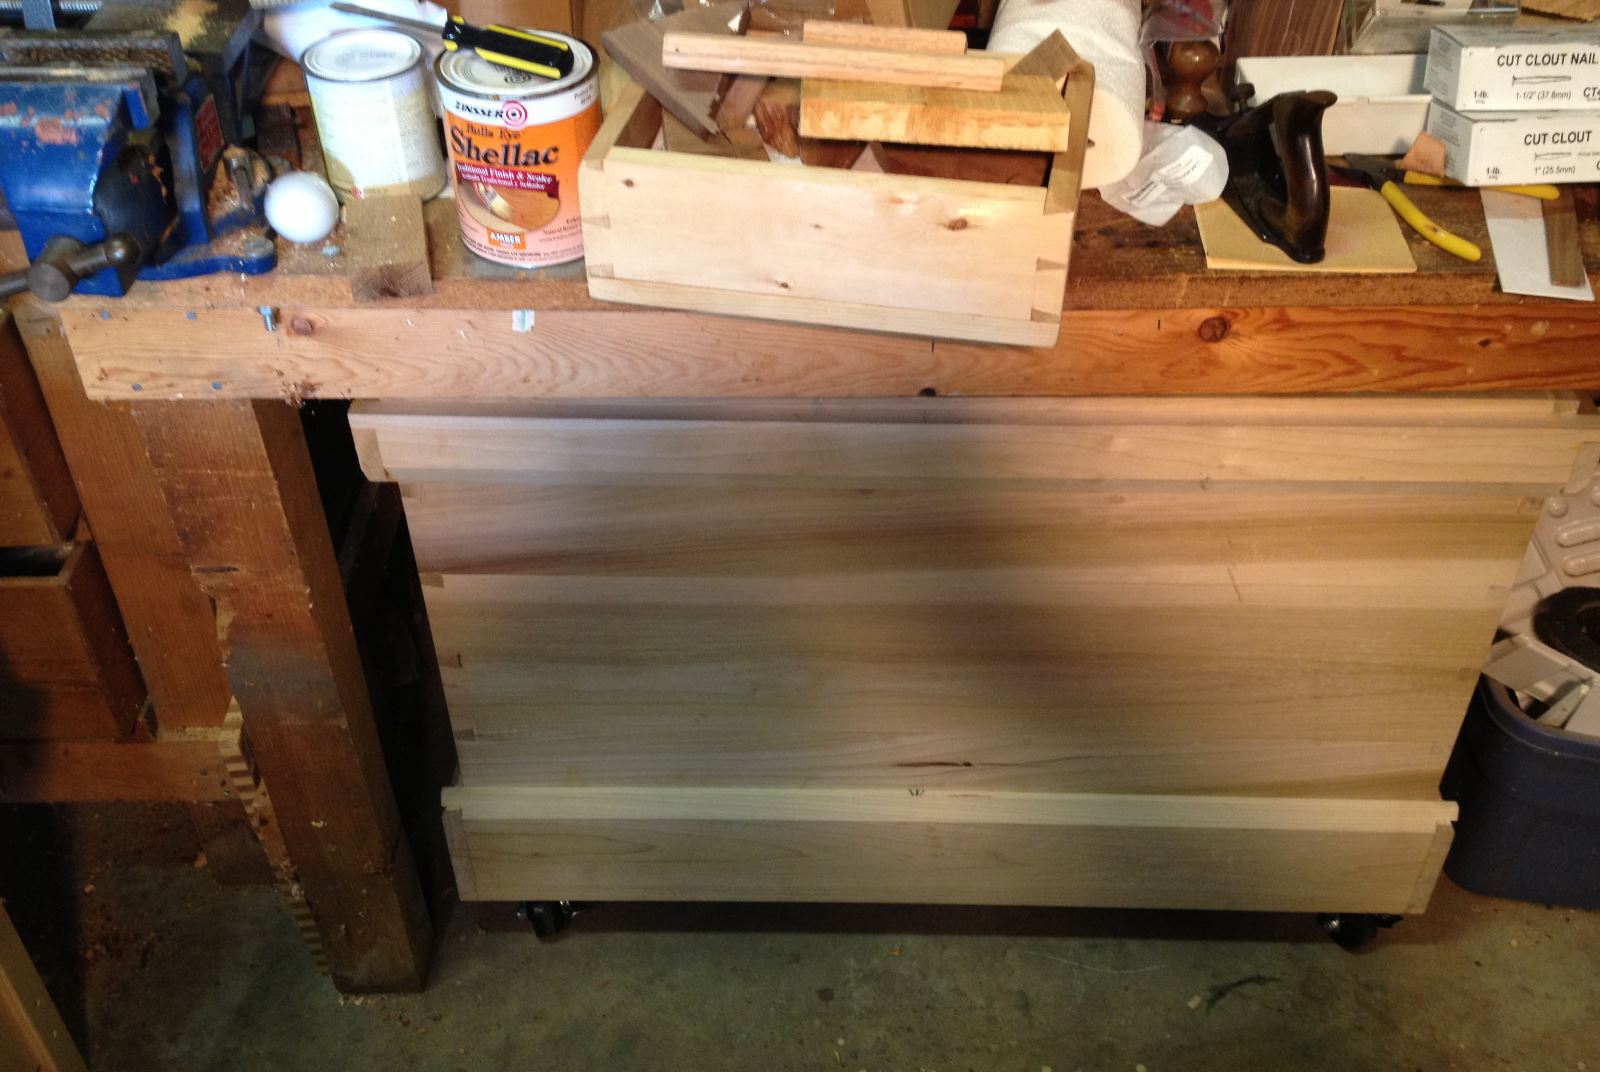
Luckily it just barely fits under the grungy shop workbenches that came with the house. Â With room for the lid.
With that sorted, I was able to turn my attention to the lid, which was still un-assembled because I wanted to trick it out with some carving. Â My understanding is that traditional chests were plain on the outside (because they get beat up a lot) and the underside of the lid and inside were usually prettied up with marquetry, and fancy veneer and the like. Â Since I can’t do any of that I thought I’d do some carving, like I like to do.
It started as conversation at the tool chest class, about how Peter Follansbee used some of his sample carvings for the runners inside his chest. Â One thing led to another and I decided to carve the underside of the lid, the tray sides, and possible the runners as well. Â You know, just to show off. 🙂
Here are some progress shots of the lid.
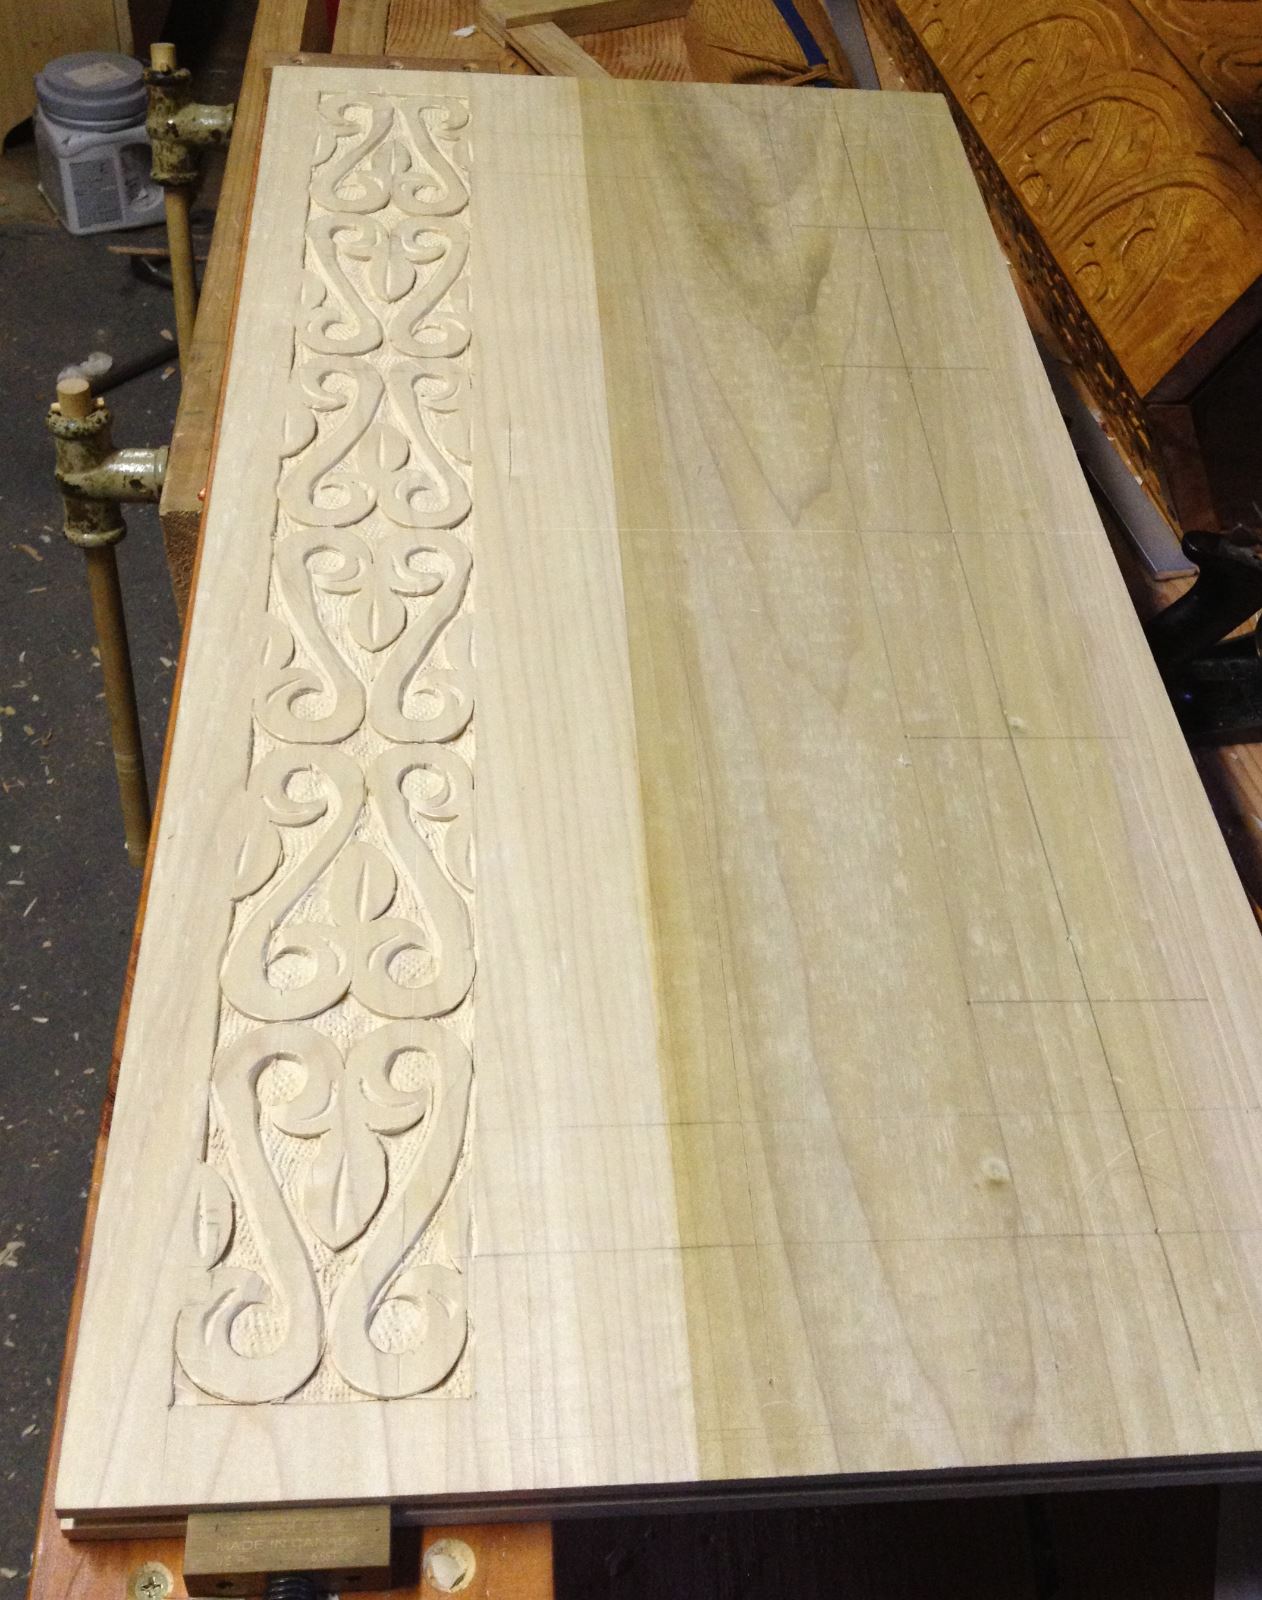
One row of S-Scrolls for the underside of the lid.
Second row of S-Scrolls complete.

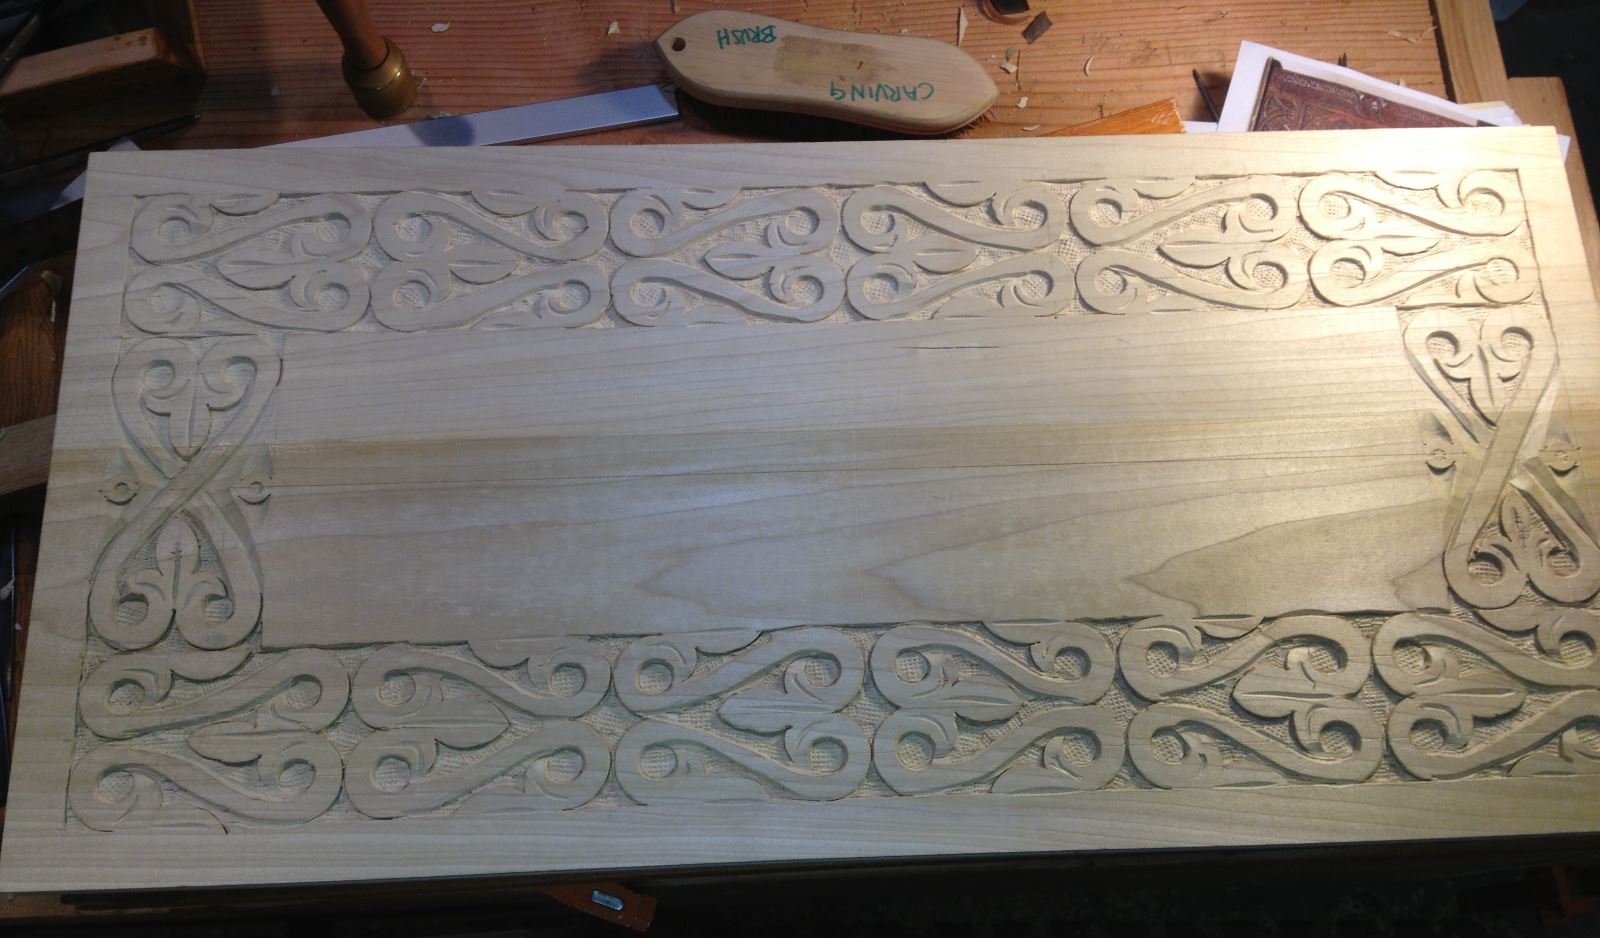
Final arrangement of carving for the inside of the panel done.
I had some thoughts around the design of the outside edge of the frame, but it had taken quite a while to get to this points, so I was thinking of a few different options including calling to good enough.  I’ve been re-reading the Joiner and Cabinet Maker and a quote from Thomas jumped out at me.  So I carved it into the upper and lower rail to remind me to slow down and do it right.
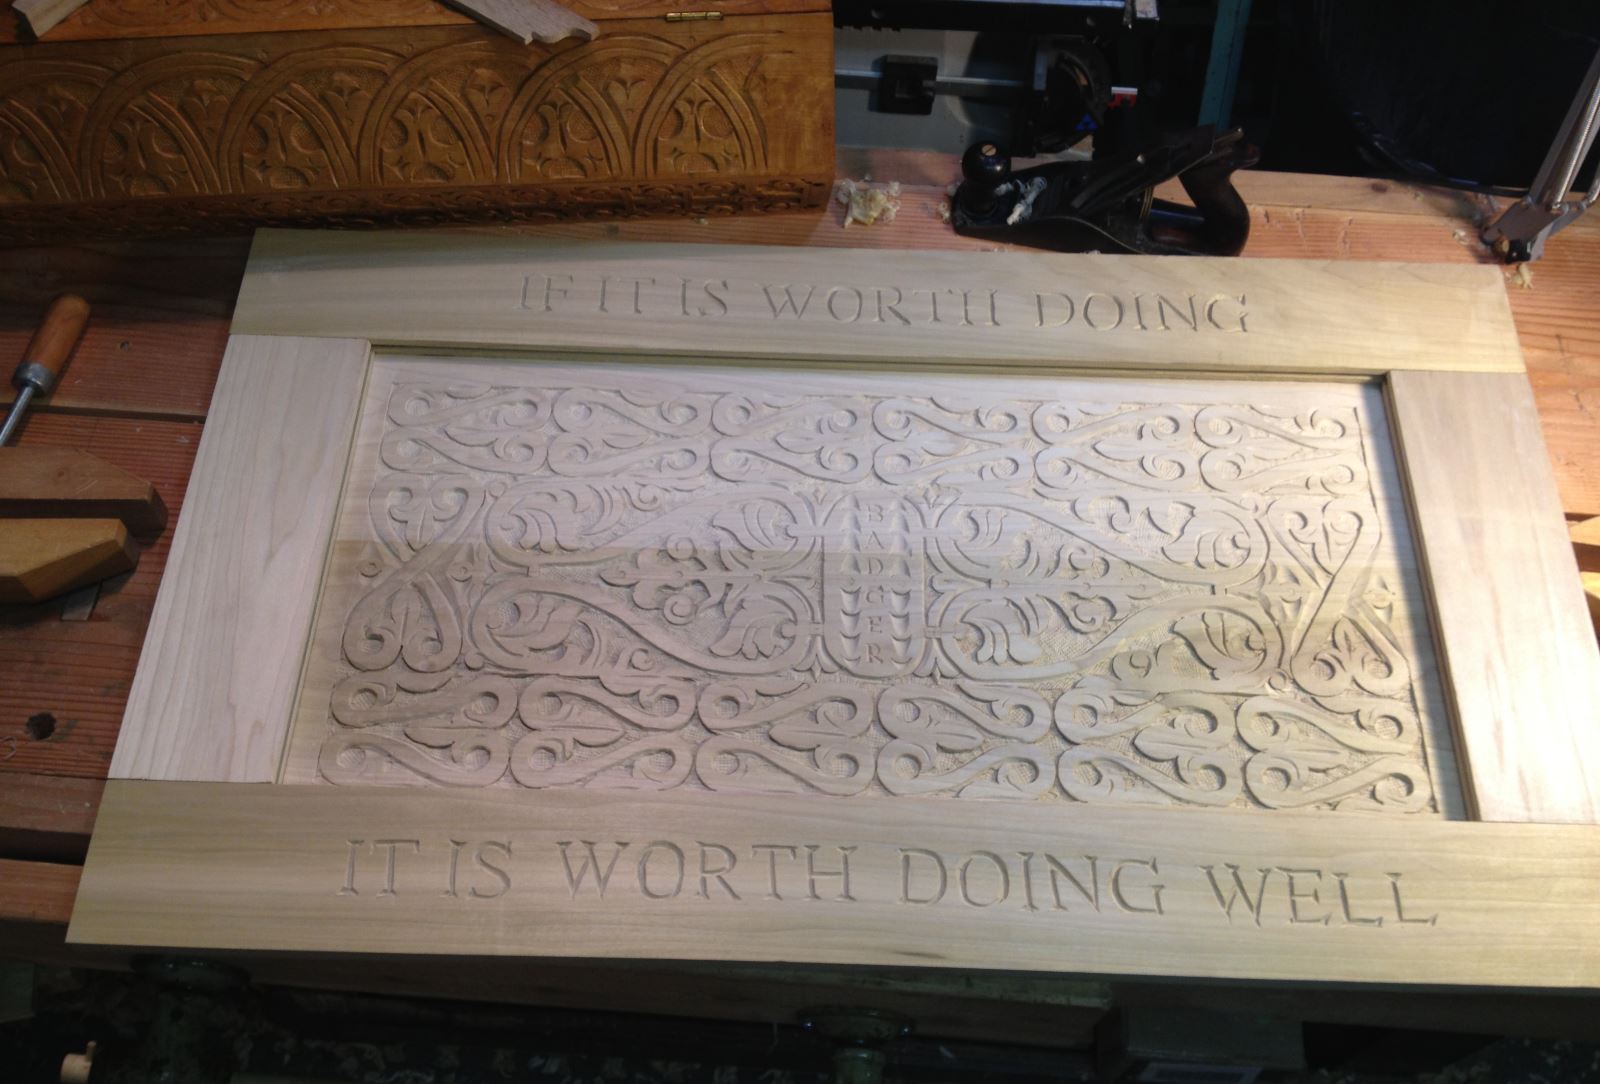
Frame and panel for the lid. The frame is just laid on top of the panel, just to show how it would look.
To get the lettering right, I printed out the words in 2″ on my inkjet and cut them out in rows. Â Taping this to the frame rail with blue painters tape I went over each letter with a pen to impress the outline into the wood underneath. Â Followed by a pencil to outline the edges, which gave me a guide to follow with my V tool. Â I have never done lettering like this before, but I have been carving for a while now so I went with my instinct and put tool to wood. Â It worked out well, and I was actually pleased with how it came out. I found an article later that says I figured it out pretty well.
Next step, fitting the panel into the grooves of the lid (it’s being stubborn about it right now, so I need to trim some edges), and gluing everything together. Â Not sure if I’m going to finish the underside of the lid though, it really wants one but I’ve heard that is a bad idea. Â Maybe just some clear shellac?
A visit to the Coyote Woodshop
I’ve been looking around for a local mill, preferably one that handled urban harvested woods.  I found the Coyote Woodshop through a web search and reached out to the owner to see what he could offer me.  David was very nice, and knowledgeable about the subject and on his invitation we set a trip out to visit his place out on Bainbridge Island.  (For those not local, it’s a quick ferry boat ride over the Sound.)   Also, there was a promise of baby goats for the kiddo, so we made a family day trip out of it.
After a tasty lunch at the Hitchcock Deli we headed down the road to check out David’s place.  It was probably 15 minute out of town, so local people should check this place out because it’s really much closer than I thought it would be.  David met us and sent me off to visit the wood shop while he pulled a pie out of the oven.  I snapped a few pictures of the wood shop and drooled over some of the woods he had available.  He has a nice selection of local woods all ready for amazing projects.

Wood from the WoodshopÂ

Wood from the Woodshop
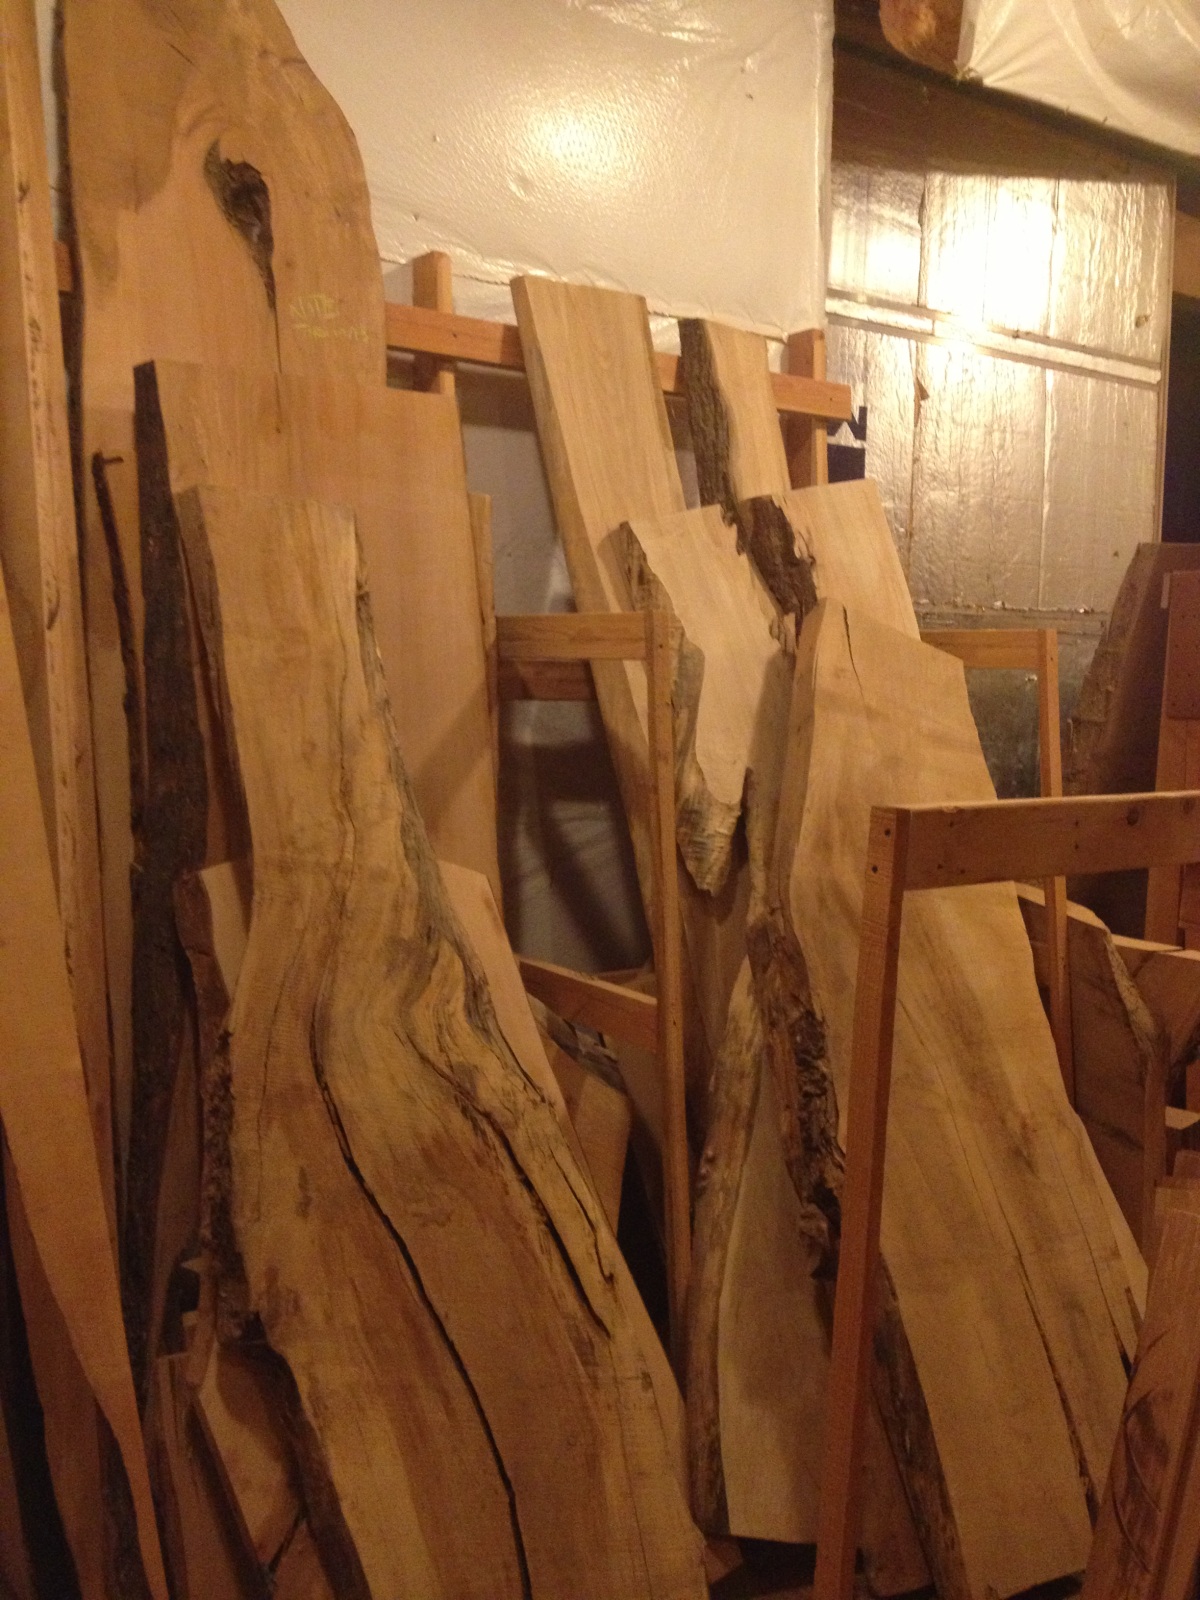
Wood from the Woodshop
Then we discussed what I’d come for, which was Alder for making a few carved boxes.  He took me out to his air dry shed, and we uncovered a big stickered pile of Alder that had been drying for two years.  Air dried carved better than kiln dried, and Alder carves well so this was a great find.  I pulled five boards 1″ x 6″ x 6′ and he showed me some White Oak he had next to it.  I pulled a quarter-sawn chunk to take home and try out carving on.  I’ve got them acclimating in my shop right now, and I’m hoping to get some time this weekend to breakdown one of the Alder boards into some usable chunks and start dressing it.   On a related note, I was able to acquire a vintage scrub plane from Josh over at Hyperkitten tools to help in the stock preparation.

Alder boards from Coyote

White Oak
It was a nice trip for the family, and I got some locally harvested air dried wood for carving.
Plus, baby goats.

Carving S Scrolls step by step

Carving S Scrolls – Finished Panel
I thought I’d do a post on carving, and show the process step by step.  The design I picked for this box front was taken from a carved chest image that I got from Peter Follansbee.  The bottom rail has a nice simple S Scroll pattern than I am using as the inspiration for this carving.  The original box  is a carved joined chest, dated 1676 that is attributed to Thomas Dennis of Ipswich Massachusetts.  The extant chest is housed at the Winterthur Museum and doesn’t appear to be pictured anywhere on the net.  There is a lot of patterns on this chest and I’ve already used a strapwork pattern from this chest for my tool box.  You can find examples of these carved chests all around the net, and Peter Follansbee does a lot of this kind of work on his blog which I highly recommend checking out if you’re interested in this type of historical carving.
The wood I’m using here is Alder wood that I picked up, and resawed down to approximately 1/2″.  I think it’s kiln dried, but the grain is nice and tight so it carves pretty well.  I took a series of pictures as I went to show the step by step process of carving the scrolls with little measuring.  The layout started out with eyeballed edges scribed with a marking gauge.  I found the mid point with a pair of dividers, and scribed center lines to start out.

Step 1 – Starting with the corners
Chisel: Swiss made 8/20 Gouge
I start out bounding the curved scrolls by using a curved gouge that looked right, although in retrospect I think it might be too small. Â I probably should have used a compass here to draw out the circle at the ends to give my self a starting point. Â It didn’t turn out too badly, but I think it could be improved.

Step 2 – setting in the “Button”
Chisel: Swiss made 8/13 Gouge
Here is where I made my first “mistake” but it was I was able to quickly pivot and move on. Â The center of the top curve of the S starts out as a circle, but if you notice, they are not directly on the center line. Â I did them opposite of the picture I was working from, but I was able to cut the picture in half and tape it back together (with duct tape, naturally) so that it matched where I was going. Â It helps to have the image in front of you, but it’s mostly for reference since I’m using the shape of the tools as the guide lines for the most part.

Step 3 – V-tool work on the main body of the S
Chisel: Swiss made 12/8 V Tool
Now we need to connect the “Buttons” (which is the term that Peter Follansbee uses in his S Scrolls video. Â I used a V tool to connect the two of each, and to be sure I wasn’t screwing up I sketched it lightly with pencil first on one side. Â After I got it work out the other side was easy to follow and it’s quick work to outline the main body of the S in the S Scroll. Â the rest of the work is done with a variety of gouge shapes.

Step 4 – Outlining the pattern
Chisel: Swiss made 4/20, 6/20, and 8/20 Gouges
Next comes the part that looks hard but really is the easiest.  With your pattern in front of you (or sketched out on the wood lightly) lay a variety of gouges down on the wood till you find the right curve that matches approximately the curve you need, and set it into the wood with a couple quick raps of the carving mallet.  Be sure to strike straight down so you don’t pop out the wood.  For this pattern I started on the circles and built out from there.  You’ll notice the center pattern is a mirror of the outer pattern.  If you look closely you can see that I’m not really that precise but the eye is very forgiving and will see the pattern for what it is.  I need to practice more to get more precision, but it is not a huge concern for me.

Step 5 – Outline the edge
Chisel: Flat chisels
Next step is to take a flat edge chisel and outline any edges that don’t get cut in the main pattern. Â I reground a couple old flat chisels I got ages ago with a sharper angle and a double bevel for these two.

Step 6a – Relieving the background (halfway)
Chisel: Swiss made 5/12, and 5/8 Gouges
Taking a couple sizes of gouges with a flat curve to them, I start working out or relieving the background.  I find the #5 sweep to be perfect for this work, and I have a couple sizes for bigger removal or getting into tighter corners.  The best way to do this step is work towards on of your gouge cuts, and take a bit out at a time.  Grip is important, and control is desired so work slowly and carefully.  You’re looking for a nice crisp edge, but not necessarily a flat bottom.  It will somewhat faceted once you’re finished, and a roughly uniform depth is good.

Step 6b – Finished relief
Here is a shot of the relief work all complete prior to texturing the background. Â It’s useful to have a coarse stiff brush to get all the chips out. Â I also spend a little time going over the whole pattern in detail to find any missed spots, or areas that need a little clean up.

Texture Punches
I thought I’d show you my home made text punches that will be used in the next step. Â The one on the far right is just a nail set which work perfectly for this, and makes a mark very accurate to the old examples. Â You probably have one in your tool box already. Â I also make a simple “maltese” cross punch for decoration from a nail, and some files. Â The two texture punches are made from round bar stock I got at the hardware store, and a big nail cut short. Â I just free handed the grid with a needle file.

Step 7 Â – Texture the background and add decoration
I use the big punch where ever it fits into the background and tapping it with a metal hammer. Â You don’t have to fill the whole background precisely, just try to cover as much as you can. Â Any areas the big punch won’t fit, I hit with the smaller sized texture punch. Â I added a couple circles with the nail punch, and added a couple cross punches. Â I realized I should have set the sides in further on the design since I plan on nailing this together, and didn’t allow for that. Â The nail set punch decoration is straight out of the original pattern.

Step 8 – Decoration on the Leaves
Chisel: Swiss made 8/13, 8/20 Gouges and 12/8 V Tool
I used a couple of gouges to add some decorative “half moon” cuts to the leaves, as it was in the main pattern I am following. Â I also added a little V tool work as well to break up the flat spaces. Â Once thing I’ve noticed about the patterns of carved boxes from this period is that they really don’t leave much open space clear, either in the background or the surface level. Â I guess nature abhors a vacuum in the design, and I think it helps.
Carving S Scrolls – Finished Panel
All finished with this box front.  I’m planning doing the sides of the box with a single length of the S, and maybe a different pattern for the back.  I am mostly just practicing my carving and design, as well as testing out this Alder wood for carving.  I don’t have regular access to the wonderful riven white Oak that Peter uses, but this might just be a good local substitute.  I like the color and grain, and I can pick it up fairly easily around here in the Pacific Northwest.
There you go, let me know what you think and I hope it helps understand this type of carving. Â It’s easier than it looks, is very forgiving and makes a great presentation.
Badger
Resawing a board by hand
It feels like it’s been a million years since I got down to the shop, but it’s really only been a couple months.  We had our annual family vacation road trip down to San Diego and back which we took three weeks for.  But right before that I’ve been having a lot of worse stress and dramatic changes there that set me back on my heels a bit.  Fortunately things are looking up  again, and I think it’s going to work out.
So, not much woodworking happened while I hunkered down mentally, and slogged through the hard times. Â So I know things are getting better because I made it down to the shop and cut a board in half. Â The long way. Â 🙂

Finished boards, resawn by hand.
A few months back I picked up some pieces of wood down in Portland, and I have been wanting to get some carving going again. Â I picked out a chunk of Alder, must be about 1″ thick or so, but I didn’t measure the thickness. Â In actual fact, I didn’t measure anything today as I eyeballed stuff or just used my dividers with standard proportions. Â The thick alder board was some nice wood and should be lots of fun to carve, but it was much too thick for making a box out. I don’t own a bandsaw that will do resawing, as the one I bought on sale at the home center is a pile of crap. Â I’ve never had any luck with this thing, and I’ve spent hours trying to get it cutting even remotely straight. Â Plus, it scares the crap out of me since I’m clumsy on a good day and I happen to like my fingers. Â (more on this later).
I’ve been thinking about making a frame saw, but I really wanted to spend some time working wood and not making yet another tool. Â When I do though, I think I’ll be using this as a guide: Â http://www.hyperkitten.com/woodworking/frame_saw.php3Â Josh is an amazing tool peddler, and apparently also works the wood too.
I have a 5 1/2 Point rip saw from Tools for Working Wood that I thought might do the trick, and I’d seen Roy Underhill do it on his show a few times so I jumped in and tried it.  And just like Roy I managed to nick my finger and draw a little blood.  Had I been using the Bandsaw, I’d probably be singing the Frodo the Nine Fingered ballad while I asked my wife to take me to the ER.  Anyway, back to woodworking shall we?

Starting the first cut
To get it started I sized the length of my board using dividers, cross cut it to length and found the middle line with marking gauge. Â Running the line around all four sides is essential, as we’ll be flipping this around a lot and we need to have that reference line. Â To start the cut, I clamped it up in my face vise at an angle, and used my dovetail saw (the only rip back saw I had handy) to carefully but quickly start the cut. Â I needed to create the first line for the saw to track into, and once I had the corner cut I followed up with the Rip hand saw. Â The trick I found was to let the saw and gravity do most of the work, as it will naturally follow the track left by the last saw, a trick we use through the whole board actually. Â Because once you cut through the corner you unclamp the board, reverse it in the vise retaining the same angle and cut down the other side. Â You keep flipping it back and forth like this because the front half of the saw is cutting wood, but the forward half is in the track of the last cut you made keeping it pretty much on the line you want to follow.

Ripping along
I kept flipping it back and forth until the vise wasn’t grabbing it firmly anymore and then flipped it end to end to start on the other side. Â This is why we needed to mark all four edges of the board. Â A couple of tricks I tried with excellent results are as follows:
– Waxing the sawblade kept it running smoothly in the cut. Â I have a block of beeswax I rub on it every time I switched the board.
– Angling the tip of the blade upwards a little helped the cut a lot, and prevented binding.
– I used a little wedge at the top of the board to open a little, which also helped keep the saw from binding.

Wedged
After my cuts met up from the other side, i was able to pop them apart and see what the inside looked like. Â It wasn’t that bad as I’d been able keep pretty much on my center line through the magic of tracking.

Board cut in half before planing
After that it was a pretty simple matter of planning down the saw marks, and cleaning up the edges with my Fore and Smooth planes. Â All in all, it took me about an hour to complete this including thinking it through, then marking, cutting and planing the board. Â If I had a fancy bandsaw it would be quicker I’m sure, but for me since I don’t own a decent band saw, this was a pretty good result for the effort. Â Plus, now I know how. Â I’m going to make a box out of this, probably carved on all four sides. Â Not sure what I’ll use for the lid, but I’ll deal with that later once I get through the carving.
Badger
Tuning up a Dado Plane

Dado Plane before tuning up
A while back I picked up a set of three Dado planes, one of which was 3/4″ in good shape from the ever amazing tool seller Hyperkitten. Of course that’s the really useful size in our modern day lumber world. I hadn’t spent the time to tune it up to working condition, so this afternoon was a good time. I needed to make some grooves in the case for the drawer supports. I could easily do it with my carcase saw and some chisel work but I’ve been wanting to try this plane out.

Disassembled
I started out taking it apart to check the steel of the blades, and nickers which turned out to be in rather good shape. I wire brushed it a little to clear some bulk of the crud off, and they both looked quite decent although the long part of the nicker had a bend in it. The plane body was solid, no checks or warping.

After sharpening
I started out on a Medium India stone on the blade, and worked through to Translucent and finally stopping all by hand. I was a bit worried that the nickers would be problematic, but after propping my stones up on the case I was able to get to the inside edge (never the outside edge if you can avoid it, you don’t want to make the over all width go down.)  As I worked the inside slowly I was having problems keeping it steady, and on closer inspection the last guy to sharpen it had the same problem. It was rounded a bit, but the points where sharp so I figured it would be good enough which turned out to be correct. I tweaked the slight bend in the top part of the nicker, and re-assembled it.

Testing the plane
I tested it out on a scrap piece of pine, and it worked fantastic. I used a fence clamped to the board as a guide, and set the depth stop by eye. The sides of the trough were square, and the bottom was smooth enough. It took very little effort to use, and is now my new favorite way to make dados! I put it right to use on the sides of my dovetailed three drawer carcase project. The prototype is in Pine, and check out the cross grain shavings I was getting with the dado.

Shavings!
All in all, I’m VERY pleased with this plane. Thanks Josh! (If you’re in the market for old user tools, follow his blog for excellent deals. He has never steered me wrong, and he finds great tools. Highly recommended.)
Badger