How to cut a dado using hand tools.
Cutting a dado
When I set out to the dado for the train rack project, I sat down with the internet and browsed a few books. It took longer than I wanted to find a method using no power tools. Cutting a dado slot is most frequently done by table saw if you believed the internet. I didn’t want to use my table saw, besides, I don’t have a stacked set of a dado blades either. I finally found what I was looking for in the Tomes of Saint Roy, and I set out to do this my self. It turned out to be as easy as he said it would be. And I was able to get a nice crisp line slot cut quickly without having to use my noisy, and to be honest a little scary, table saw. Here is how I cut my first dado slots by hand.
Marking the Board
The first step is to mark all the important lines you’ll need to make your dados clean and even. Take a marking gauge and mark the long side with the depth the dados should be. Then take your take your square and mark out the lines where the dado’s will go. Plan this part carefully, and take your time laying the lines out and will show in the final work.
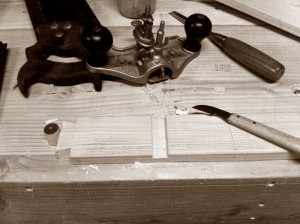
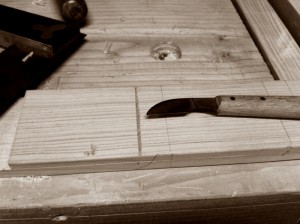
It really helps to have your work secure as you start this, but it could be done on a bench hook if you don’t have an end vise and bench dogs set up. Once you have your line drawn in a light pencil mark, take a marking knife to follow that line with a shallow cut. It helps to hold the square firmly, and keep the knife pressed against the edge of the square, and the handle straight up and down from the board. First pass should be a light cut, focused on keeping it straight and true. Subsequent cuts should follow this line, going deeper each pass until you have a nice deep cut. The goal is to sever the fibers, and make a square straight line with a clean edge. If you just cut straight on the pencil line with a saw you’ll likely end up with frayed or rough edges. Now is a good time to mark the waste side as well, just like in dovetailing, so you can keep your cuts on the correct side of the line.
Cutting the V
Once you’ve got a good cut line in the board, you take your knife and cut a sort of V groove on waste side of the line.  Make sure to not undercut your straight side, and keep the cuts in the waste side of the line. It doesn’t have to be super straight, since you’ll be getting rid of this material anyway. You’re going to create a trough for the saw to ride in, which will make your cut go straight and keep it riding where you want it to. It’s too easy for a saw to skip when you’re starting your first cut which can lead to ugly edges where it might show on your finished piece. I also find it helpful to cut an extra notch with my knife where the saw cut would start to prevent any chance of skipping, just make sure to only notch the waste side, otherwise it will show.
Sawing the line
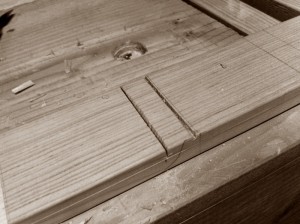
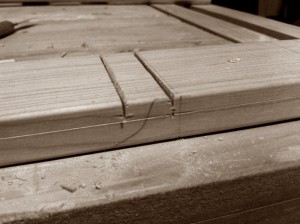
Now that we have a trough for the saw to ride in, it’s time to cut the line down to our marked depth. I’m using a vintage Disston back saw that I picked up at an antique store and rehabbed for this, but any clean cutting saw should do as long as the kerf isn’t too wide. Take the saw and rest it in your groove, and carefully start your cut. Keep an eye on the cut and make sure it’s on track and it’s not jumping around scarring the work. Once you have a good cut going, you can pick up the pace a little, just keep good control in mind. Check frequently on both sides to make sure you are not cutting below your marked depth. It doesn’t take long to get to the depth usually, since the dado is probably not too deep. Make sure you’re right up to the depth line on both sides, and stop.
Make the second cut
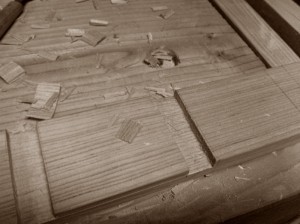
Now we should be ready to cut the second line, but first it’s a good idea to double check your width by holding your shelf board to the line, and seeing if you need to adjust it any. I had been sloppy in marking my lines the first time, so you can see second pencil line in the photo. Sizing from the actual board is a good way to eliminate any measuring mistakes. Repeat the steps for cutting the first line with the marking knife, but be this time be sure to cut your V on the other side of the line, keeping it in the waste as always. After cutting a good V, saw down to the line as before.
Chisel out the waste
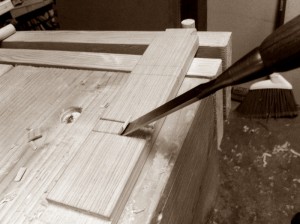
Now it’s time to start making the actual dado after all that measuring, marking and and cutting. Take a chisel as close to the width of your dado as possible, or smaller if you don’t have close, and begin to chisel out the waste. I like to start on each side with a quick tap a third to half way from the top to prevent tear out. Don’t try and hog the whole thing out at once, just take a couple layers out first. Go easy for the first third to create the walls, and then you can be a little more aggressive. Once you’re into it, I liked laying it bevel up and holding it flat and pushing it horizontally to peel up the bulk of the waste, but use whatever chisel technique you’re comfortable with. If you’re going to use a router plane to finish, then don’t go all the way to the bottom of you cut, leave it a little proud. Otherwise, pare down the wood as smooth as you can.
Finish the bottom of the cut
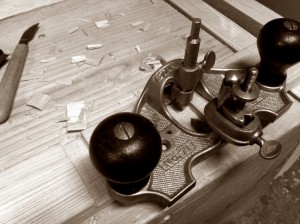
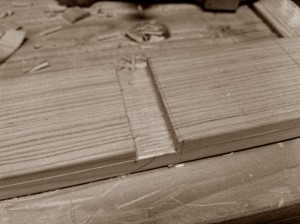
I used a Stanley #71 to finish out the dado bottom to ensure a clean tight fit. I set the depth at just shy of the marked line for the first couple of passes to avoid tearing out too much, but it went really quickly and I had a nice clean trough in no time. A final pass at the marked depth, and I was done and had a clean edged dado.
Final Thoughts
This took a lot less time than I thought it would, and once I had the technique down (and took lots of photos) on the first board, I was able to assembly line the second board in half the time. The project was well recieved by my “client” aka my 3 year old son, who got a sweet new rack for his growing Thomas Train collection.
3 Comments
Comments are Disabled





Thank you, thank you, thank you! This is absolutely what I’ve been searching for as I attempt my very first dado. I appreciate the photos, but I must also thank you for writing very clear instructions. You are a great teacher.
Thank you very much. I had researched how to, but nowhere did I find actual photos. This was very important tome because I’m getting rid of all power tools except my circular saw. Back to nature, so to speak.
Thank you, this is how I imagined this would be done, but you included a lot of detail and tips that I wouldn’t have thought of. I’m sure you have saved me time and materials!