Carving layout trick
Tonight I started work on another version of the carving layout from last time. I was setting up to measure out the layout, and happened on a method of laying out perfect squares with no measuring. The 17th century layout that I’m using, is based on squares, and my first attempt was a little off because my measuring wasn’t perfect. This trick worked great, and my squares were right on.
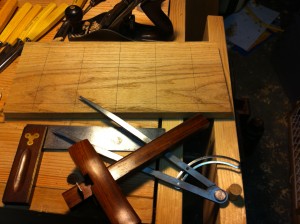
Here is the finished layout, with the tools I used to accomplish this.
Steps:
1. Using a marking gauge, layout a border along the top and bottom of the board along the long edge.
2. Using the compass starting at one end along one of the edge lines, figure out the middle point. I just keep switching back and forth between the ends moving it a little each time until the arms of the compass are at the same point from both ends.
3. Using a square draw a line down the mid point line across both edge lines.
4. Put your compass in the point where the mid point and top edge line meet, and spread the arms to the opposite point on the bottom.
5. Make an arc lightly on both sides, and repeat from the bottom point.
6. The point where the two arcs cross is the middle length line, and you can mark this line with a straight edge through both points.
7. Now put the compass arms to the top mid point, and the point where the middle lines meet. This is the size of your squares.
8. Pace out points along the top line, using the width you found in step seven, and mark lines from each of these points with the square again.
Ta Da! You have a square layout, no measuring, and you didn’t have to do any complicated math to figure out the size of the squares. Now it does help to measure out some rough idea of what you want to make sure you cut the wood to the right size, but I leave a little on each end to trim down later.
The first time I tried doing the squares, I spent a lot of time trying to find the right size for the squares, dividing and fudging, and in the end my measurements were off a little bit. This way I can make it close enough in length, and just pace out the squares based on initial measurement (the top and bottom edge setting on the marking gauge).

