The “Anarchists†Saw Bench Box Part 2
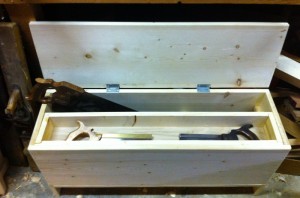
One of the key elements of this box that drove me to use the word “Anarchist” as an homage to Chris’s book was this sliding drawer/tool trays. I was intrigued with how they worked, and how they really added to the tool holding awesomeness of the “Anarchists Tool Chest” that he builds in the book. Part two of the box build tonight was adding one of those tool trays to my saw bench box.
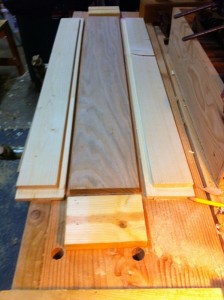
It’s built from Pine with an Oak bottom for durability, and increased wear. There are two strips of oak nailed to the inside of the box that act as rails for the tray to slide back and forth. It also introduced me to one of the really nice benefits of using cut nails in your work. I put the first nail in and it projected a tiny bit through the other side of the wood. I thought it would clear, but I was wrong. So I pounded that one back, and used some nippers to cut the rest of the nails a little shorter. The iron on traditional cut nails is not hardened like most modern day nails, so this is an easy step. Plus, you’re already pre-drilling the holes for the nails, so the fact that the tip is slightly less pointy (and still square) doesn’t make a bit of difference.
The tray itself is simply a box. I had started out with a simple rabbet on the ends of the sides, but when I mocked it up, it was off a bit in size by being too deep, and too narrow. So I changed course and set up my Stanley #45 to cut a long rabbet along the bottom of hold the tray bottom. I nailed it together with some cut nails, and trimmed up the edges to fit smoothly in the chest.
One thing that was nice about tonight’s work was how confident I felt about what I was doing. I’ve been banging around the shop for a while now, but tonight it didn’t feel like I was flounder, I almost felt like I had some of this stuff down. I have a LOT to learn for sure, but it was nice not to feel so lost every time I picked up a tool.
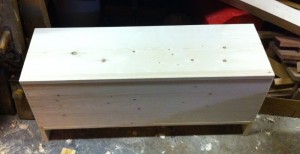
It’s now in it’s home up against the MDF workbench the came with the house. I don’t use that bench for much now that I’ve gone all hand tool and stuff, mainly because it’s way to high for proper use of the planes. It can be shoved under if it’s in the way, but it’s mostly going live there so I can easily get my saws out as needed. It also makes a comfortable seat to sit on while contemplating my next move, something I’ve tried to do more of as I build my skill set. Rather than launching into the next step, planning and thinking it out so I can be sure to do it right the first time.
Plus when my three year old son comes down to hang out with Daddy, he can sit on it while watching. Which usually last about maybe 60 seconds before he’s up and touching things.
Badger
One thing that was nice about tonight’s work was how confident I felt about what I was doing. I’ve been banging around the shop for a while now, but tonight it didn’t feel like I was flounder, I almost felt like I had some of this stuff down. I have a LOT to learn for sure, but it was nice not to feel so lost every time I picked up a tool.I nailed the box together


Brilliant idea! And thanks for sending it out into the world – I’ve been wondering how to solve the same problem, and this is a fine answer. I foresee a similar chest in my own shop soon.
Thanks again,
Jeff
Thanks Jeff. Good luck with your build!
I love this project. I am of course a big fan of the six board chest and this is an awesome idea and use for that design. You’ve gotten me thinking about some other options when it comes to this idea. Thank you.
D
That is a really cool idea for a sawbench. I might have to steal that idea from you :). Great blog by the way!
James
@ James – Steal away! Thanks for the compliments.
@ Derek – I’ve enjoyed your blog as well, thanks for stopping by. Yeah, the six board chest is a great starting point for ideas actually, it’s pretty flexible in design. I’m thinking of a carved oak check only 24″ wide or so to carry tools to job site in. I help maintain the site where my son goes to preschool and I often have to cart random tools around.
badger
Great to see the follow-on to this project. It’s a great idea. I don’t have any free wall space (too many big metalworking machines shoved against the walls) so tool chests and saw chests are in my future. Ever so much nicer than being in a pile on the nearest horizontal surface.
@Joe, absolutely. Since I built this box it’s been great. My bench is clearer for having built it, which means i spend less time moving stuff around and more time working on the bench.
I’m going to build mine from red oak, mainly because I have a bunch laying around.
This is a great idea, Badger. Perfect for those of us challenged to make the most of a small space. Thanks for sharing.