Practicing S Scroll for carving

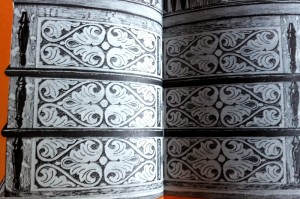
Example of S Scrolls on 17th Century Furniture. Original Cupboard is at Yale University, made in New Haven or Guilford CT c. 1640-1680. Image from “Treasury of American Design and Antiques – Clarence Hornungâ€.
Today I spent some time practicing a bit of carving… with a pencil. I recently read in a book recommended by The Village Carpenter (Kari Hultman) on her blog. I’ve been reading it since I got into the hand tool woodworking, and it’s been an inspiration. The book “How to Carve Wood” by Richard Butz recommended practicing some of the carving details on paper before putting chisel to wood, and I’ve been wanting to try some of the S Scroll type carving in the near future. So I set out to try it today, and now that I have I highly recommend this practice for figuring out complex patterns. I’ve been staring at the S Scrolls on period pieces, and it’s a bit hard to figure out where to start. I know the theory, but the practice sort of intimidated me.
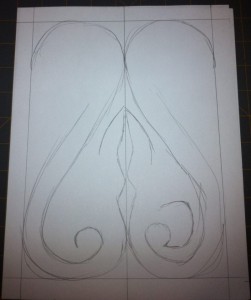
So I started out by laying out the layout lines I would use on the wood.
Then I made rough half circles for the tops of the S, which in the wood I would probably do with a pair of dividers.
Next I extend the middle of the S lines in a diagonal fashion, forming the middle of the S, paying attention to the thickness of the line I am forming.
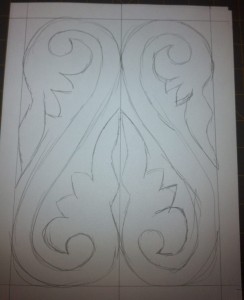
Once I’ve formed the S, I then start working on the floral inspired stuff that fills the space. I found it very helpful to take the bottom of the S and form a small circle, and extend that into a leaf to fill some of the space in the bottom loop. Same with the side leaves, extending up the middle guide lines with some curves that will become leaf shapes.
Next I bring the leaf shapes of the middle, and bottom and fill in two leaf shapes between them, trying to form them using shapes of a chisel, since that is how I’ll outline these. Then I just did the same thing up sides with the top leaves. The basic outline is done at this point. It helps to look at the negative space, to see how much is left, since you’ll have to carve this away. Keeping it even is good too, but not totally required.
Next I add some “veining” that I would do with the V tool, and play with some of the open space, to see if maybe leaving some moon shapes would look good. It’s pretty free form at this point.
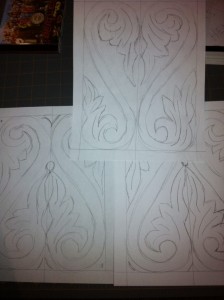
That’s pretty much a complete S scroll pattern. It can be repeated endlessly, and it can be scaled up or down to fit nearly any rectangle shape. You find them with back to back S scrolls like I did here, or you see them as a single S alternating as a border. I spent a few pieces of paper getting some of these sketched out, and I feel a lot more confident setting chisel to wood now. I’m sure it won’t be as simple as sketching, but at least I now have a concept of how to lay it out.
My next step is to apply this treatment to some Oak I’m going to turn into a saw box.
Badger


did you see the mistake in the first photo? Is that a drawing in Butz’ book? the original cupboard it’s from is at Yale University…made in New Haven or Guilford CT c. 1640-1680…
I did notice it, one set of S scrolls is reversed. Caused me a moment of confusion for sure.
The picture is from “Treasury of American Design and Antiques – Clarence Hornung” that I picked up at a used book store for less than $10. It only has a short section of carved boxes, and is mostly bric-a-brac throughout the large volume. But that was a nice example of the S Scrolls I wanted to try out.