
Posts in Category: carving
A study in interlacing.
A combination of work and family life has made visits to the shop a rare thing for a while. Â A combination of exhaustion and boredom made posts to the blog even rarer. Â Such is life.
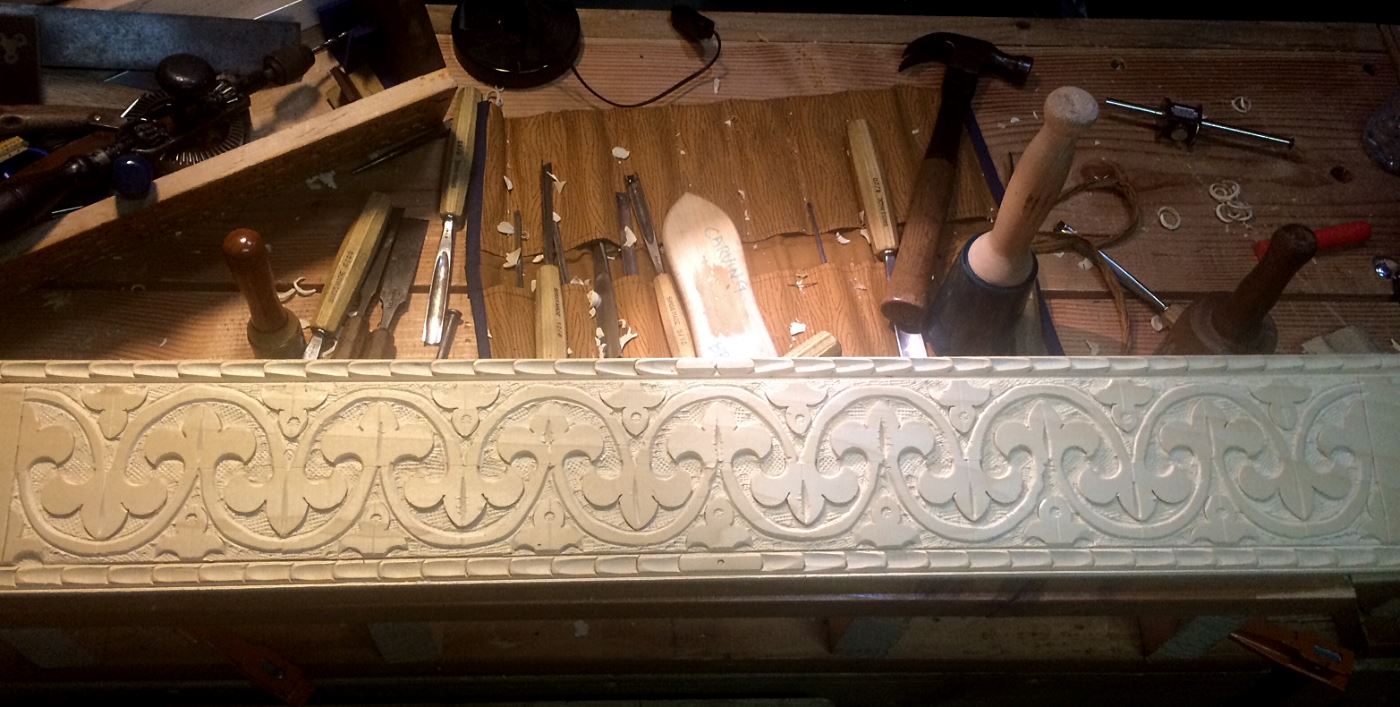
Got a little carving done the last couple of weekends, working on some new stuff to mix it up a bit.  I call the post a “Study in Interlacing” because each of the three panels I am working on is some kind of over-under type pattern.
On a lark I tried your standard “celtic knotwork” pattern, the kind you bang out on graph paper for fun.  It’s a lot of repetition of cuts, and it’s easy to miss one line if you are not methodical about it.  Layout took the most time, and once that was done, I was able to carve it pretty quickly.  The majority of the work is V-tool work, with a small shallow gouge to take care of under cutting. I used one of my background texture punches to finish it out on the “dots”.

Knotwork and Basket Weave carving
After that I looked a different type of “weave” that I have seen  before in a book on Japanese carving.  It looks like a basket weave, and nearly wrecked by brain trying to lay it out.  The secret is that its NOT a square grid layout.  It’s a two x three layout, almost like a herringbone pattern. Once I got that, I was able to lay in the lines, and get to work.  This one is a lot of flat wide chisel work, and a larger shallow chisel to handle the over under work.  I think it looks great in a raking light.
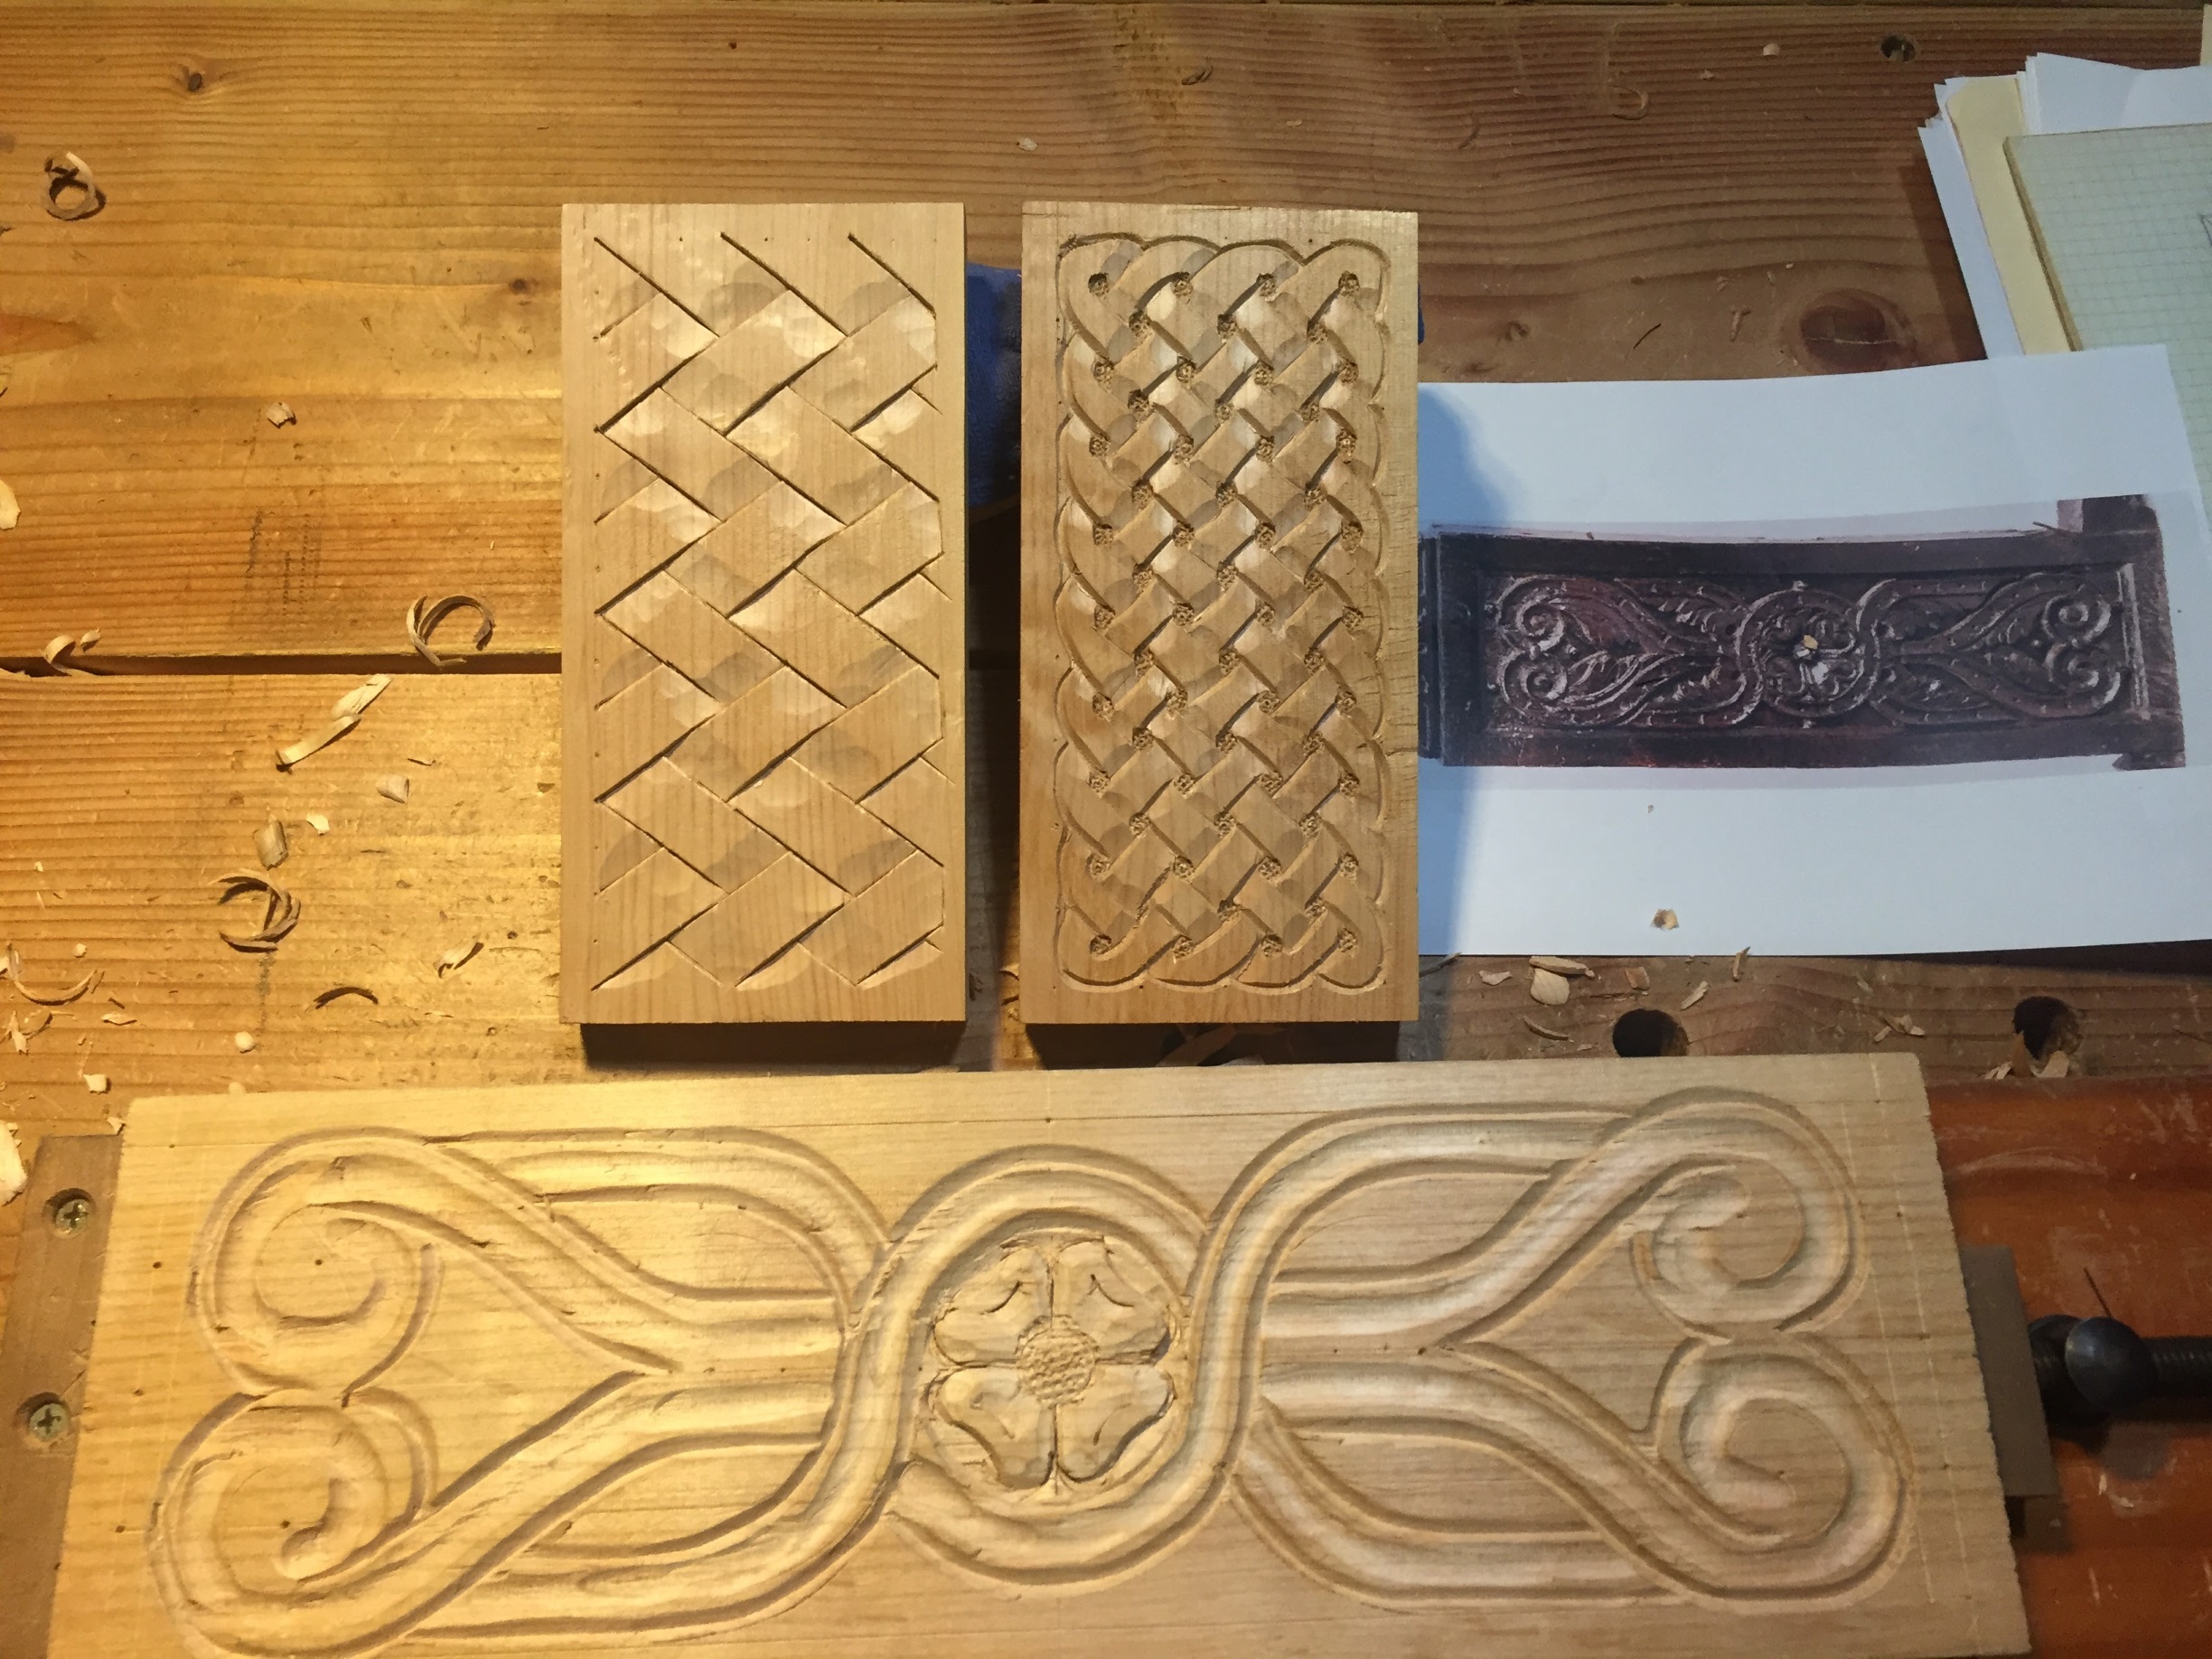
Sides and front of the “Study in Interlace” Box.
Continuing the theme, I drew inspiration from a “pew end” carving that I spotted at Marhamchurch Antiques, a massively great site for medieval carving enthusiasts.  One of the set of four Pew Ends recently sold there had this great over under theme that I wanted to try.  Layout was fairly straight forward if you’ve done a bunch of S-Scroll carving, so I started with the center circle using a pair of dividers and just eyeballing the width of the ring. I used the same line width all throughout to maintain a consistent look.  The two ends are laid out like half of an S-Scroll pattern with the two circles, and then I just connected all the lines and figured out over-under pattern.
Started with a V-Tool I outlined the whole thing, and started in with medium deep gouge to dish out the center of all the lines. Â This is where is started to go astray unfortunately. Â This is Alder, which fairly soft, and the tight corners chipped out like crazy. Â I did the best I could to clean it up with slightly shallower gouge, but I wasn’t able to totally clean it up. Â I’m not super pleased, but I’m going to finish it up anyway to get the practice.
The top will likely be Pine or Poplar depending on what I have in the shop. Â If I have a big wide poplar piece, I might carve that as well, we shall see.
Badger
Travel box
I’m going to be travelling east in a week to take a carving class from Peter Follansbee!  It was pretty much a spur of the moment thing, and my family is coming with to visit some of the sites and hit New York for a day on the way back.  I needed to take some of my tools with me so I thought I’d whip together a box.  And of course I can’t NOT carve it… especially if I’m going to a carving class.  Gotta show off ya know.

Carved Travel Box
The box is made from Poplar because that’s what I had in the shop at the time. Â I wish I’d gotten some Alder or Walnut but IÂ didn’t have the money handy or the time. Â Luckily this was some harder Poplar that usual, and was consistent for the most part. Â It was also a nice wide board, so I was able to carve the top which I don’t typically do.
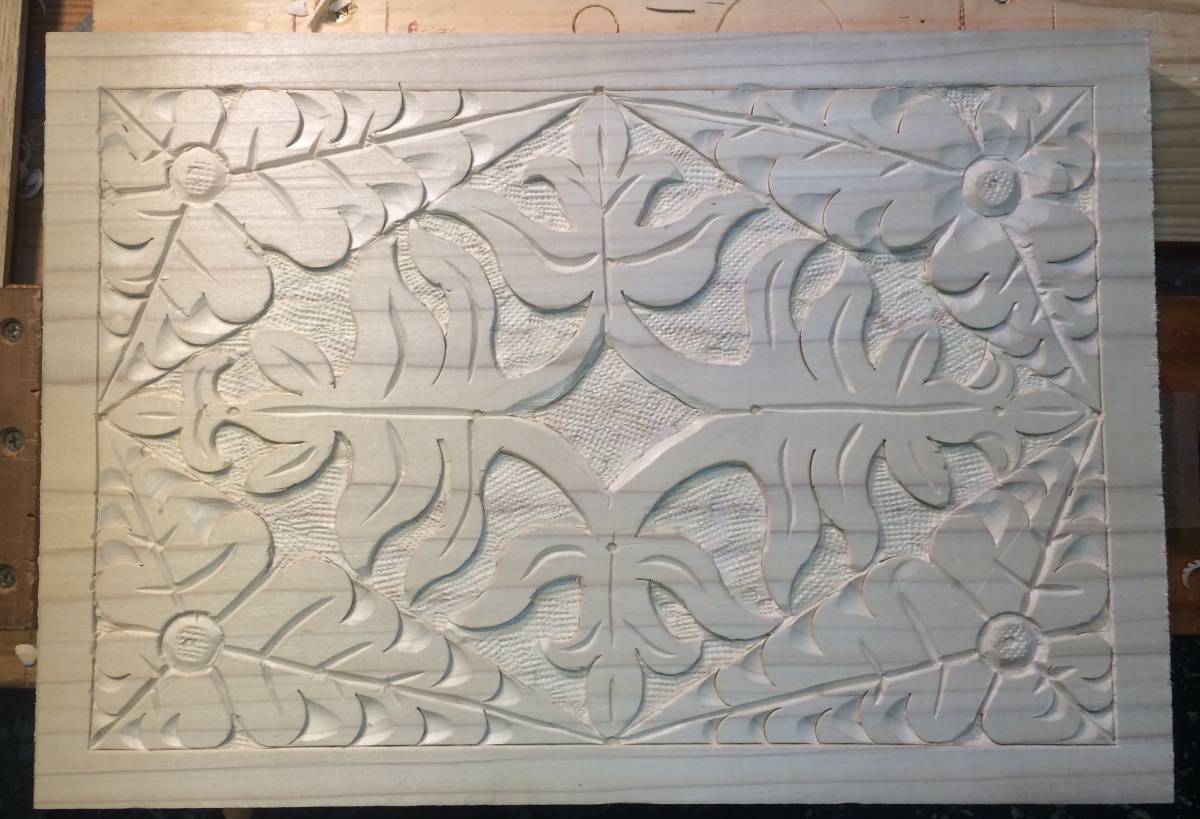
Top design for the Travel Box.
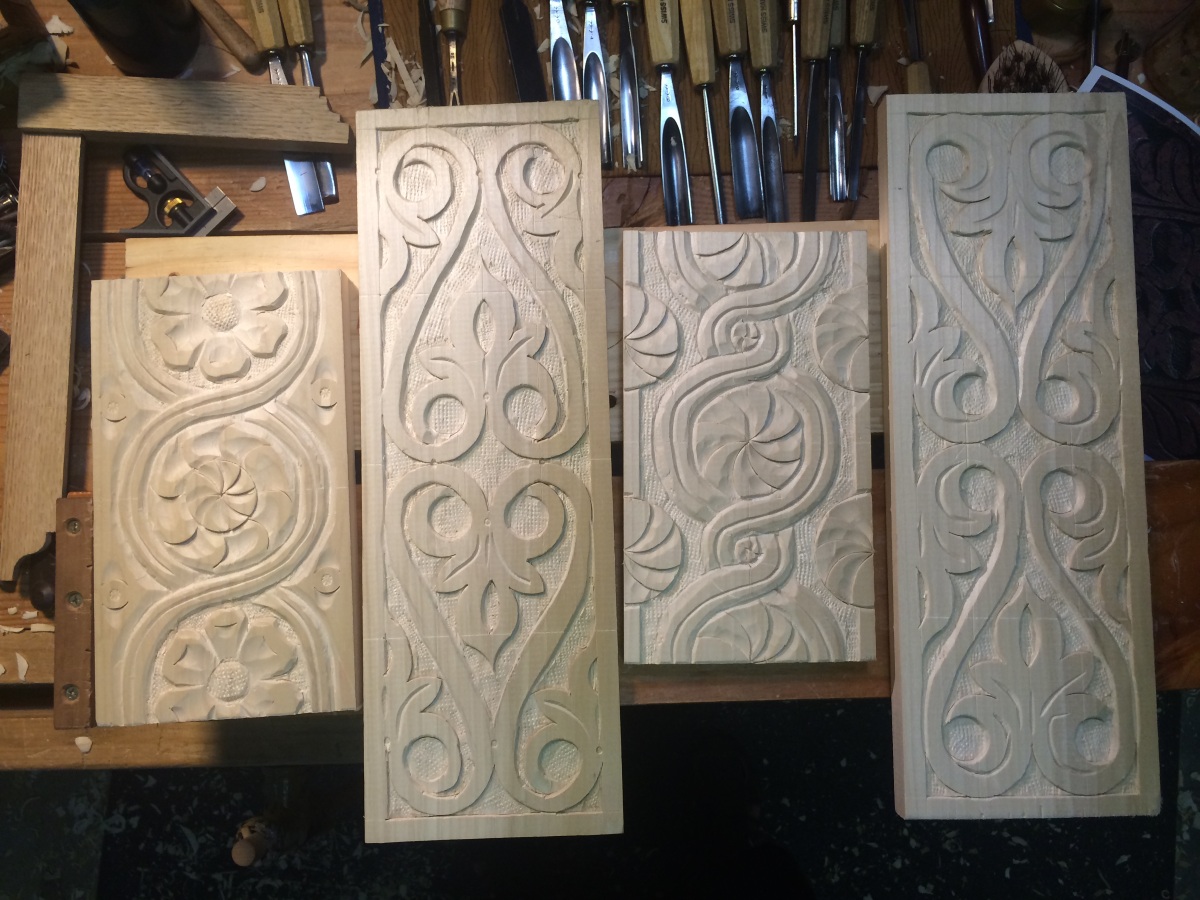
Carved box sides for the Travel Box.
For the front and back panels, I used S-Scrolls which I consider to be the swiss army knife of designs, and the sides were variations on the interlaced circles motif. Â Typically a box of the period would only have the front, and maybe the sides carved but I like to practice layout and carving so I did all surfaces.
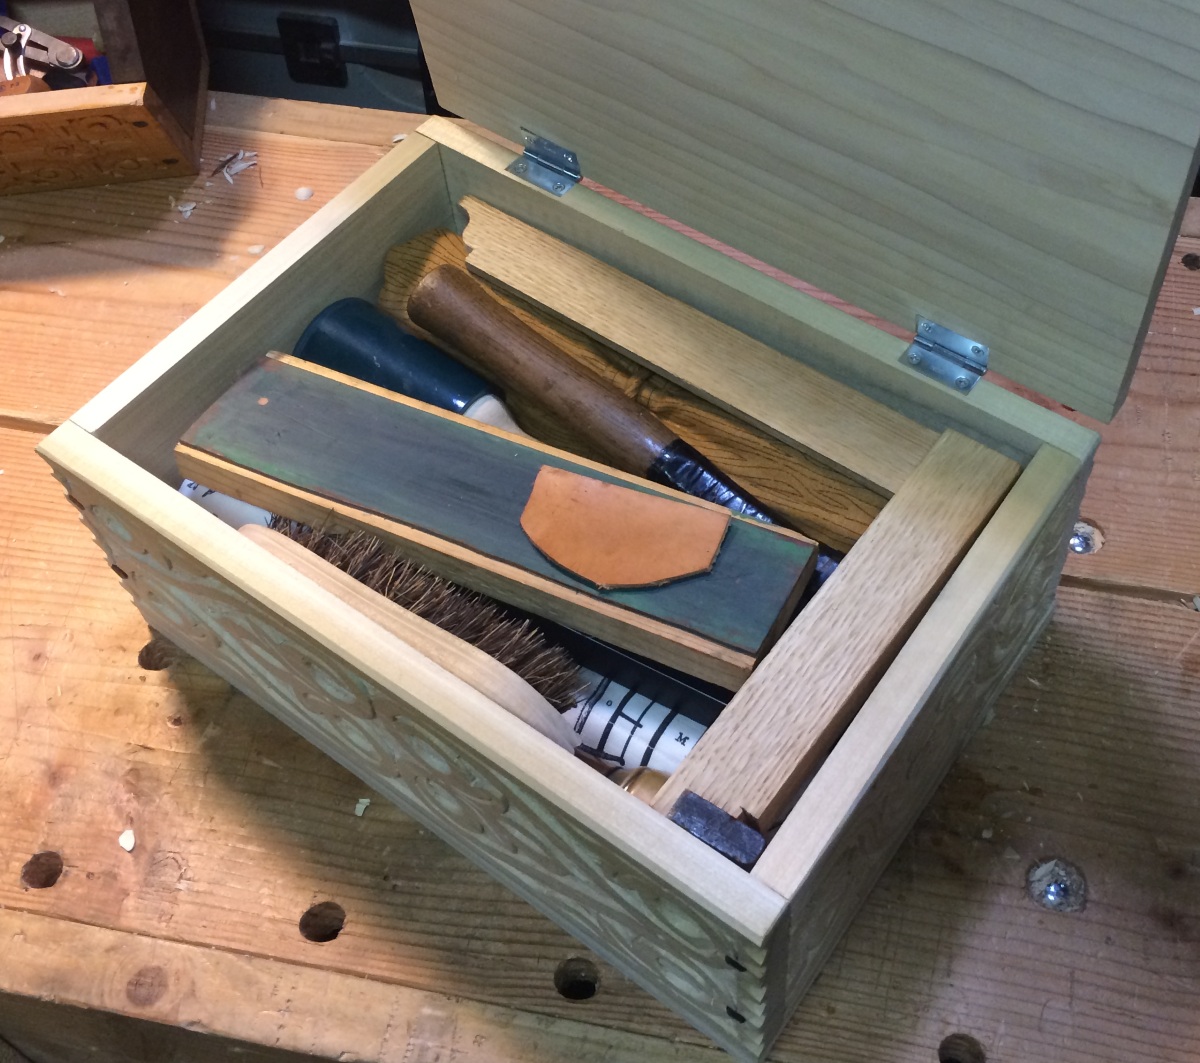
The Travel Box – Packed.

The tools!
I designed the size of the box to fit in my big suitcase, and to fit my tool rolls full of chisels.
I was able to cram the following in the box:
- 18 carving chisels
- 1/4″, 1/2″, 3/4″, 1″, 1 1/2″ bench chisels
- 5/16″ Mortise Chisel
- 2 carving mallets
- 3 compass
- Awl
- Marking knife
- 2 marking gauges
- metal hammer
- decorative punches (in the mint tin)
- 2Â squares
- Folding rules
- Pens/Pencils
- Stropping block
- Block Plane
- Carving Brush
I’m going to have borrow some tools when I get there, but I should be ok. Â The whole kit weighs 27 lbs.
I’m pleased with it, especially the top design because that’s a new layout for me.  The central design is based on a Thomas Dennis chest panel, and the outside edges I lifted from another panel of the period.  My only complaint is the wood, with that awful coloring. I can’t use my normal Shellac top coat without adjusting the color or bleaching the wood.  Which will have to wait till I get back.
Badger
As I work on finishing the Anarchist Tool Chest project, I needed to finish the carving for the sides of the tills. Â Now, I wouldn’t ordinarily carve Poplar if I can avoid it, but this is the wood that was supplied as part of the class. Â In parts it was fine, in other is crushed like paper, ugh.
Anyway, I tried a variation of the Fleur pattern I found on an old chest that is at the Met.  I like the little Fleur pattern to fill in the triangle left by the arc.  Pretty cool looking.
Side of the last till, carved in a new variation on the Fleur pattern.
That should be all the sliding till sides, so now it’s time to start putting them together and finding a while to fit them into the chest.
Getting closer!
Back to work on the Tool Chest
After quite a long hiatus on this project because of Life, Work, and various and sundry things I am back to working on my Anarchist Tool Chest. Â It sucks that I had to put this down for so long, but it just had to be on the back burner for a while.
Last weekend I picked the project back up again and actually made some progress.  With the lid being done, the next step was to mount the lid on the shell.  Which means hinges.  I personally hate hinges.  I suck at them.  I just do.  So it was part of why I was putting this off for so long.  I took a deep breath and tightened my belt and other euphemisms as well and just got to it.
Except I didn’t.
Turns out the wood had moved quite a bit since the last time.  The lip where the lid rested on had swelled horizontally somehow, and was no longer straight.  I suspect the wood we used wasn’t totally dried (if you were in the class you can hear the dripping sarcasm from here).  I planed off a bit on each front and back lip until my lid and back edge lined up again.
Now it was time for hinges.

Hinge!
Which actually went just fine despite all my whining and wailing. Â I followed the directions in the ATC book fairly faithfully, and took my time. Â The lid ended up every so slightly askew, which I cleaned up with a few passes of the plane.
So, now I have a functioning lid that fits well and opens smoothly.
Lid Open!
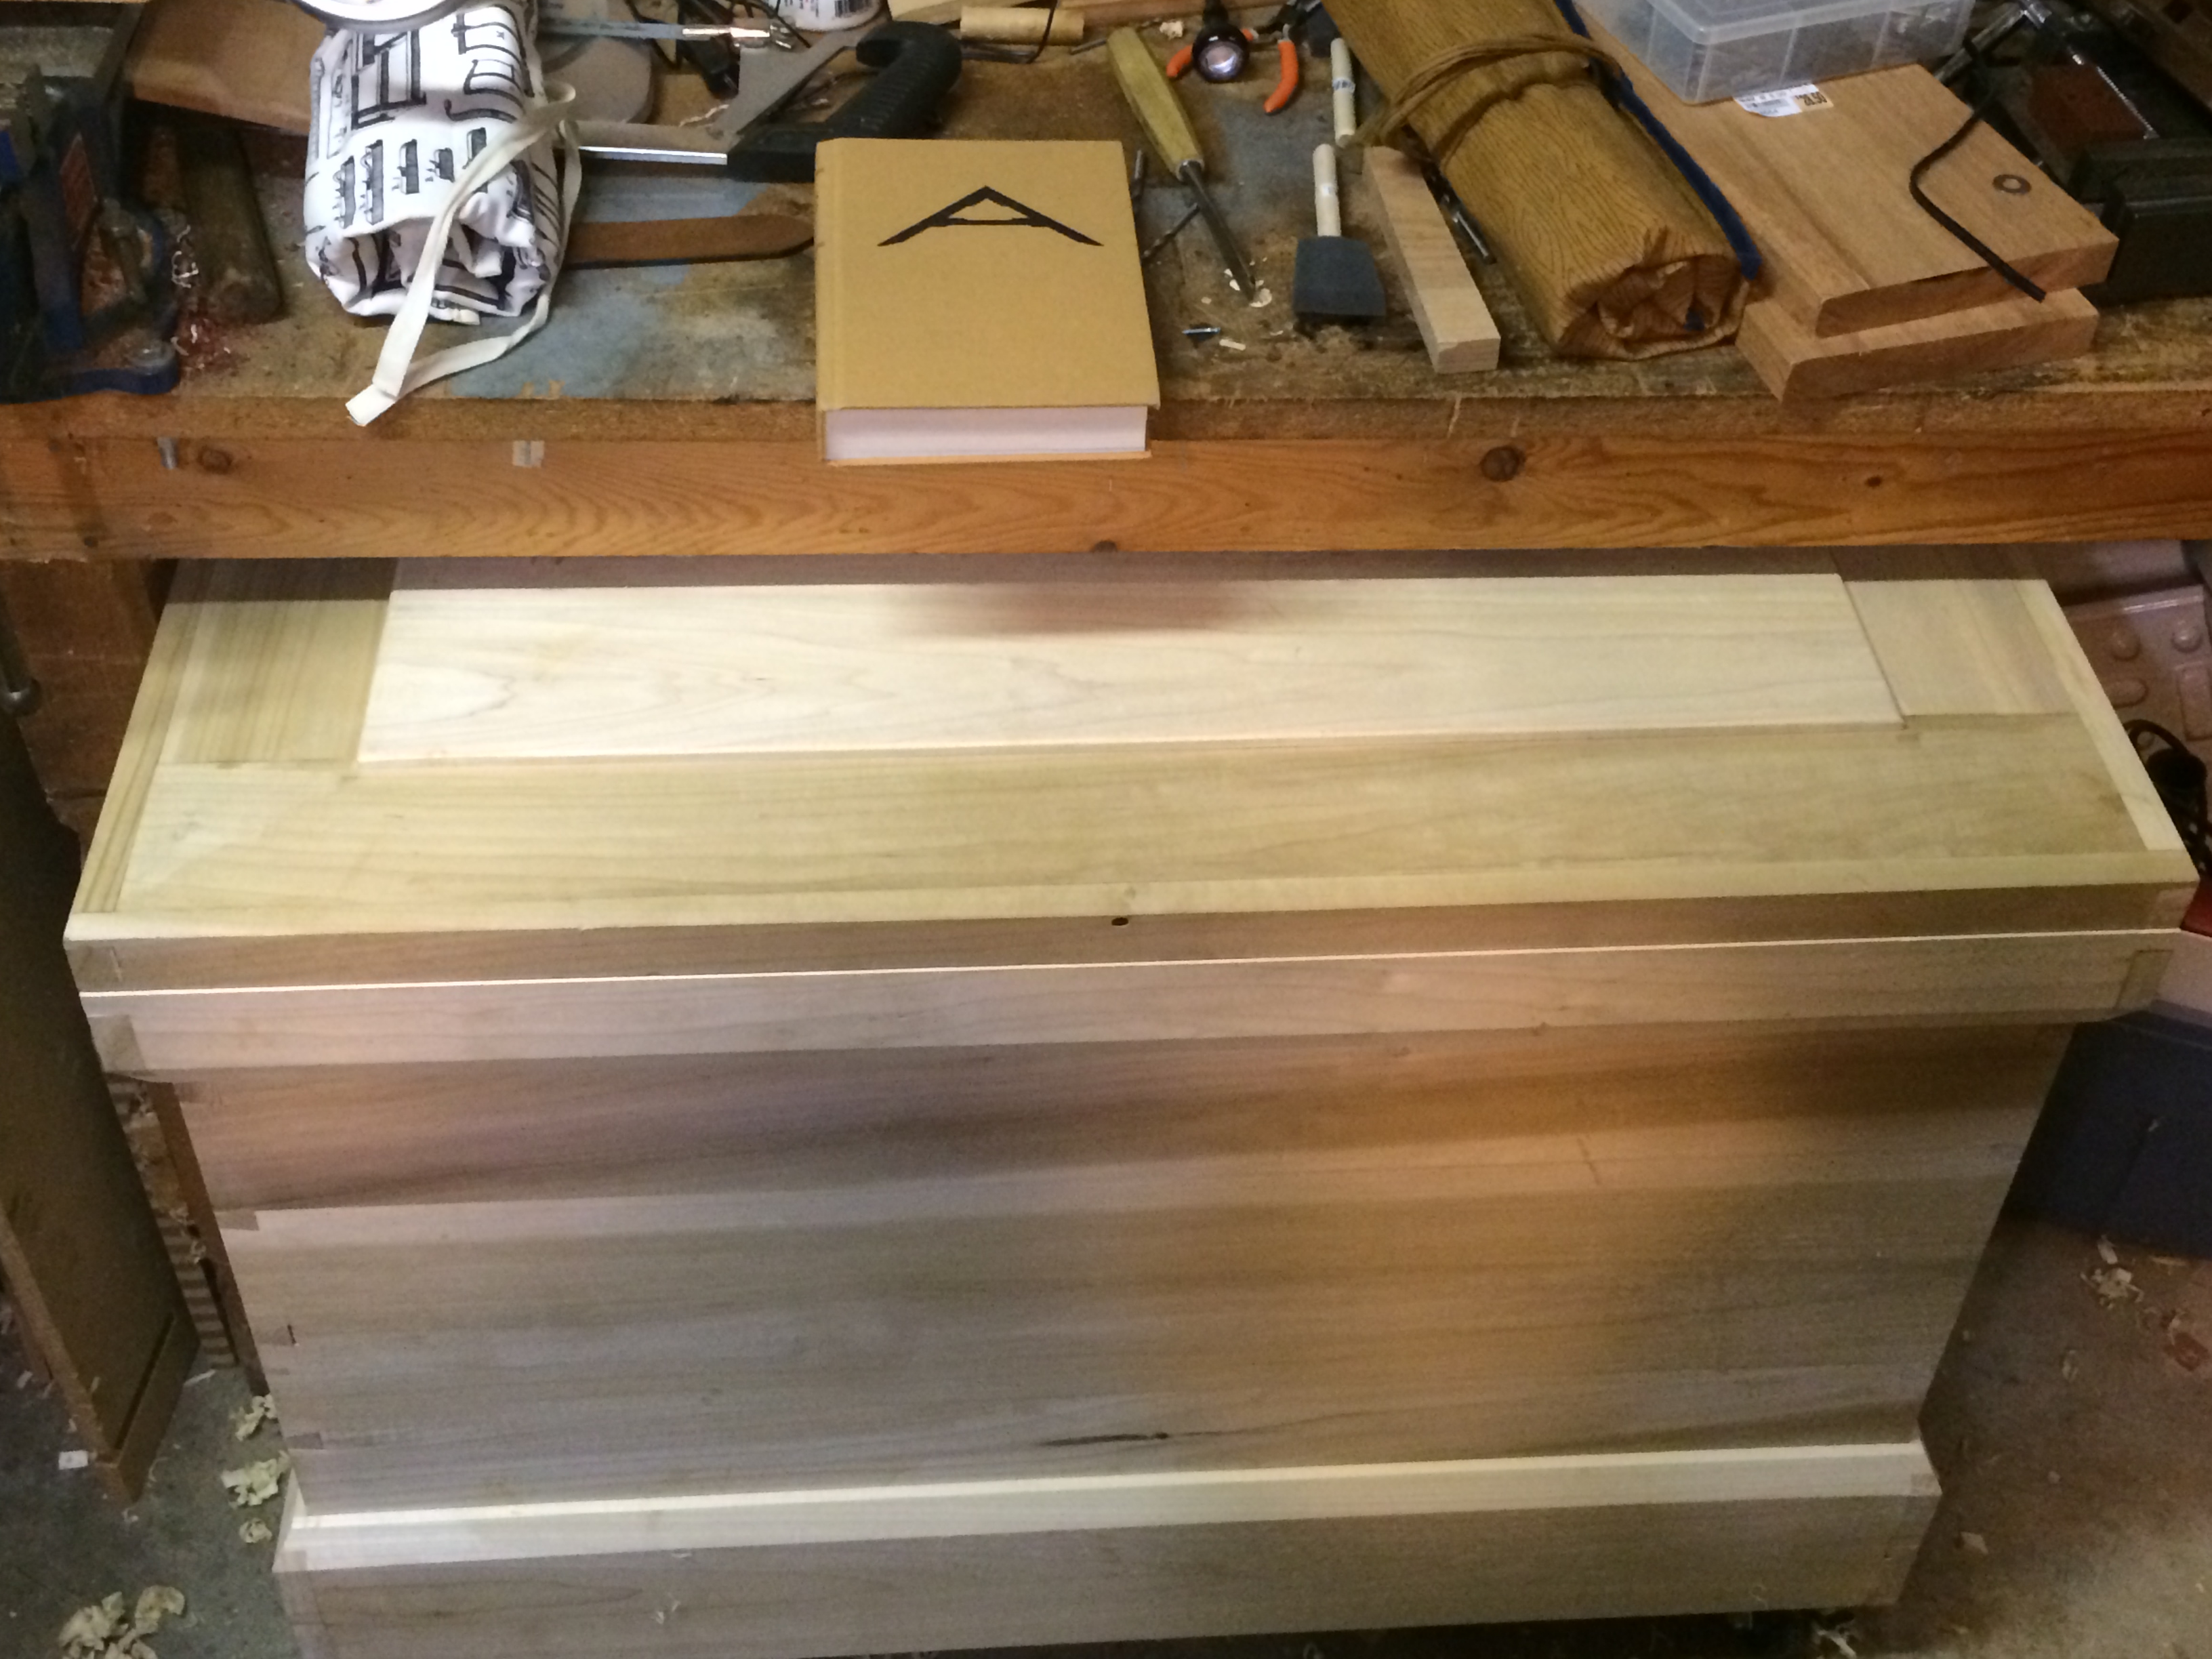
Lid closed! (and tucked under my secondary bench.
This completes the outside woodwork. Â I’ll paint it black with milk paint, and then start in on the inside. Â I might actually get to start putting TOOLS in it soon. Â That is pretty exciting.
Badger
Carving Class load out…
Loading up for the class
I was loading up for the Letter Carving class I’m teaching tomorrow at Rockler, and I was struck by the pile. Â I guess I like to carve things… 🙂
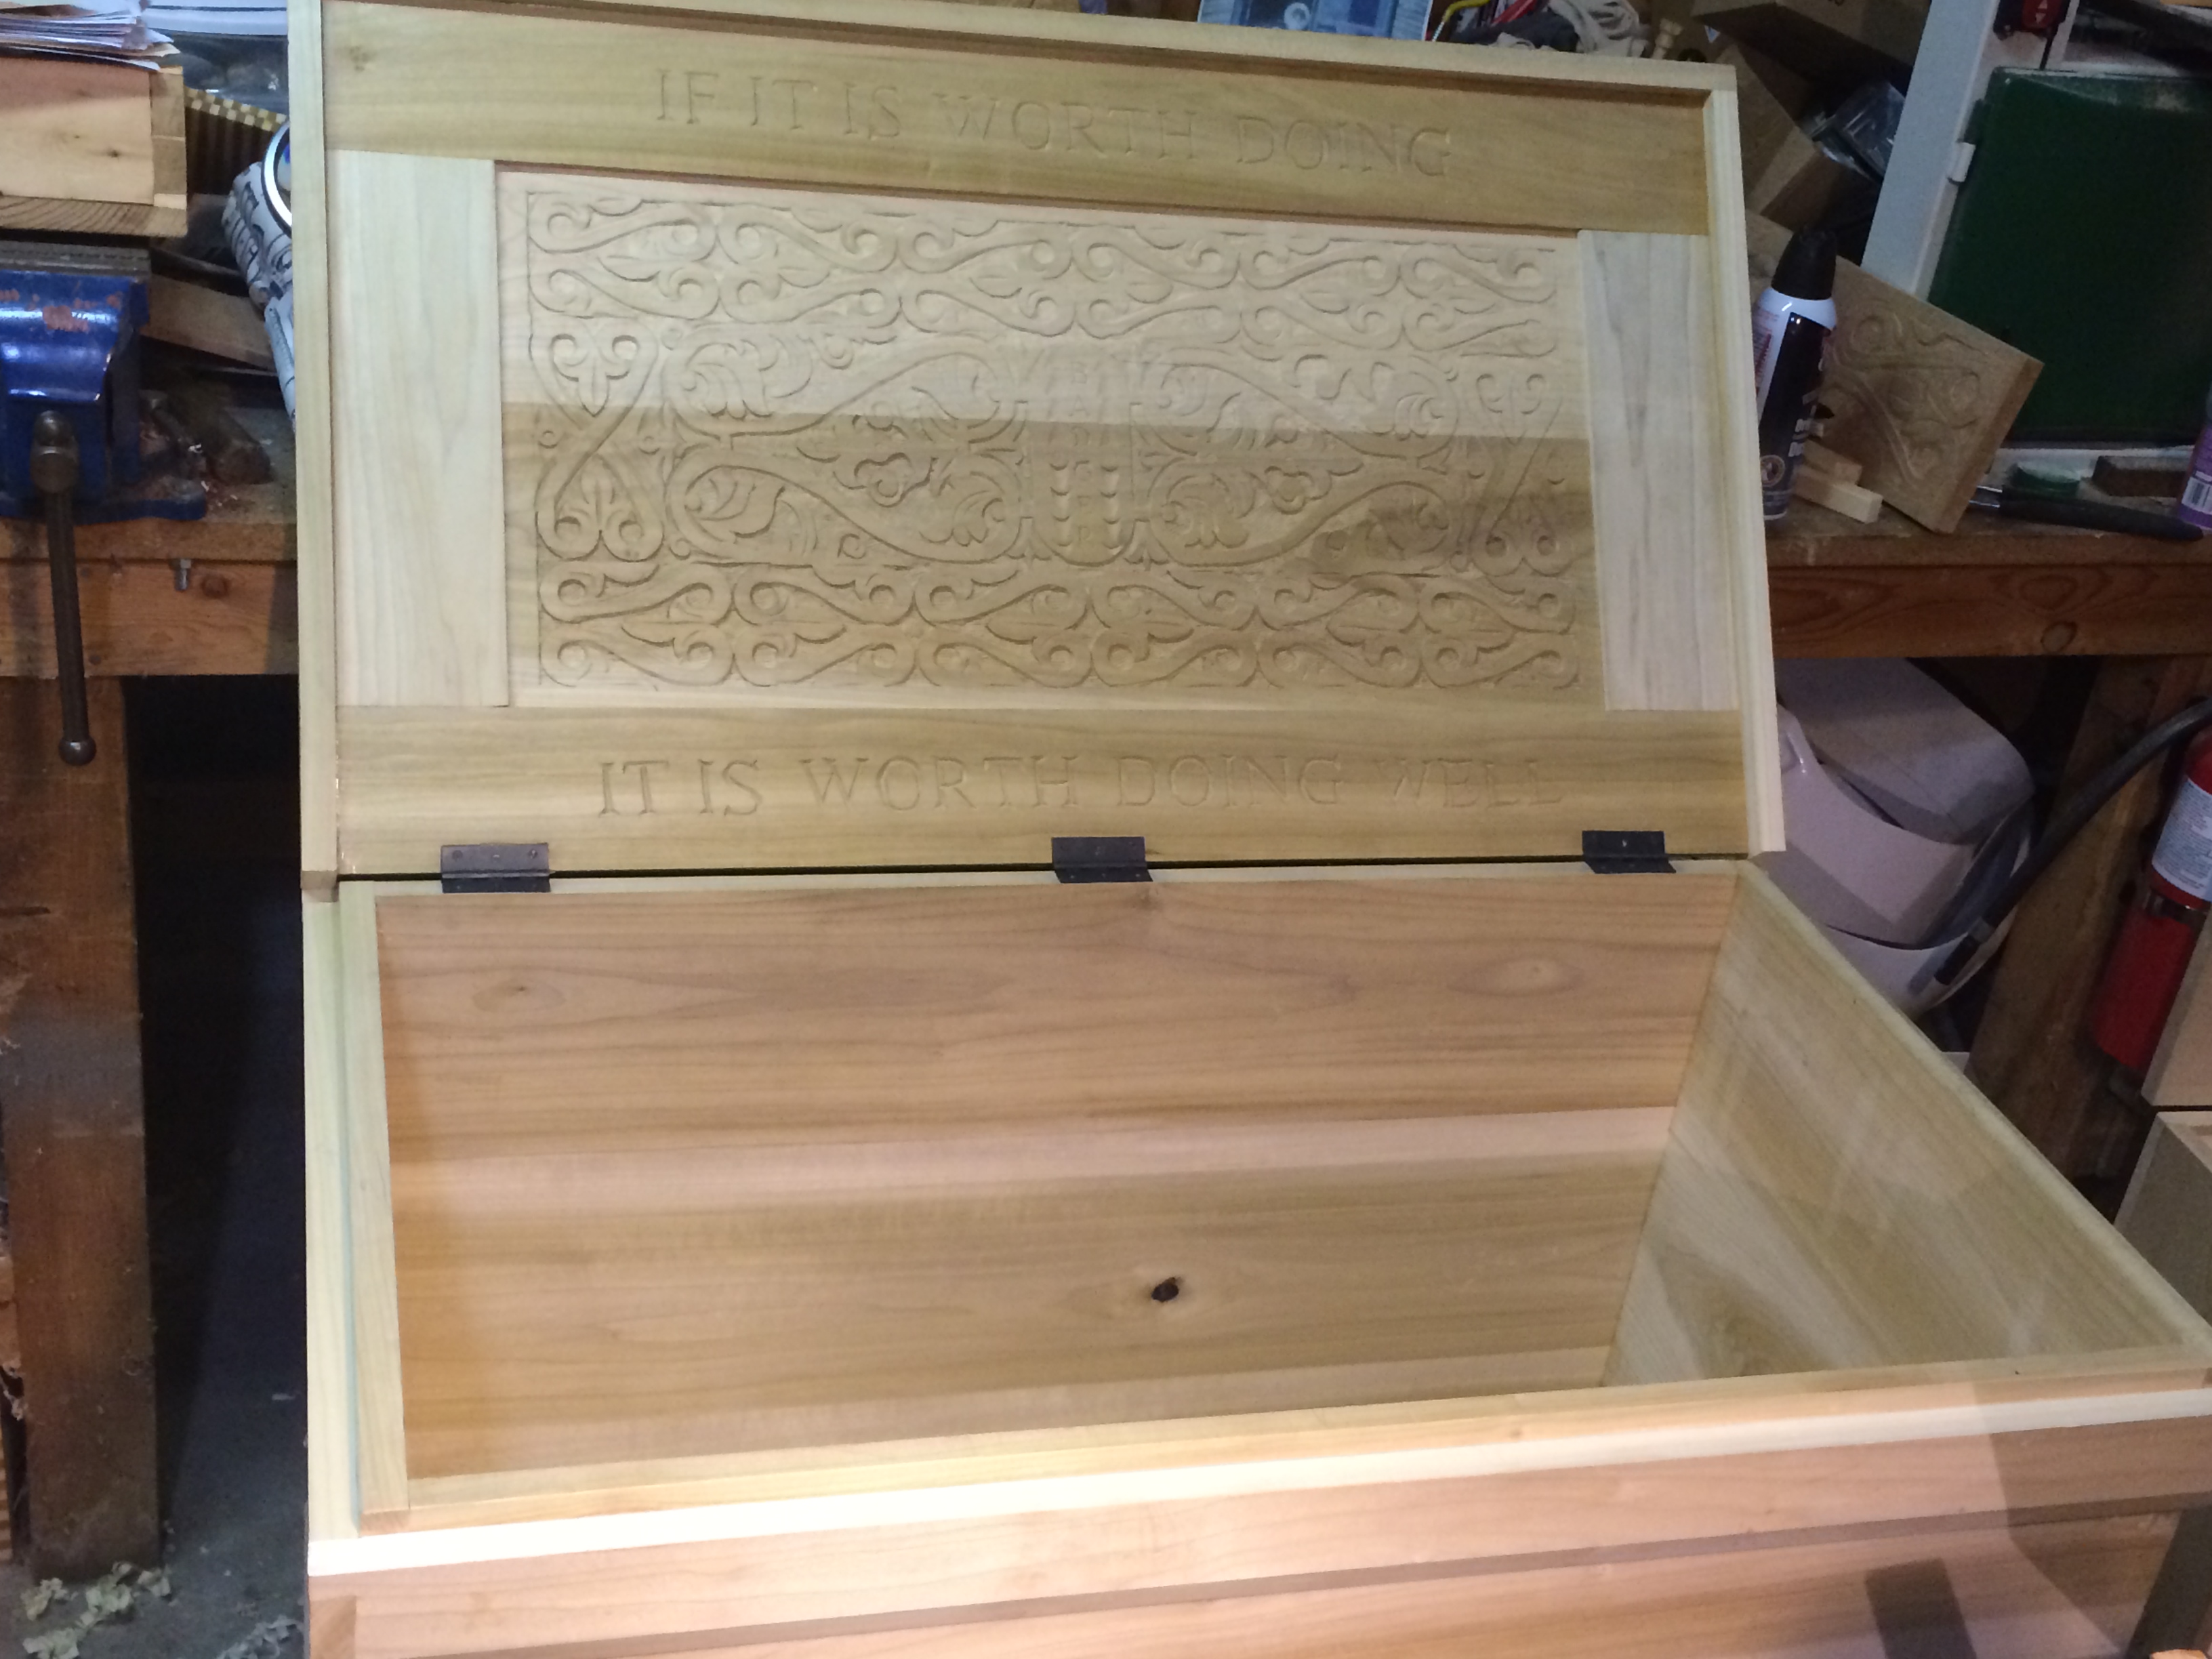
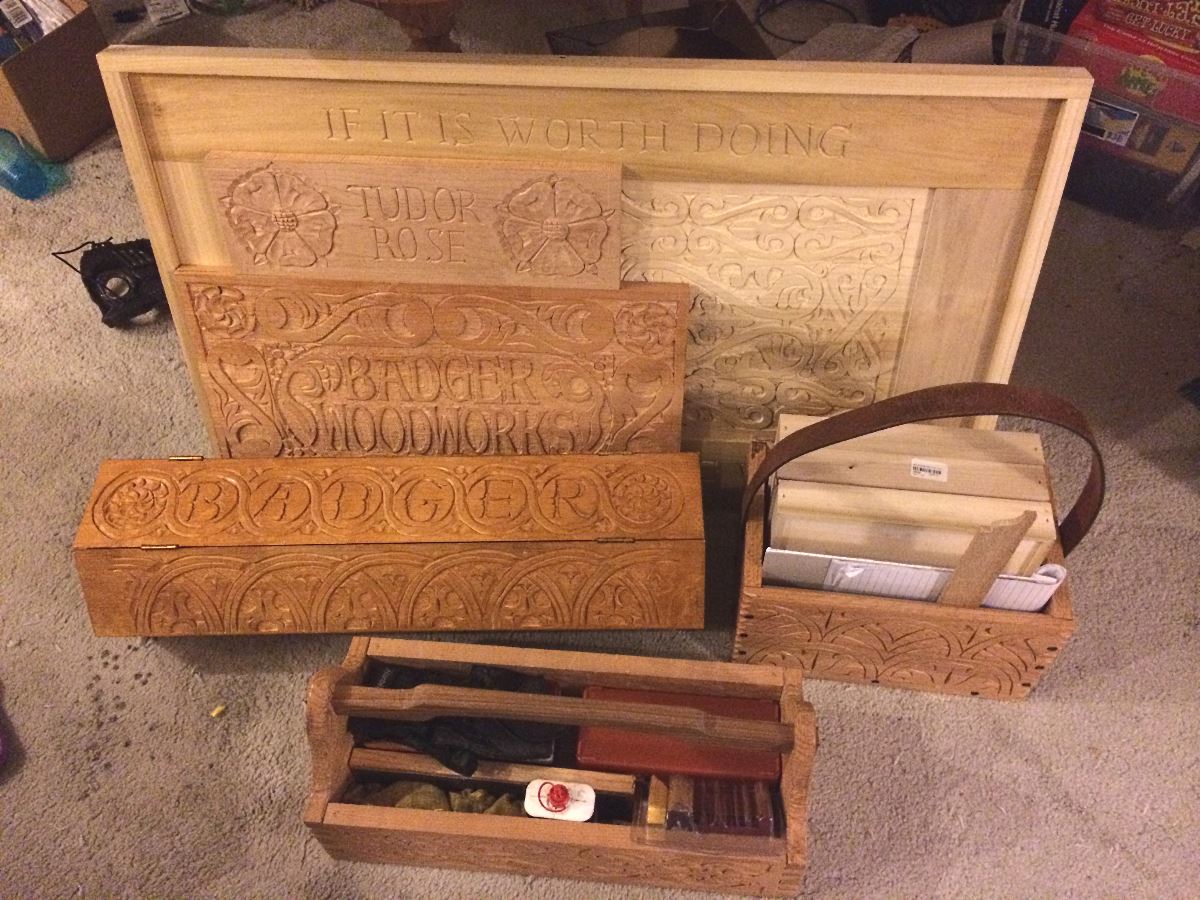
In the back is the inside of my Anarchist Tool Chest Lid, emblazoned with “If it is worth doing, it is worth doing well.” Â A practice board for my Tudor Rose class and my Shop Sign all finished up.
Then there is my six sided box, one of  my first carved boxes with the “arc” style design and my tool tote.
I’ve been thinking about making a “Dutch” tool chest, but I’ll need to find some good wide Poplar boards because carving pine is crap. Â And I certainly can’t NOT carve it. Â I have a reputation to protect. 😛
I am considering another carving class in the fall as well.
Carving a Rose Sample Board
In preparation for the Class this Saturday, I refreshed my memory on carving the “Tudor” style rose. Â I completed my carving sample board last night, and I think it turned out pretty well. Â I was originally going to do a row of roses, but in the end I did two flanking roses and free-handed some lettering in the center.

Tudor Rose sample board
I also snapped some step by step pictures along the way for my hand out.  Once I get something share-able I’ll probably post it to the blog as well as these flowers are a lot easier than they look.  Plus they are great practice for nearly all the basic flat relief carving motions and skills.
If you’re around North Seattle on Saturday I’ll be in the back of Rockler store if you want to drop on by.  Also, I think there are spaces still open in the class if you’re interested.
badger
Teaching Carving and Demo
This Saturday I taught my first woodworking class.
I’m just going to take a moment to dwell on that last sentence. Â It’s a big one for me. Â A sort of “Level Up” moment in my life. Â I’ve always been a guy who makes stuff, or fixes things, or takes things apart (sorry mom) and sometimes puts them back together. Â But being a “teacher” of woodworking is brain-stretcher for me.
This journey down the woodworking rabbit hole has been pretty interesting, and I look at people like Chris Schwarz and Peter Follansbee as teachers, guides, and generally cool people. Â (and sorry Chris, but I did model my teaching style on yours a little bit, I know that probably gives you a little heartburn but it fits well with my style.)
Saturday I did the first part of the class as it is a two parter, and we covered the basics while carving a single panel.
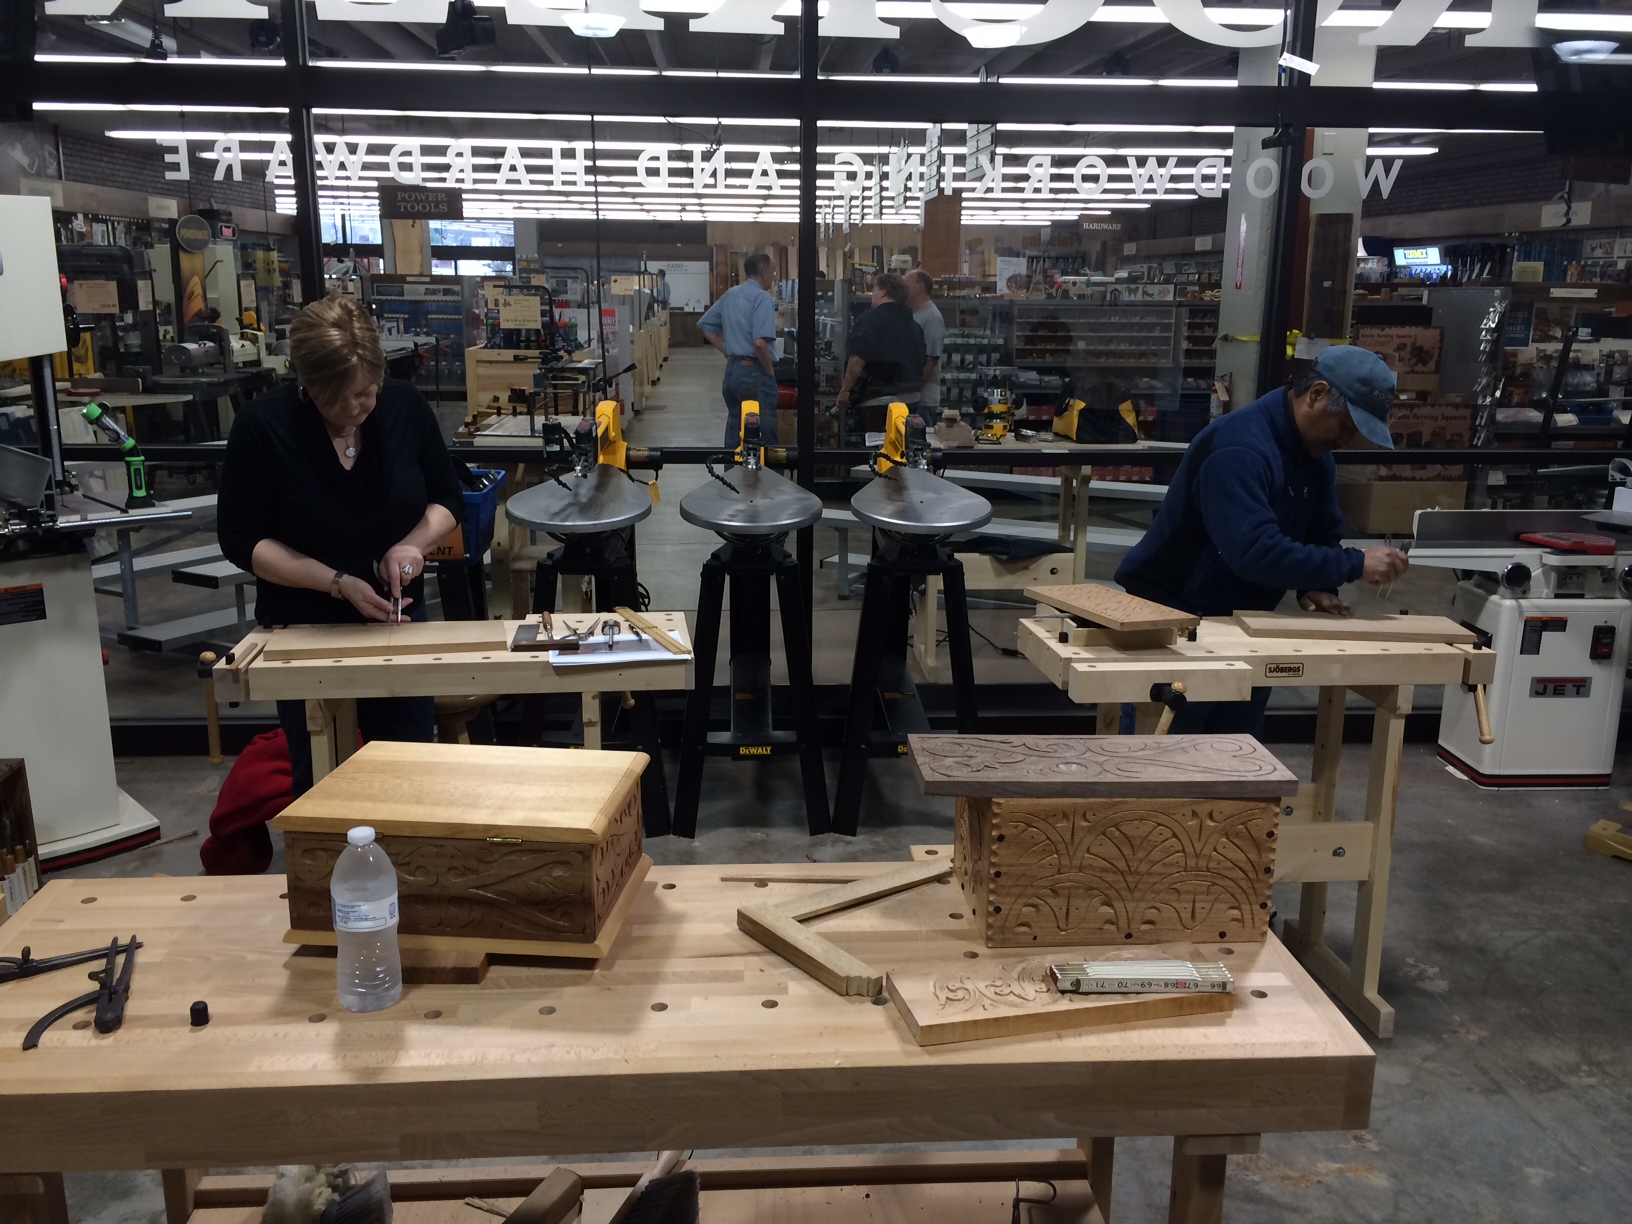
Students at the Flat Relief Carving Class. Rockler, Northgate Seattle WA 4/12/14
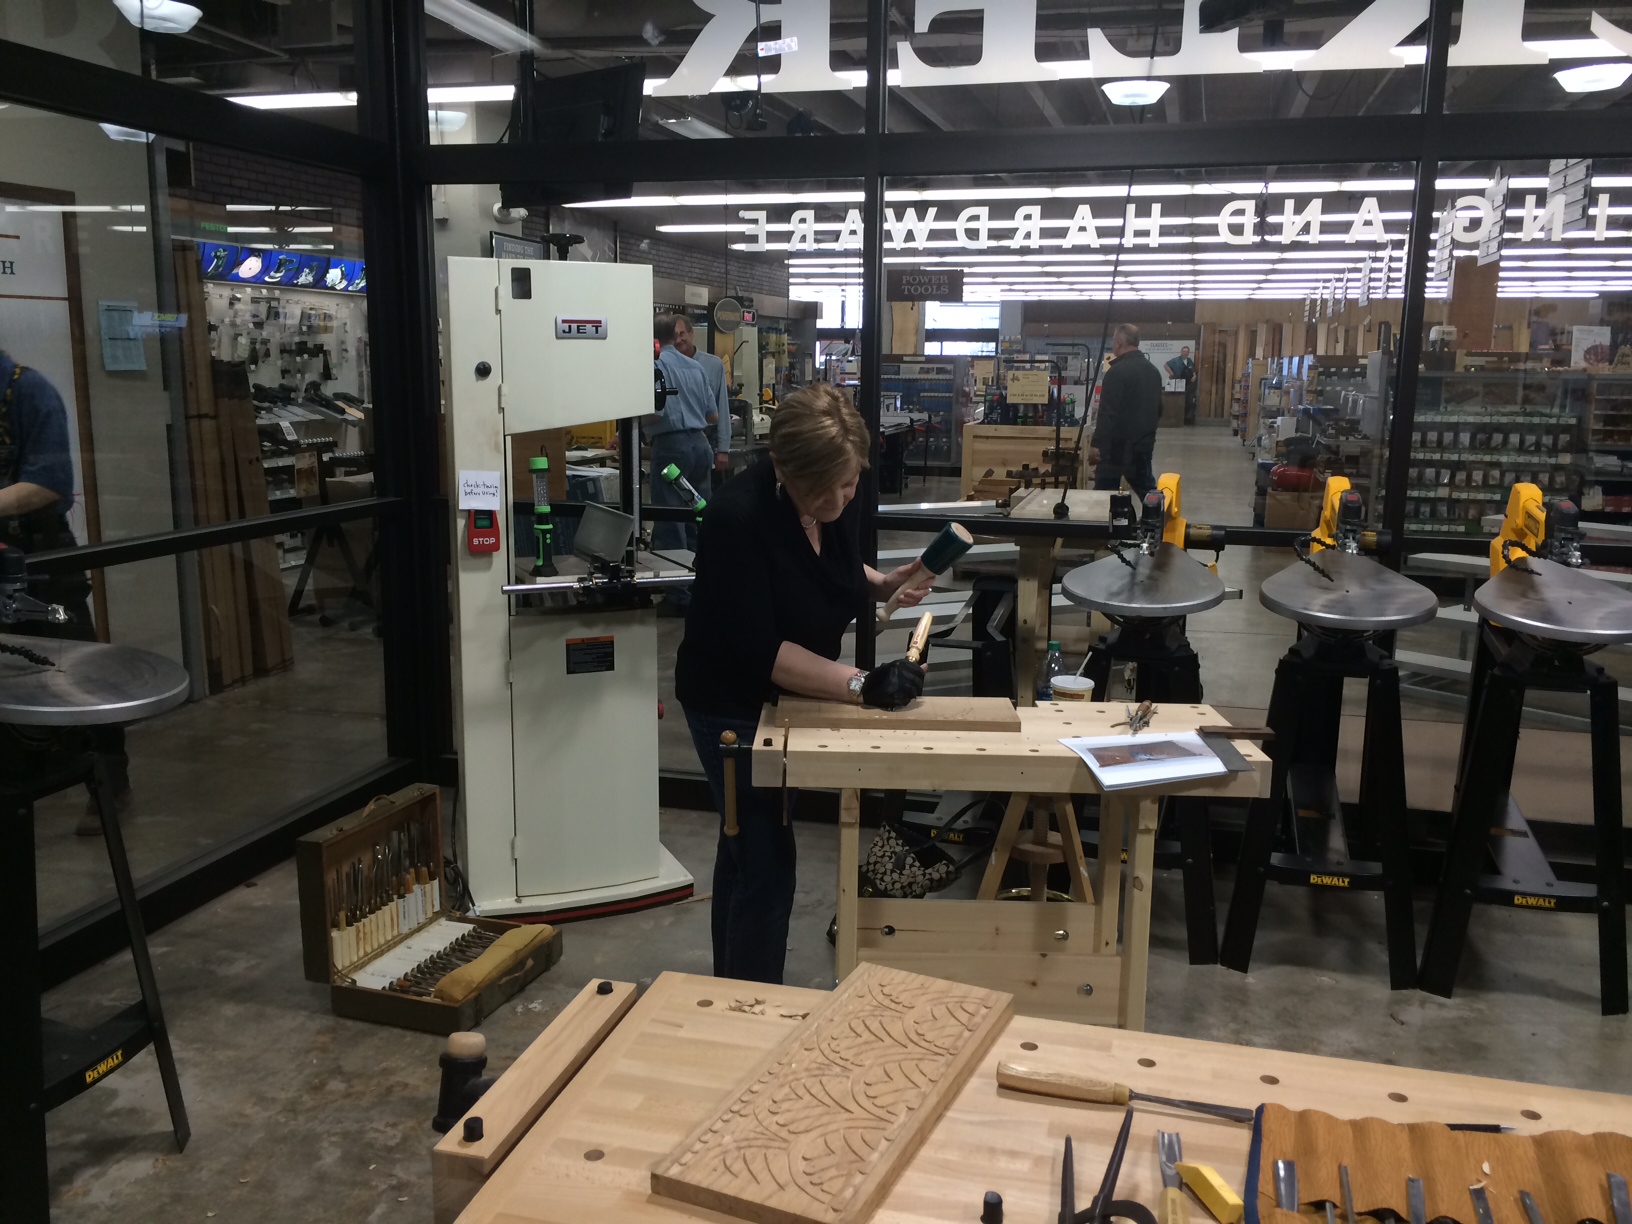
Students at the Flat Relief Carving Class. Rockler, Northgate Seattle WA 4/12/14
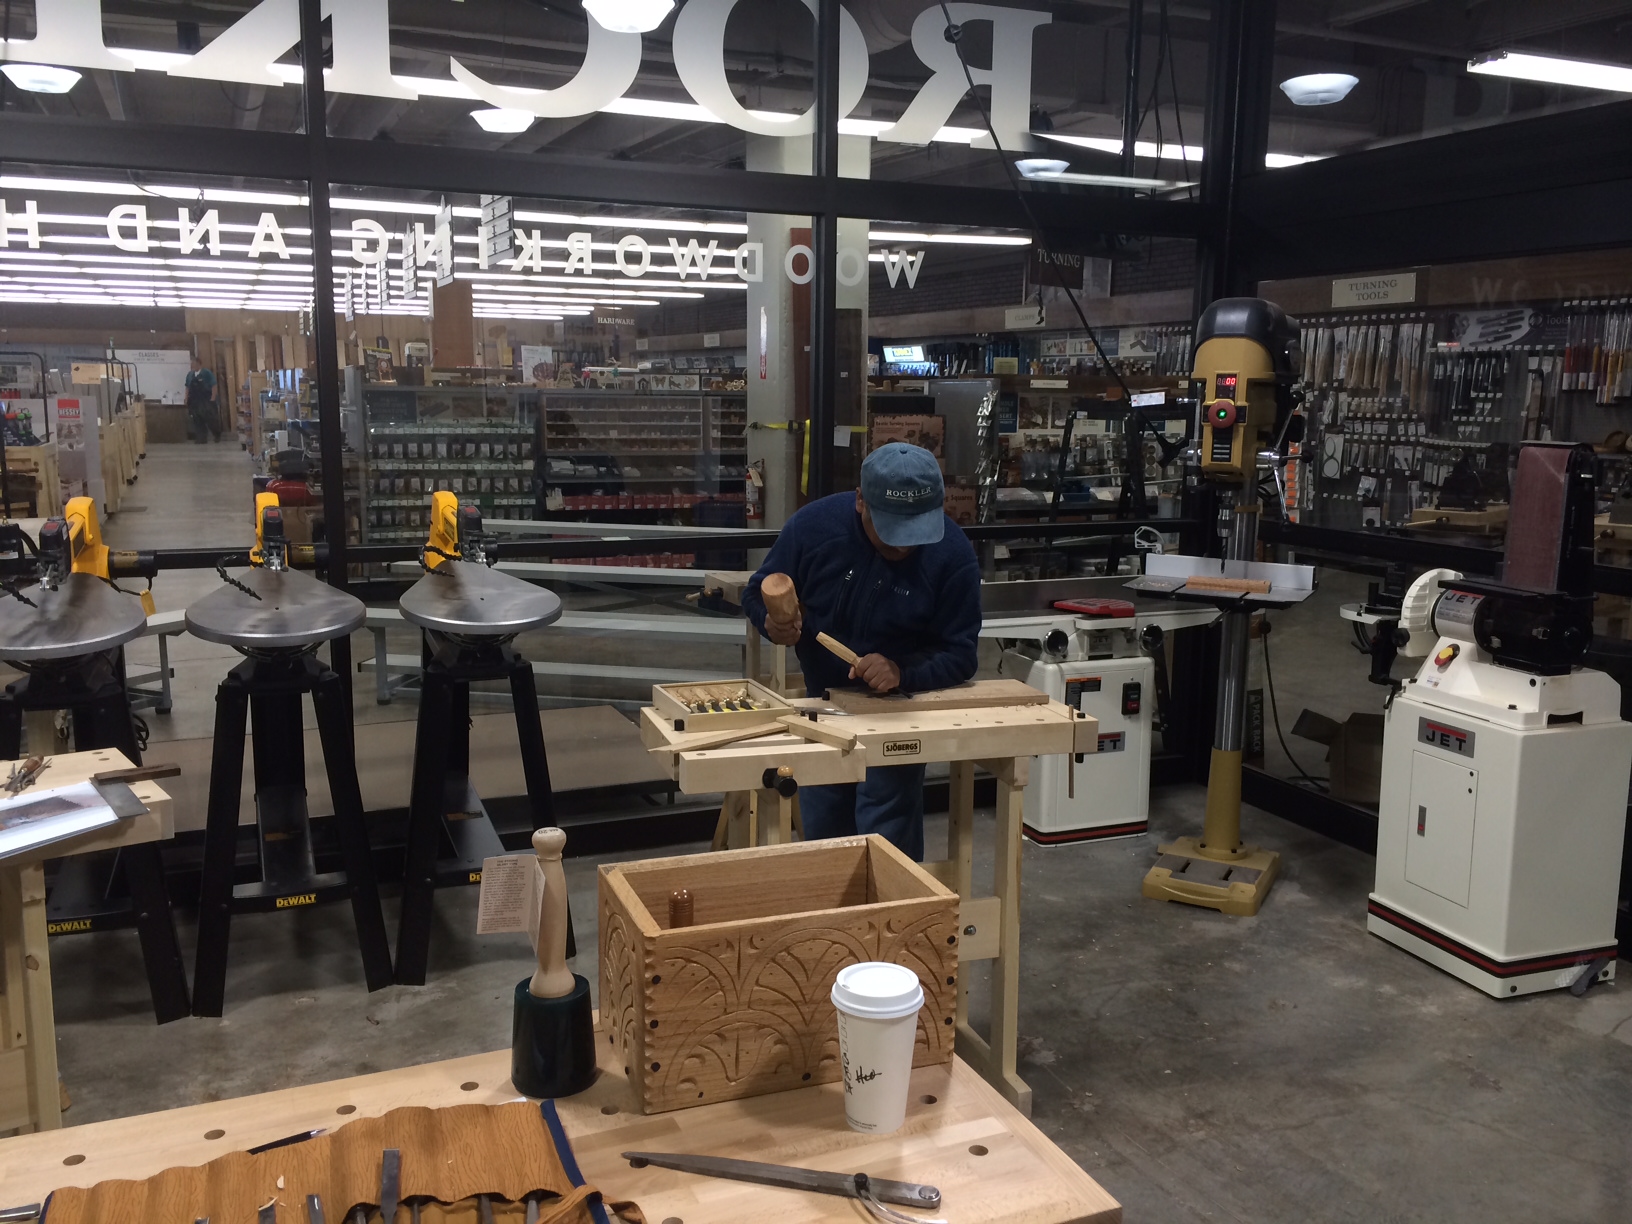
Students at the Flat Relief Carving Class. Rockler, Northgate Seattle WA 4/12/14
First we covered the gouge cut decoration along the top and bottom edge of a piece of oak. Â This showed how to hold the chisel, dividers, carving mallet. Â The repetition allowed them to build some muscle memory and get a feel for the motions and for the materials.
Then we did a simple repeated arc pattern in the center area. Â This showed them layout with dividers, and lots of practice with the V tool. Â As well as some design at the point of the tool for the floral decoration, and some punch work with the accents. Â One student finished, the other got at least the core design down. Â All in all it was successful for me as a teacher in that I got through what I wanted in somewhat the order I wanted to. Â I had gauged the right amount of work and discussion. Â They both felt more comfortable with the tools by the end, and their work was improving each step.
Things that I learned.
- Cover more about sharpening, and bring my sharpening equipment so I can fix a battered chisel.
- Get better wood than the Oak we used. Â It was case hardened, and had some wiggly grain which was a frustration.
- Make sure I have a anti-fatigue mat at my bench to ease my aching knees.
- The class itself was little too advanced for a first time class at this venue. Â I’m thinking of doing a simpler class on letter carving (which I already have one student signed up for if I do it.)
The students were very interesting. Â One lady brought her fathers tools, and a great story about how he used them and passed them to her. Â It was a beautiful set, I mean LOOK at these.

A bit of History
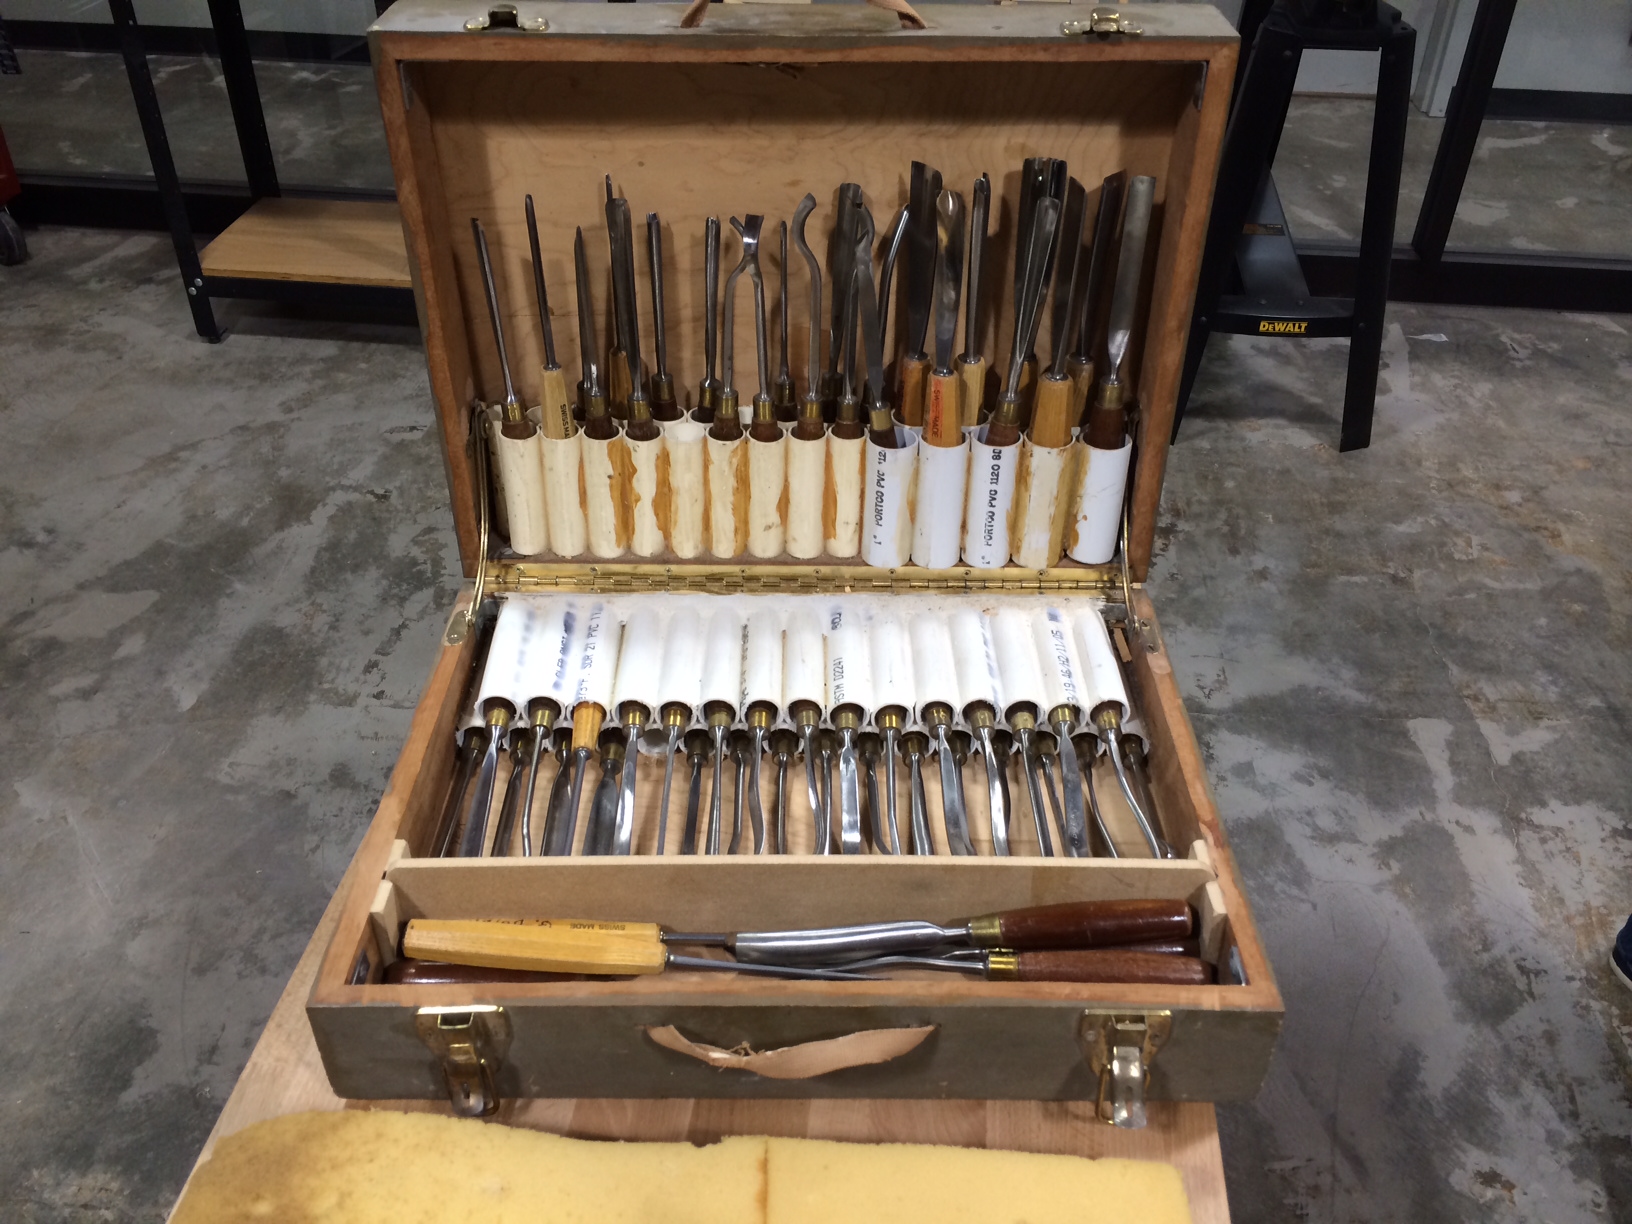
A beautiful set of carving tools with a great bit of history.
It was a great experience, and I’m glad I was able to help her connect with her past a little.
The other student was from Nepal and his home village there had a tradition of woodcarving. Â He wanted to learn some of it and he took my class to see if it was something that he could do. Â Both students seemed to enjoy the class, and I got a good compliment at the end saying I was a great teacher. Â I’m not great at taking praise, but I’m glad it went well for everyone.
In two weeks we’ll pick up where we left off (hopefully with better wood) and tackle some S Scroll carving.
Badger
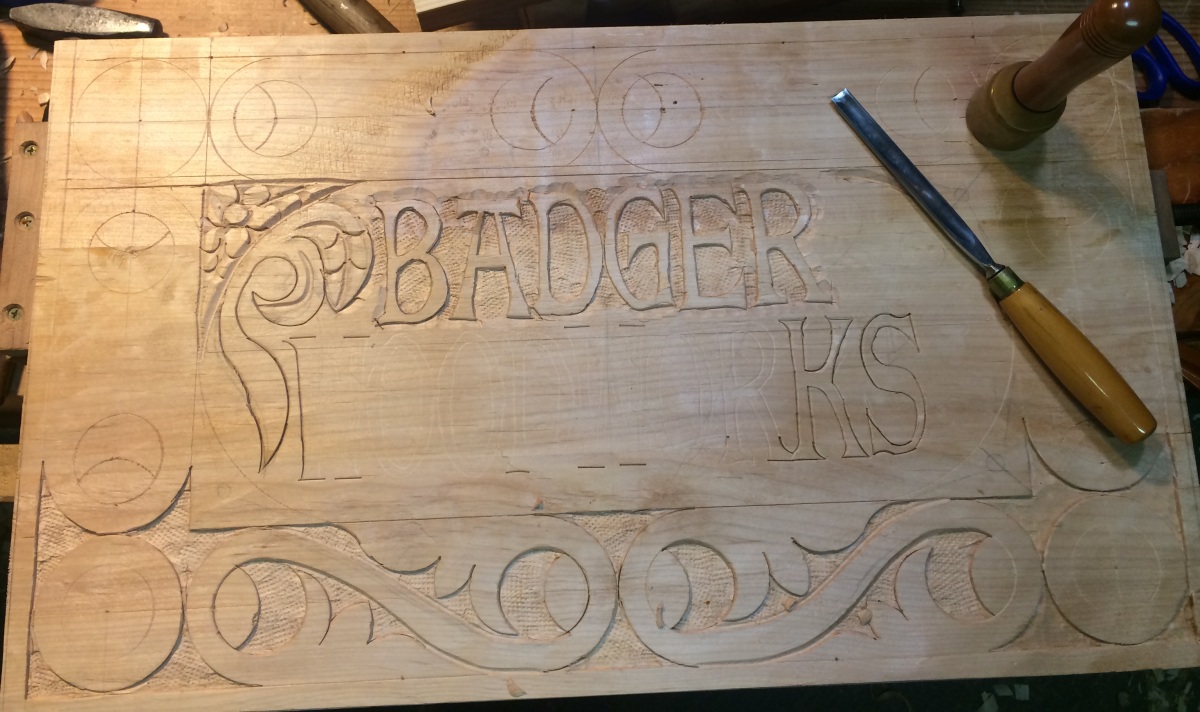
Shop Sign progress part 2
See previous post here: Part 1
Before I talk about the sign, I want to mention that I think there are still a couple open slots in my wood carving class this Saturday April 12, 2014 at Rockler Woodworking Store in Northgate (Seattle, WA). Â Â It’s a two day class, and I start with the basics and work up to more complex stuff.
Letters outlined
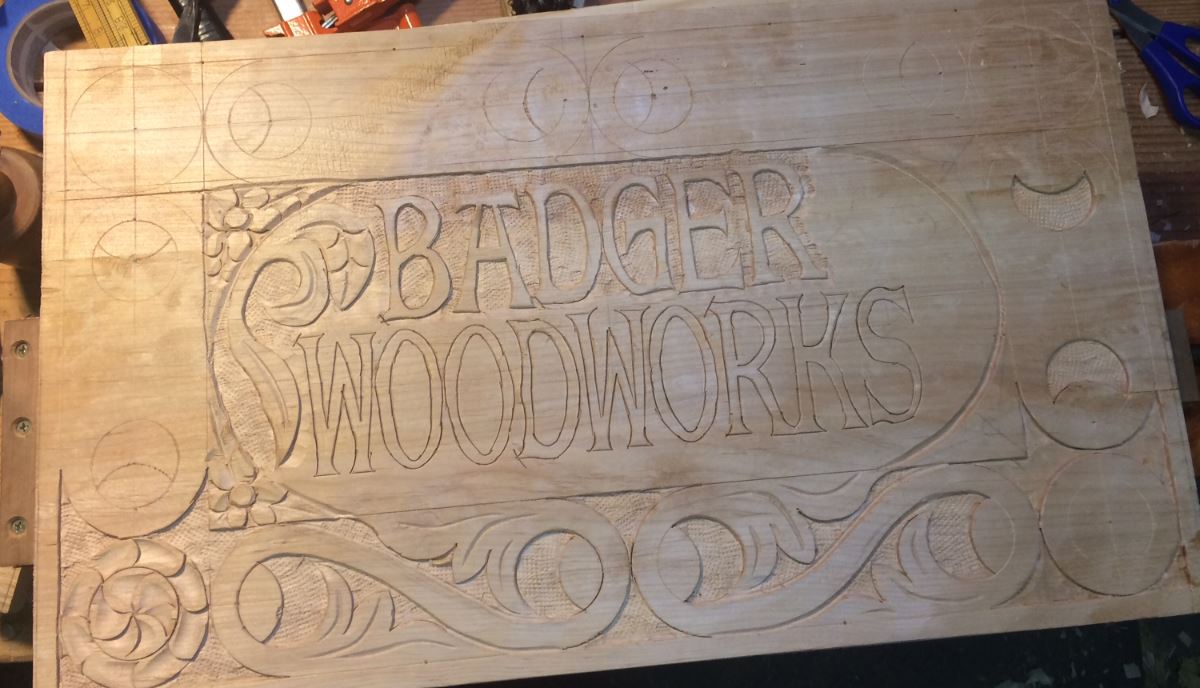
Tonight I finished outlining the letters, and finished most of the major detail carving for the center area. Â Things I learned… Â Super glue is handy to have on hand, and thin letters in soft-ish wood is not necessarily a good idea. Â And yes those things are related.
The Alder is nice to carve, but it’s a bit soft and the thin legs on the letter had occasional problems when I slipped or pried even slightly off course. Â I had to replace four different chunks, and the S could not totally be repaired. Â Regardless I’m pretty happy with the result, and I’m going to be calling this a “Prototype” anyway.
Majority of the letter work done.
I just need to finish up two of the round bits, and four S scrolls around the out side. Â A coat of Shellac should make it pop a bit, but over all it’s been a fun experiment. I definitely need to pay more attention to the general widths of the letter parts.
The outline of the letters was actually easier than I anticipated, and I did the bulk of the work with three chisels.
Flat chisel for straight areas.
Small medium curved gouge for the finials and bases on the letters, and some of the tighter inside curves.
Small flat-ish gouge (probably a #3) for outline the gentler curves.
I ended up using a fair number of other chisels because I had them, but I think I could have done almost everything with those three. Â It’s a case of using what you have to fit the outline you want.
I’m actually considering offering a one day class on letters both V-chisel incised Times New Roman, and a bolder font done like my sign above for bigger stuff. Â After I get through the relief carving class, I’ll see what Rockler wants to do in that area.
Badger
Shop Sign progress part 1
As I was preparing to teach my upcoming carving class, I realized I didn’t have a sign. Â So, I thought I’d warm up my carving muscles for my class and demo, and make a sign for Badger Woodworks at the same time.
I started with some the Alder I’ve posted about before which I’m running a little low on, and glued three sections together to make a larger panel. Â I used Hide Glue and a bunch of clamps, and it worked like a charm. Â The wood has some funky grain in a few spots, but otherwise seems carve-able.
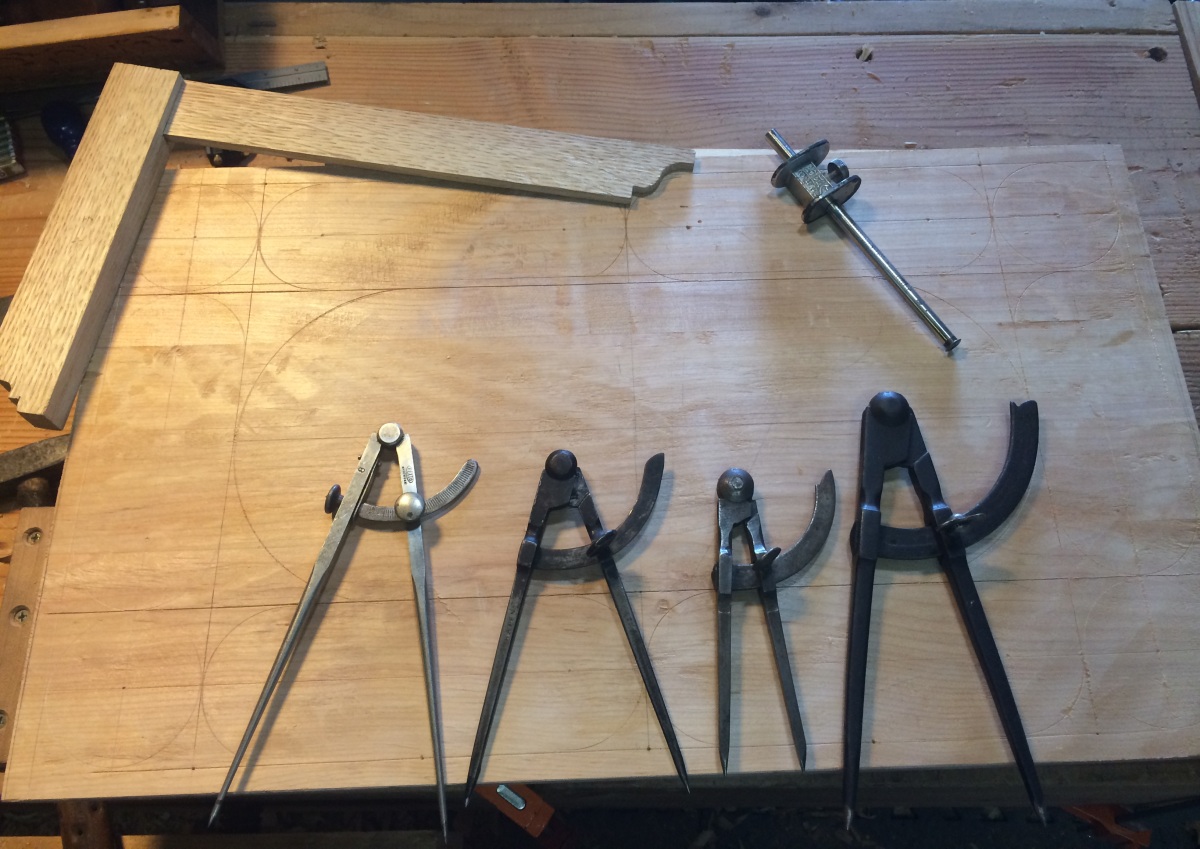
Staring the Layout
For this layout I started with a border around the edge, and set circles in the corners. I played around with proportions until I got something where I could put two S scrolls along the bottom, and a single one up the sides. Â Putting the roundel or circle in the corner made it easier to layout, and gives me lots of options for designs. Â I tried to do some strapwork based on the circles on a previous design and nearly drove myself mad trying to make it work with the proportions so I skipped that this time.
Since I knew I was going to put my shop name in the middle, I sub-divided my remaining space and used the center line to create two half circles at the ends to bound the middle space. I’ve seen a bunch of corner/triangular space filling designs in other chests and I thought this might be a good place to experiment with those.
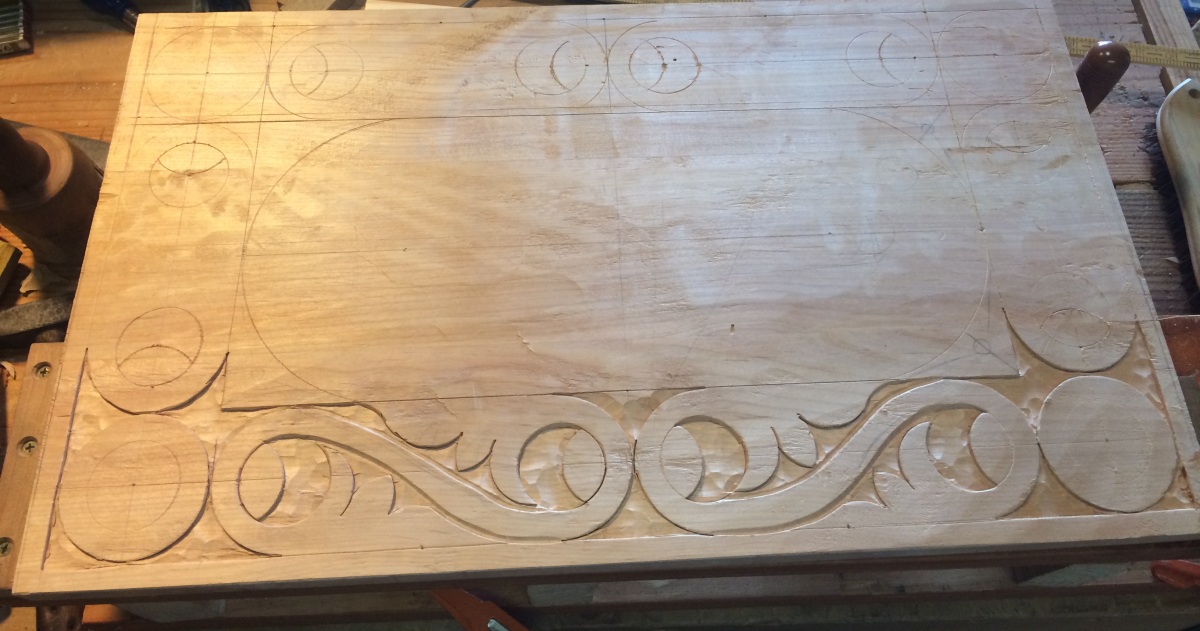
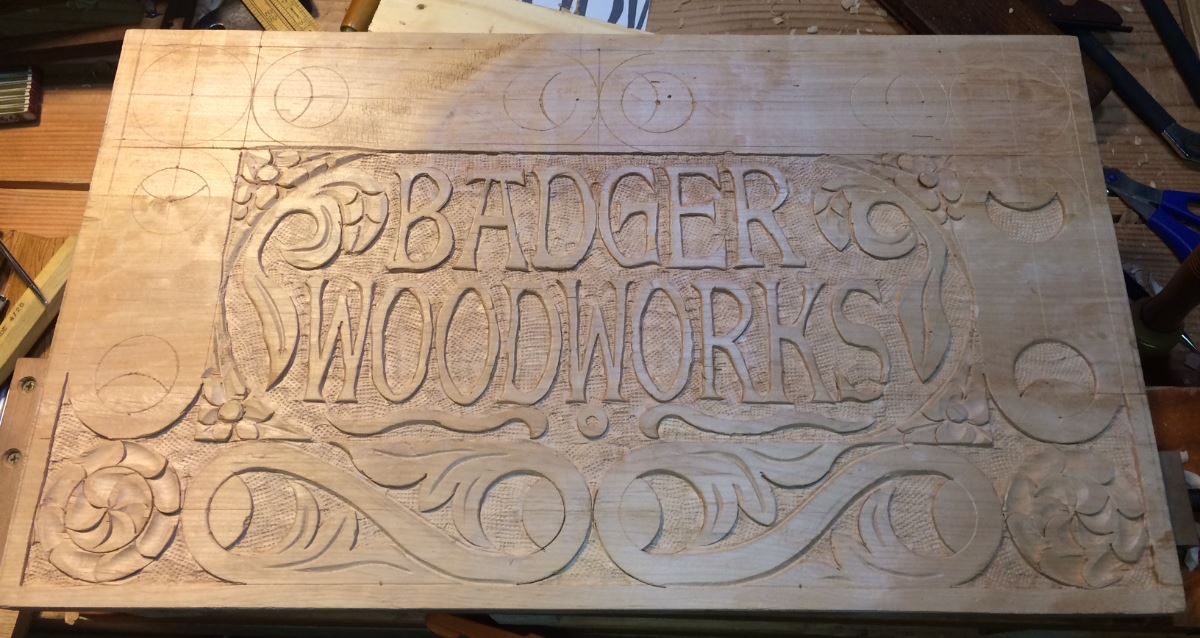
Carving the Scroll work
With the layout basically done, I started setting the scroll work, and relieving the background. Â I knew I had the carving demo coming up so I deliberately didn’t finish the outside edge so I could use it for examples in my demo. Â I experimented with a half button inside the loops, but I’m still not sure the design element works here.
Outline of the text and filling some space
For the text I went to my trusty word processor, picked a good font and started playing with layout. Â Once I felt I had something good, I started printing out samples and laying them on the wood. Â It took four tries to find the right spacing and layout. Â Once I had that I taped it down with blue tape, and went over the outlines with a pen directly on the paper pressing down HARD to make a dent in the wood below. Â This left a nice impression that I was able to follow later to make the letters.
I knew that “Woodworks would be much longer than “Badger” so I had to fill in some space as well. Â I tried free handing the design but I’m not sure it works as well as I was hoping, something I will need to practice some more.
To outline the letters I set in outline with 3 different chisels, a small medium curve gouge, a slight larger gentle curved gouge, and a straight/flat chisel. Â I was able to do almost every single curve with these two gouges. Â I had to be very careful on the thinner legs of the letters and already chipped one out which I had to glue the wood back in. Â Then it’s just a matter of relieving the outside, and texture punching the background.
More to come later as I finish the project.
Wood carving Demo at Rockler
Well, I think I just passed some kind of milestone. Â I did my first woodworking demo tonight. Â The Northwest Woodworkers Association asked me to do a demo of my carving at their monthly meeting held at Rockler. Â I think it went all right, they seemed to like it and I got some good compliments from the guys afterwards. Â It was my very first demo, and I’m not what you’d call good at public speaking. Â I was super nervous, but it went all right.
I’m teaching a class on Flat Relief Carving in April at this store, if any one is interested and I think there are at least a couple spots still open. Â It’s a two day class, $100 for the whole thing and they are going to have tools available I think. This was a good warm up for the class that’s for sure.
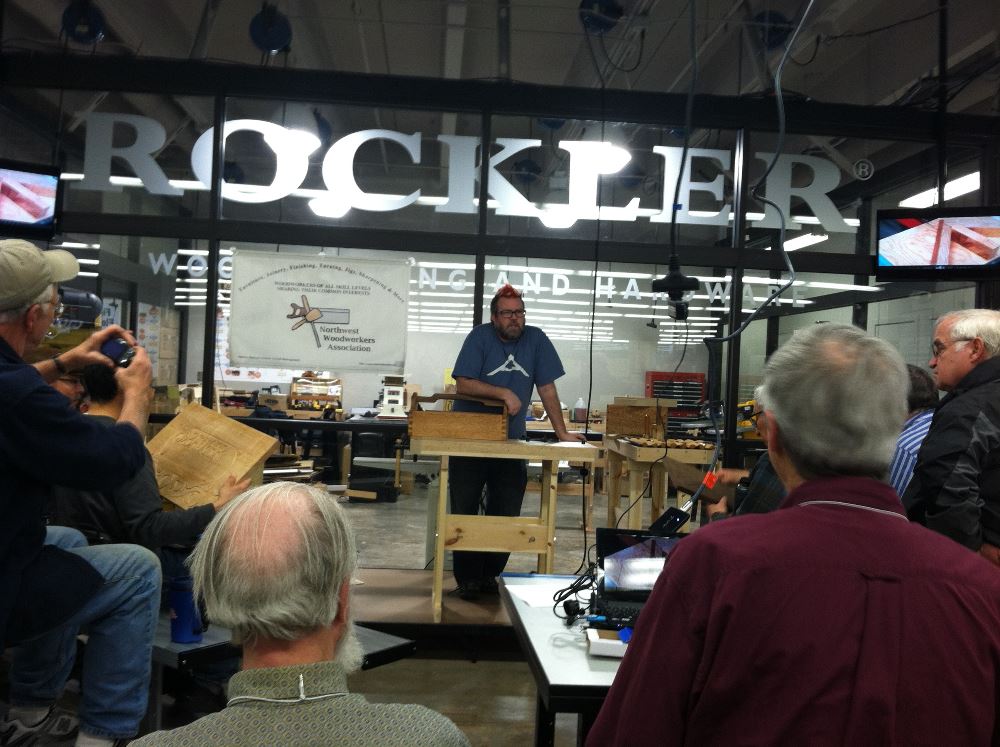
Doing the Demo at Rockler
http://www.rockler.com/retail/stores/wa/seattle-store/classes-store02
badger
You must be logged in to post a comment.