Carving S Scrolls step by step
I thought I’d do a post on carving, and show the process step by step.  The design I picked for this box front was taken from a carved chest image that I got from Peter Follansbee.  The bottom rail has a nice simple S Scroll pattern than I am using as the inspiration for this carving.  The original box  is a carved joined chest, dated 1676 that is attributed to Thomas Dennis of Ipswich Massachusetts.  The extant chest is housed at the Winterthur Museum and doesn’t appear to be pictured anywhere on the net.  There is a lot of patterns on this chest and I’ve already used a strapwork pattern from this chest for my tool box.  You can find examples of these carved chests all around the net, and Peter Follansbee does a lot of this kind of work on his blog which I highly recommend checking out if you’re interested in this type of historical carving.
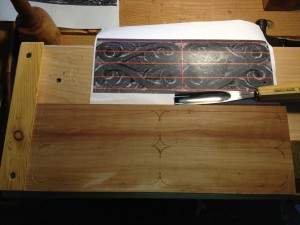
The wood I’m using here is Alder wood that I picked up, and resawed down to approximately 1/2″.  I think it’s kiln dried, but the grain is nice and tight so it carves pretty well.  I took a series of pictures as I went to show the step by step process of carving the scrolls with little measuring.  The layout started out with eyeballed edges scribed with a marking gauge.  I found the mid point with a pair of dividers, and scribed center lines to start out.
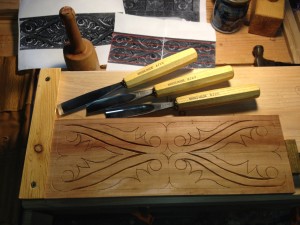
Chisel: Swiss made 8/20 Gouge
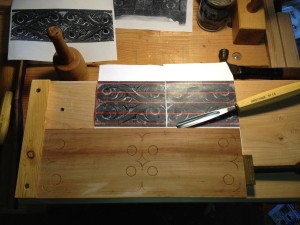
I start out bounding the curved scrolls by using a curved gouge that looked right, although in retrospect I think it might be too small. Â I probably should have used a compass here to draw out the circle at the ends to give my self a starting point. Â It didn’t turn out too badly, but I think it could be improved.
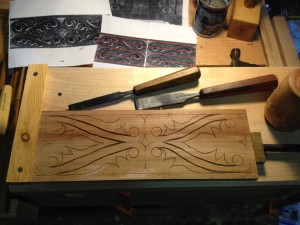
Chisel: Swiss made 8/13 Gouge
Here is where I made my first “mistake” but it was I was able to quickly pivot and move on. Â The center of the top curve of the S starts out as a circle, but if you notice, they are not directly on the center line. Â I did them opposite of the picture I was working from, but I was able to cut the picture in half and tape it back together (with duct tape, naturally) so that it matched where I was going. Â It helps to have the image in front of you, but it’s mostly for reference since I’m using the shape of the tools as the guide lines for the most part.
Chisel: Swiss made 12/8 V Tool
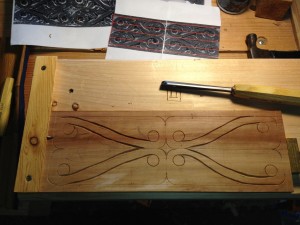
Now we need to connect the “Buttons” (which is the term that Peter Follansbee uses in his S Scrolls video. Â I used a V tool to connect the two of each, and to be sure I wasn’t screwing up I sketched it lightly with pencil first on one side. Â After I got it work out the other side was easy to follow and it’s quick work to outline the main body of the S in the S Scroll. Â the rest of the work is done with a variety of gouge shapes.
Chisel: Swiss made 4/20, 6/20, and 8/20 Gouges
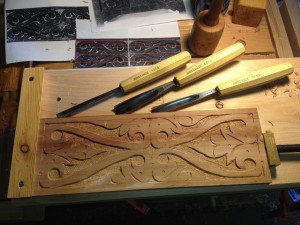
Next comes the part that looks hard but really is the easiest.  With your pattern in front of you (or sketched out on the wood lightly) lay a variety of gouges down on the wood till you find the right curve that matches approximately the curve you need, and set it into the wood with a couple quick raps of the carving mallet.  Be sure to strike straight down so you don’t pop out the wood.  For this pattern I started on the circles and built out from there.  You’ll notice the center pattern is a mirror of the outer pattern.  If you look closely you can see that I’m not really that precise but the eye is very forgiving and will see the pattern for what it is.  I need to practice more to get more precision, but it is not a huge concern for me.
Chisel: Flat chisels
Next step is to take a flat edge chisel and outline any edges that don’t get cut in the main pattern. Â I reground a couple old flat chisels I got ages ago with a sharper angle and a double bevel for these two.
Chisel: Swiss made 5/12, and 5/8 Gouges
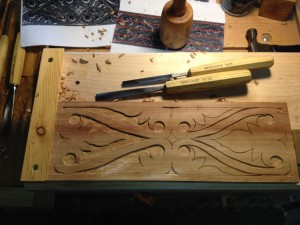
Taking a couple sizes of gouges with a flat curve to them, I start working out or relieving the background.  I find the #5 sweep to be perfect for this work, and I have a couple sizes for bigger removal or getting into tighter corners.  The best way to do this step is work towards on of your gouge cuts, and take a bit out at a time.  Grip is important, and control is desired so work slowly and carefully.  You’re looking for a nice crisp edge, but not necessarily a flat bottom.  It will somewhat faceted once you’re finished, and a roughly uniform depth is good.
Here is a shot of the relief work all complete prior to texturing the background. Â It’s useful to have a coarse stiff brush to get all the chips out. Â I also spend a little time going over the whole pattern in detail to find any missed spots, or areas that need a little clean up.
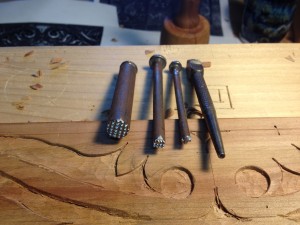
I thought I’d show you my home made text punches that will be used in the next step. Â The one on the far right is just a nail set which work perfectly for this, and makes a mark very accurate to the old examples. Â You probably have one in your tool box already. Â I also make a simple “maltese” cross punch for decoration from a nail, and some files. Â The two texture punches are made from round bar stock I got at the hardware store, and a big nail cut short. Â I just free handed the grid with a needle file.
I use the big punch where ever it fits into the background and tapping it with a metal hammer. Â You don’t have to fill the whole background precisely, just try to cover as much as you can. Â Any areas the big punch won’t fit, I hit with the smaller sized texture punch. Â I added a couple circles with the nail punch, and added a couple cross punches. Â I realized I should have set the sides in further on the design since I plan on nailing this together, and didn’t allow for that. Â The nail set punch decoration is straight out of the original pattern.
Chisel: Swiss made 8/13, 8/20 Gouges and 12/8 V Tool
I used a couple of gouges to add some decorative “half moon” cuts to the leaves, as it was in the main pattern I am following. Â I also added a little V tool work as well to break up the flat spaces. Â Once thing I’ve noticed about the patterns of carved boxes from this period is that they really don’t leave much open space clear, either in the background or the surface level. Â I guess nature abhors a vacuum in the design, and I think it helps.
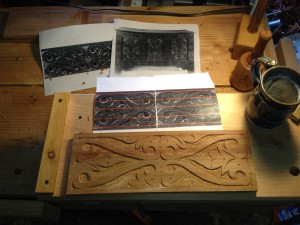
All finished with this box front.  I’m planning doing the sides of the box with a single length of the S, and maybe a different pattern for the back.  I am mostly just practicing my carving and design, as well as testing out this Alder wood for carving.  I don’t have regular access to the wonderful riven white Oak that Peter uses, but this might just be a good local substitute.  I like the color and grain, and I can pick it up fairly easily around here in the Pacific Northwest.
There you go, let me know what you think and I hope it helps understand this type of carving. Â It’s easier than it looks, is very forgiving and makes a great presentation.
Badger



Thanks for the posting. I’m intending to start in on this myself soon, and this was a very useful tutorial!
where did you get the punches
Kurt, I made the texture punches myself with a needle file and some steel rod. The smaller one is a large nail from the hardware store, and the bigger one is some cold rolled mild steel rod I found.