Tool chest progress, finishing the lid.
Previous post on tool chest here.
Made some progress on my tool chest this weekend. Â I’ve been plugging away at it slowly since I brought it home from my class in Port Townsend.
First challenge was fitting the beast into my small shop, which is really just the back end of a two car garage that is full of boxes of stuff. Â I was worried that it wouldn’t fit, and I’d have to dance around it to get anything done until I totally re-arranged everything.
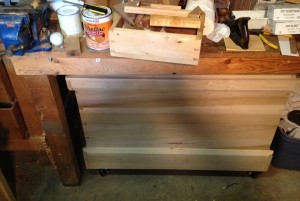
Luckily it just barely fits under the grungy shop workbenches that came with the house. Â With room for the lid.
With that sorted, I was able to turn my attention to the lid, which was still un-assembled because I wanted to trick it out with some carving. Â My understanding is that traditional chests were plain on the outside (because they get beat up a lot) and the underside of the lid and inside were usually prettied up with marquetry, and fancy veneer and the like. Â Since I can’t do any of that I thought I’d do some carving, like I like to do.
It started as conversation at the tool chest class, about how Peter Follansbee used some of his sample carvings for the runners inside his chest. Â One thing led to another and I decided to carve the underside of the lid, the tray sides, and possible the runners as well. Â You know, just to show off. 🙂
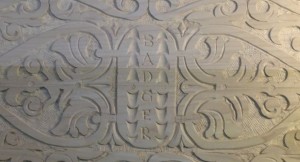
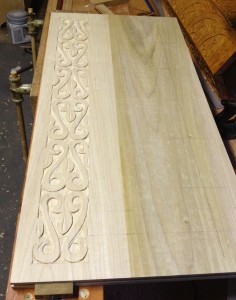
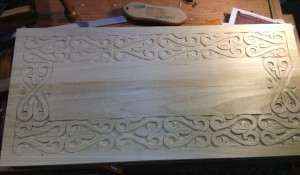
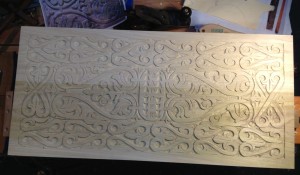
Here are some progress shots of the lid.
I had some thoughts around the design of the outside edge of the frame, but it had taken quite a while to get to this points, so I was thinking of a few different options including calling to good enough.  I’ve been re-reading the Joiner and Cabinet Maker and a quote from Thomas jumped out at me.  So I carved it into the upper and lower rail to remind me to slow down and do it right.
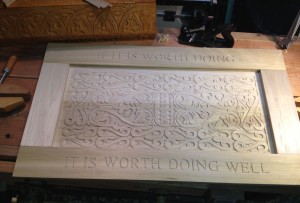
Frame and panel for the lid. The frame is just laid on top of the panel, just to show how it would look.
To get the lettering right, I printed out the words in 2″ on my inkjet and cut them out in rows. Â Taping this to the frame rail with blue painters tape I went over each letter with a pen to impress the outline into the wood underneath. Â Followed by a pencil to outline the edges, which gave me a guide to follow with my V tool. Â I have never done lettering like this before, but I have been carving for a while now so I went with my instinct and put tool to wood. Â It worked out well, and I was actually pleased with how it came out. I found an article later that says I figured it out pretty well.
Next step, fitting the panel into the grooves of the lid (it’s being stubborn about it right now, so I need to trim some edges), and gluing everything together. Â Not sure if I’m going to finish the underside of the lid though, it really wants one but I’ve heard that is a bad idea. Â Maybe just some clear shellac?
5 Comments
Comments are Disabled

Dude!! That is indescribably incredible. What an inspirational thing to look at in the shop everyday when you open up the lid and go to work.
Well done.
Love the lid.
As to the finish, consider shellac and black wax. The wax will highlight the carving.
That looks great! Love the quote as well.
Not sure about how it would work over carving, but I’ve wondered about what effect burnishing with a pollisor might have on the inside of a chest. It gives it a luster while not moisture sealing as tight as a film finish, which should be good for rust, but I have no test of this hypothesis yet. I’d suppose that you could finish some bits and still leave enough raw wood to follow Schwarz’s “rules” :’J especially if he says shellac and wax!
Thanks every one. I’m pretty pleased with this, it’s my first time doing a big design and I wrestled with it quite a bit.
Chris, black wax? Hrm, I’ll have to look into that, sounds interesting. Could change the color of the poplar, which is never a bad thing.
Jeremy, I use a stiff-ish natural bristle brush as part of the carving process to clear chips and stuff, and it does a little bit of burnishing. The poplar is soft in places so I think the Pollisor would probably tear some of the more fragile bits off. On a nicer hardwood like a white oak it would be amazing.
Was just considering what it would look like in oak myself.. Beautiful box and great workmanship, you must be well pleased with the progress so far. Can’t wait to see the finished product.