
Monthly Archives: April 2014
A few updates: Class, Tool Rolls, and Good Press.
Class Notes:
Finished the second day of my two part class on Relief Carving at Rockler this weekend. Â Of the two people I had signed up, I had one no-show (she had to work apparently) so I spent some quality time with the other guy. Â This session we covered carving some S-Scroll pattern on some Alder. Â The wood was much better for the class, and I think I’m going to use it more frequently in teaching and in personal. Â The rack of wood up front had some other woods, but this was best straight grain stuff I could find.
I also have some news! Â I will be teaching two more carving classes at Rockler this year, in addition to the high likelihood of doing some demos as well.

Tudor Rose Panel
Based on the Medieval Rose panels I did for my mothers box, I’m going to do a single day session on how to carve this rose motif. Â I used the words “Tudor Rose” since I figure that they would be more commonly known by that name.
Class Name: Carve a Tudor Rose by Hand
Date: May 15th, 2014 Â 9:30 – 3:30
Price: $85
Learn to carve this stylized rose from history that is often called a “Tudor Rose”. The class will start with the basics and take your through each step to carve your own decorative rose. This project will show you all the elements of relief  carving and makes a great display piece on its own.
I’ll also be doing a class on Basic Letter Carving by Hand in the fall as well, it’s currently scheduled for August. Â Neither one is listed yet, but the Rose class will be up there soon as I’ve sent in the final details
Follow up on the Demo
The demo that I did back a month ago for the Northwest Woodworkers Association published their meeting notes for that meeting, with a really nice write up about the demo I gave. Â I’m not a huge fan of talking about my self, and self promotion but I think this article covers things pretty well.
Tool Rolls
Tool Roll for Sale
My wife finally put together her page on Etsy for selling those Tool Rolls I post about from time to time. Â You can find them for sale here on her page.
Teaching Carving and Demo
This Saturday I taught my first woodworking class.
I’m just going to take a moment to dwell on that last sentence. Â It’s a big one for me. Â A sort of “Level Up” moment in my life. Â I’ve always been a guy who makes stuff, or fixes things, or takes things apart (sorry mom) and sometimes puts them back together. Â But being a “teacher” of woodworking is brain-stretcher for me.
This journey down the woodworking rabbit hole has been pretty interesting, and I look at people like Chris Schwarz and Peter Follansbee as teachers, guides, and generally cool people. Â (and sorry Chris, but I did model my teaching style on yours a little bit, I know that probably gives you a little heartburn but it fits well with my style.)
Saturday I did the first part of the class as it is a two parter, and we covered the basics while carving a single panel.
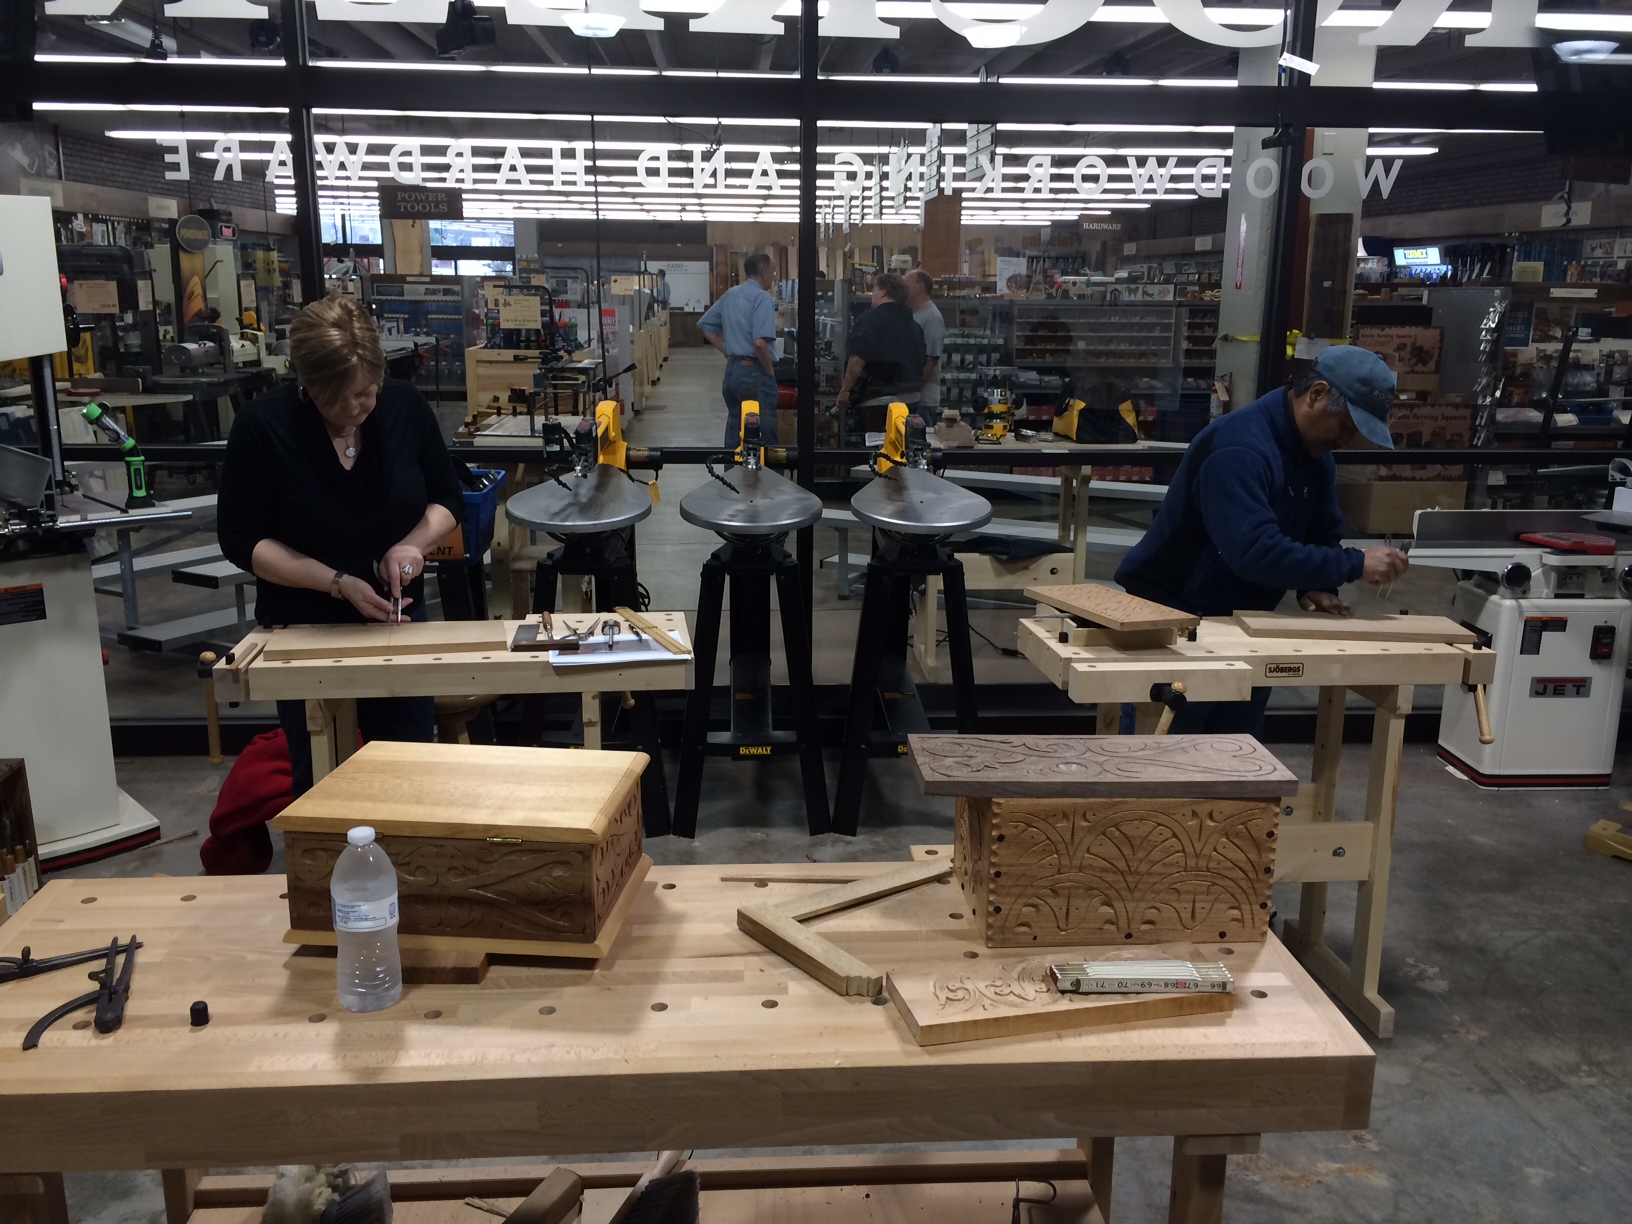
Students at the Flat Relief Carving Class. Rockler, Northgate Seattle WA 4/12/14
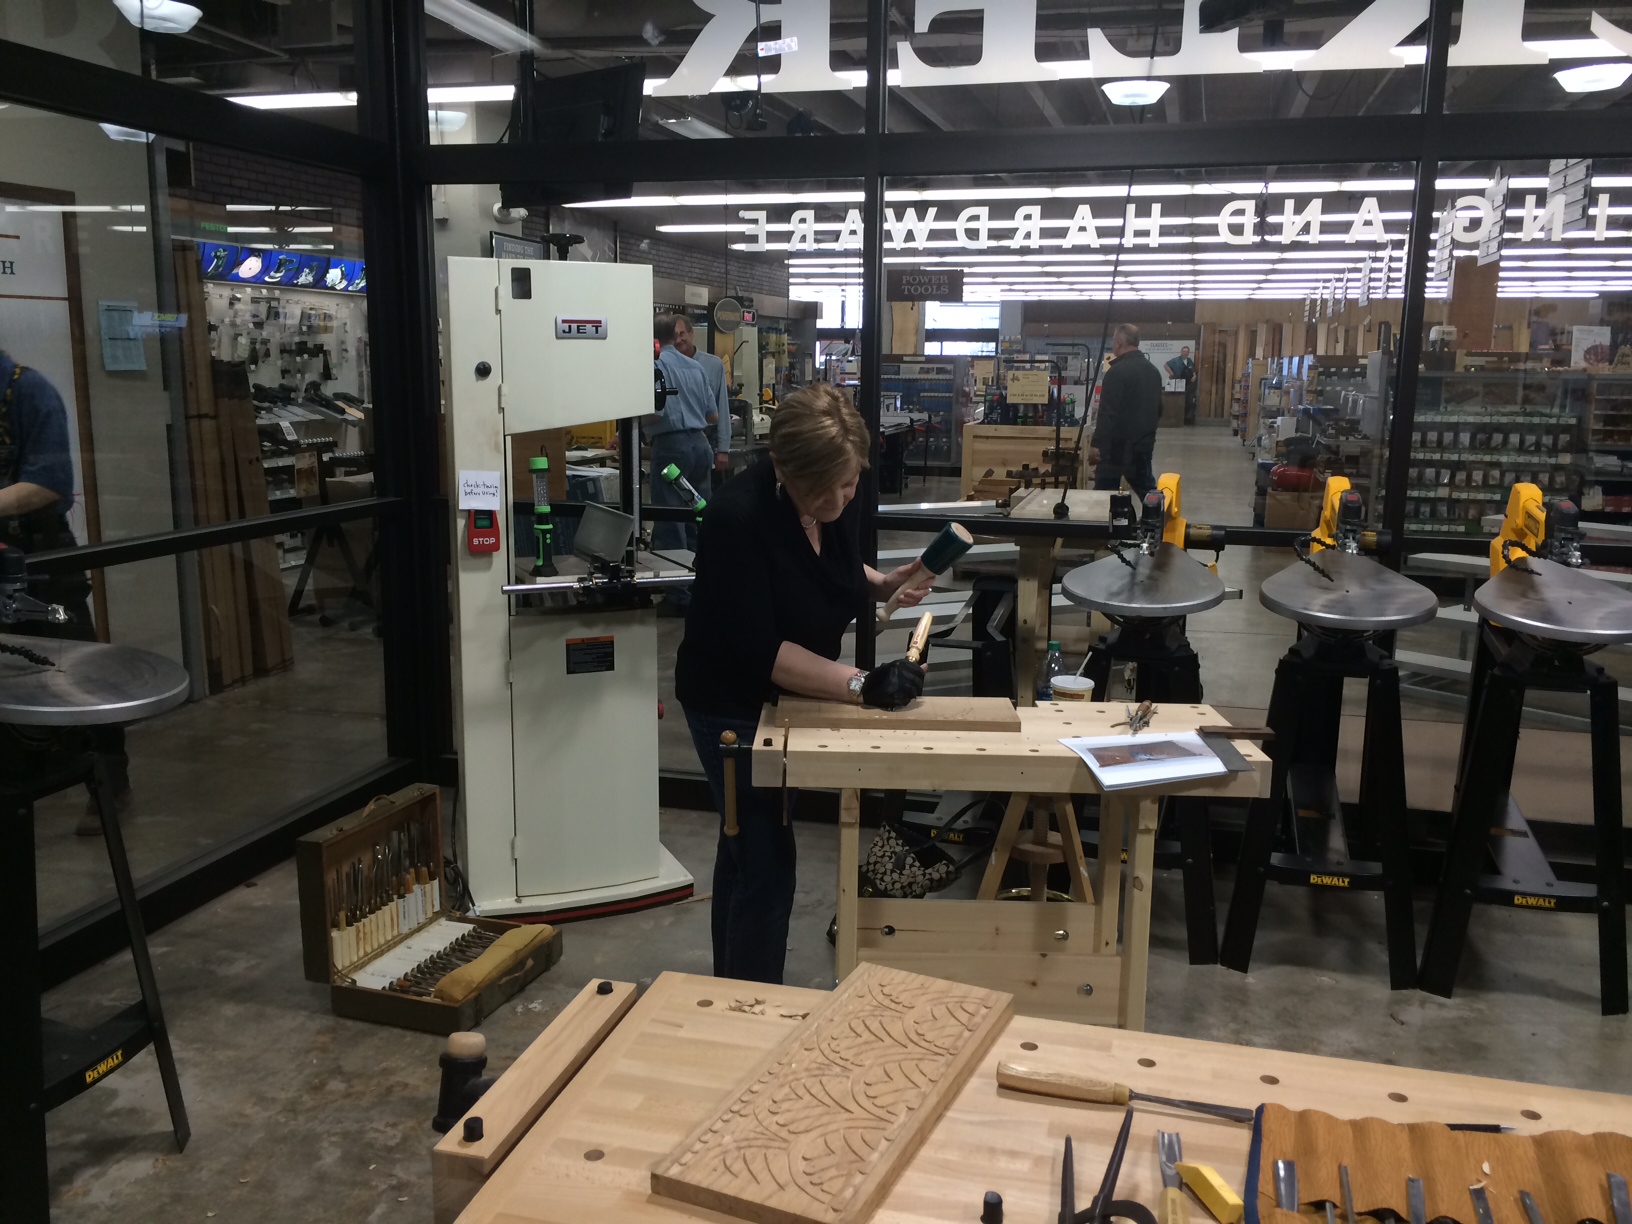
Students at the Flat Relief Carving Class. Rockler, Northgate Seattle WA 4/12/14
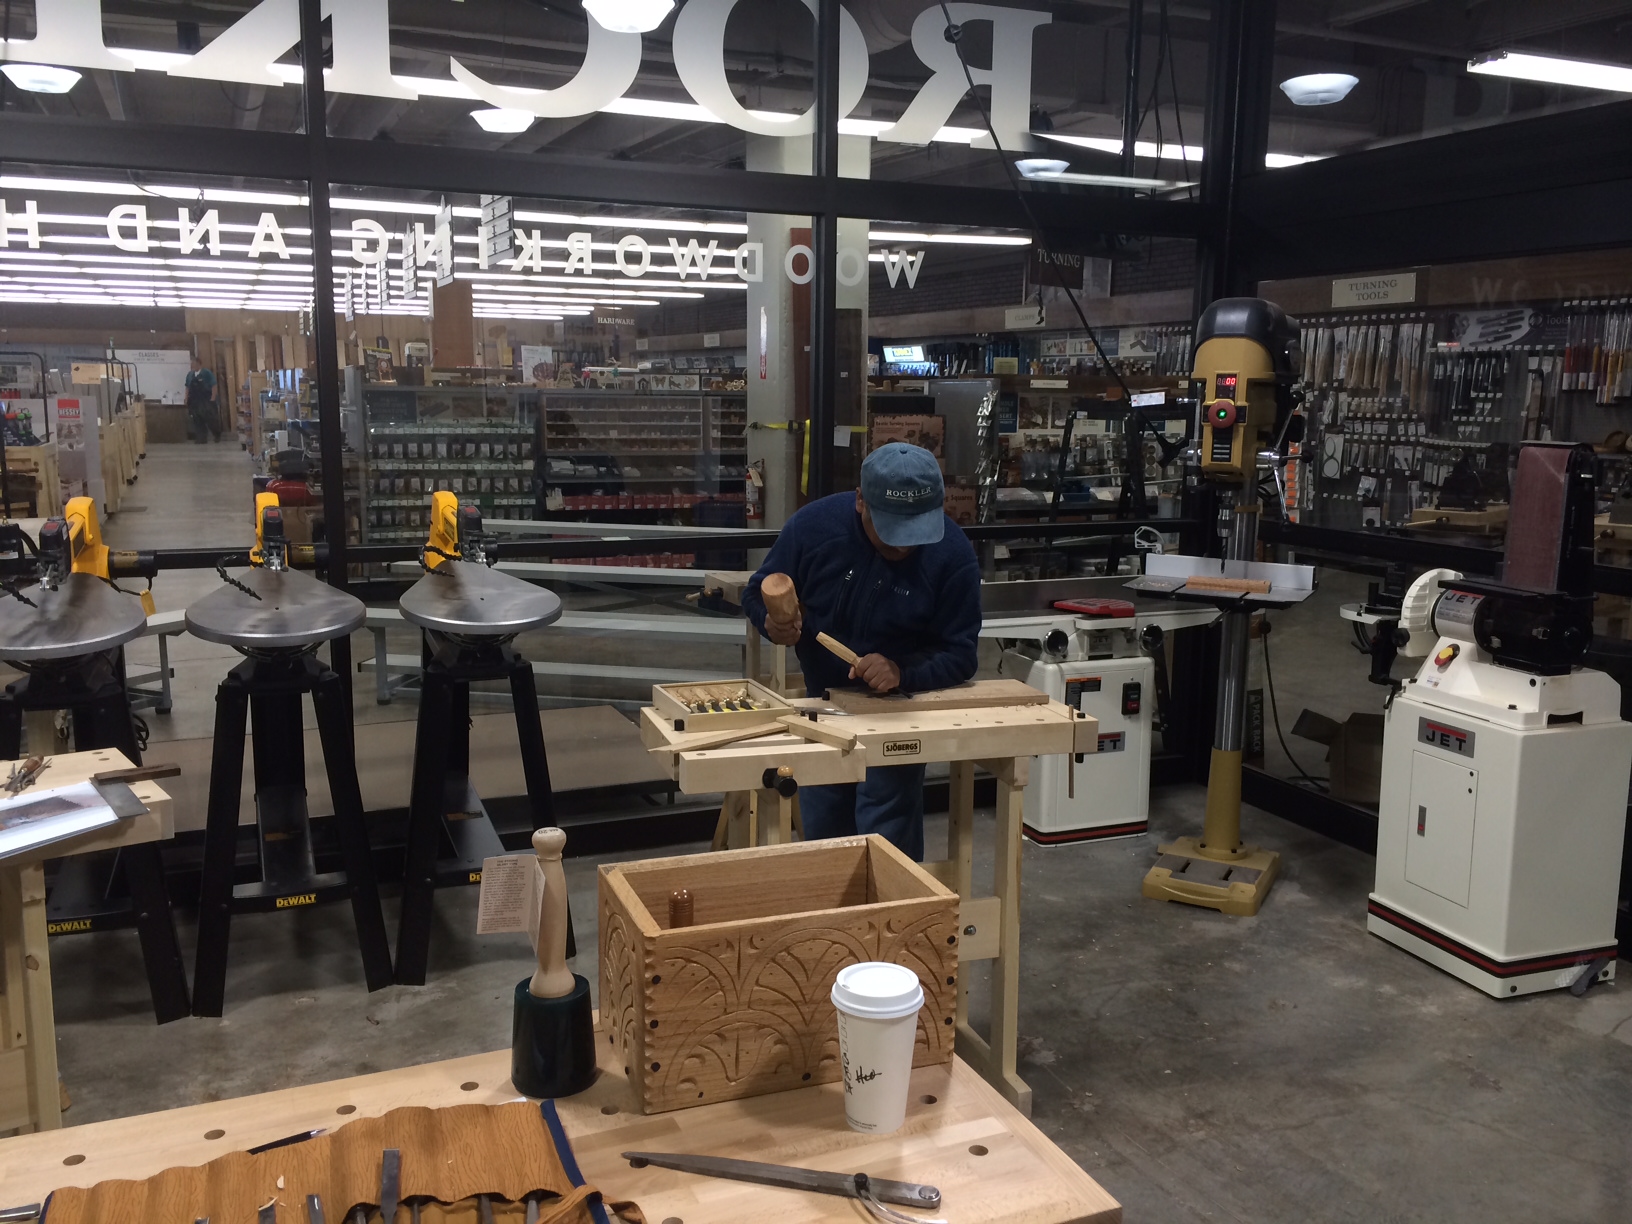
Students at the Flat Relief Carving Class. Rockler, Northgate Seattle WA 4/12/14
First we covered the gouge cut decoration along the top and bottom edge of a piece of oak. Â This showed how to hold the chisel, dividers, carving mallet. Â The repetition allowed them to build some muscle memory and get a feel for the motions and for the materials.
Then we did a simple repeated arc pattern in the center area. Â This showed them layout with dividers, and lots of practice with the V tool. Â As well as some design at the point of the tool for the floral decoration, and some punch work with the accents. Â One student finished, the other got at least the core design down. Â All in all it was successful for me as a teacher in that I got through what I wanted in somewhat the order I wanted to. Â I had gauged the right amount of work and discussion. Â They both felt more comfortable with the tools by the end, and their work was improving each step.
Things that I learned.
- Cover more about sharpening, and bring my sharpening equipment so I can fix a battered chisel.
- Get better wood than the Oak we used. Â It was case hardened, and had some wiggly grain which was a frustration.
- Make sure I have a anti-fatigue mat at my bench to ease my aching knees.
- The class itself was little too advanced for a first time class at this venue. Â I’m thinking of doing a simpler class on letter carving (which I already have one student signed up for if I do it.)
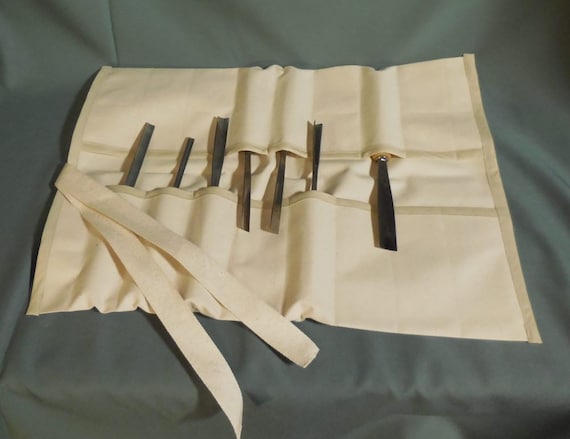
The students were very interesting. Â One lady brought her fathers tools, and a great story about how he used them and passed them to her. Â It was a beautiful set, I mean LOOK at these.

A bit of History
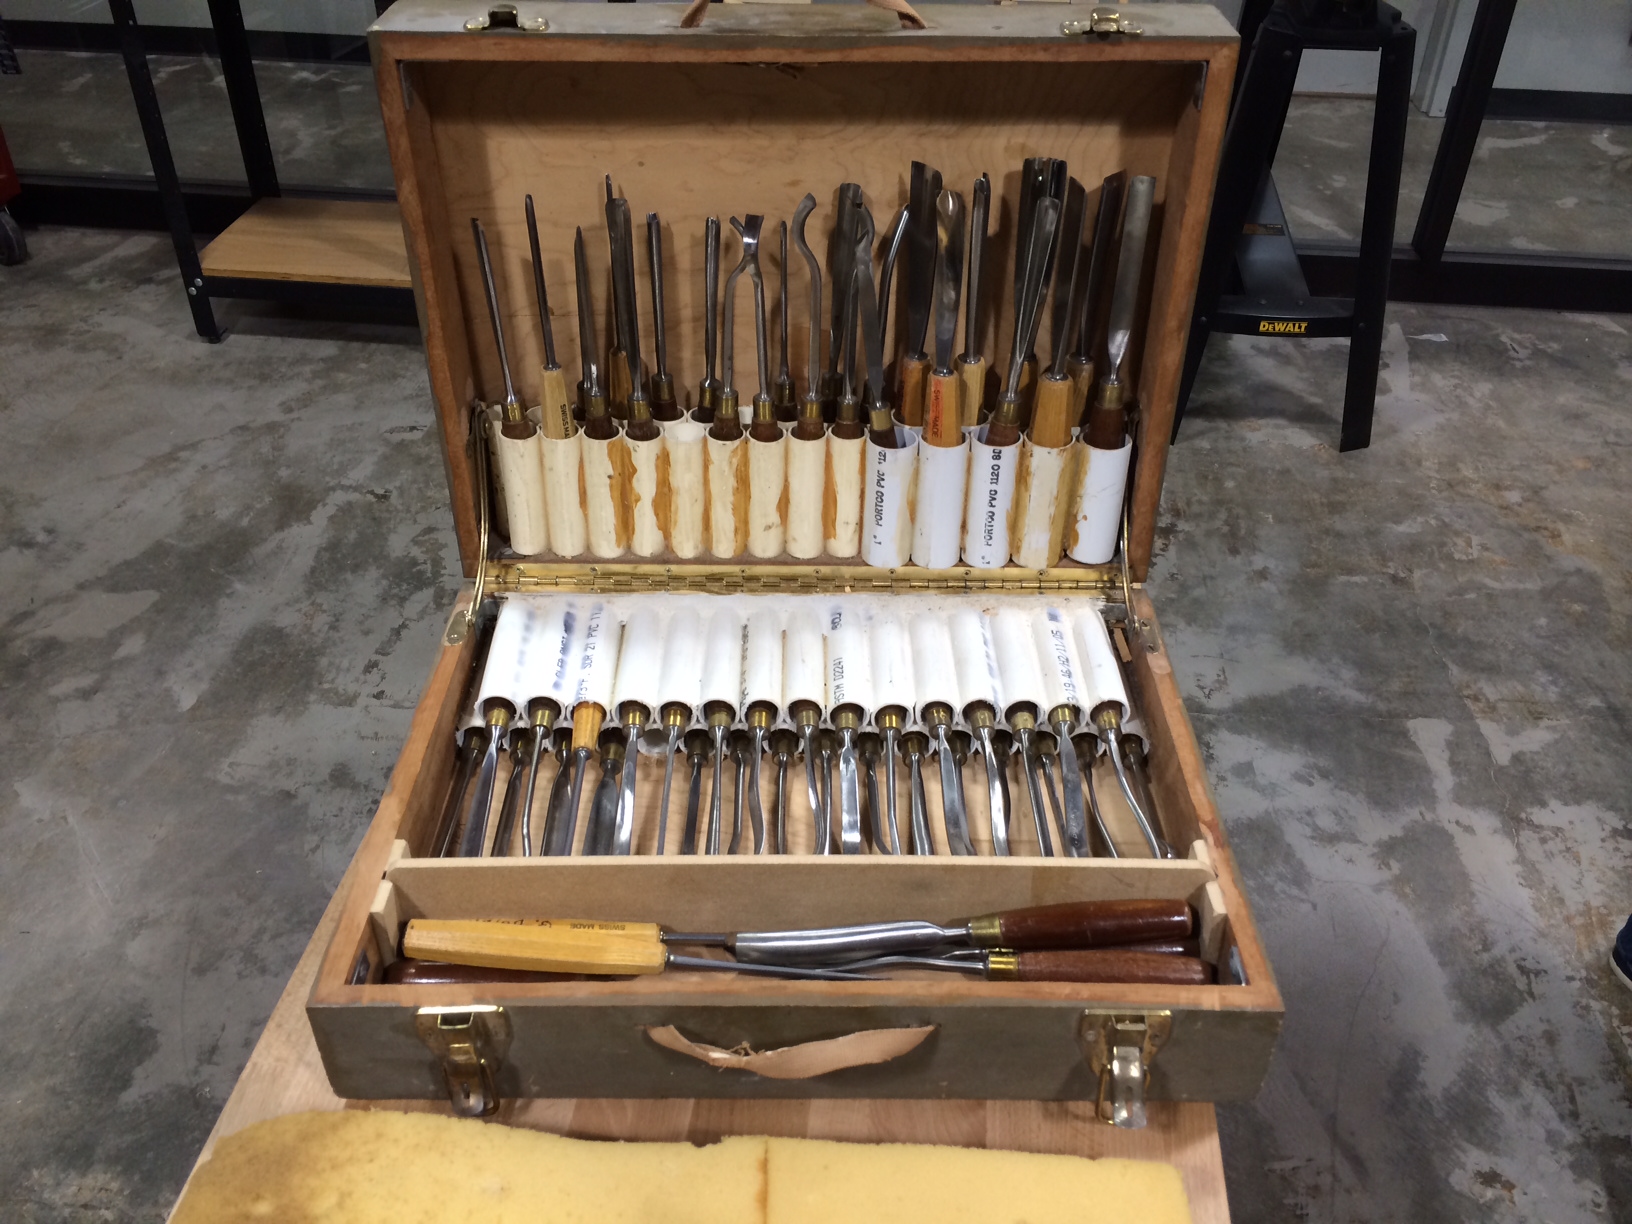
A beautiful set of carving tools with a great bit of history.
It was a great experience, and I’m glad I was able to help her connect with her past a little.
The other student was from Nepal and his home village there had a tradition of woodcarving. Â He wanted to learn some of it and he took my class to see if it was something that he could do. Â Both students seemed to enjoy the class, and I got a good compliment at the end saying I was a great teacher. Â I’m not great at taking praise, but I’m glad it went well for everyone.
In two weeks we’ll pick up where we left off (hopefully with better wood) and tackle some S Scroll carving.
Badger
Shop Sign progress part 2
See previous post here: Part 1
Before I talk about the sign, I want to mention that I think there are still a couple open slots in my wood carving class this Saturday April 12, 2014 at Rockler Woodworking Store in Northgate (Seattle, WA). Â Â It’s a two day class, and I start with the basics and work up to more complex stuff.
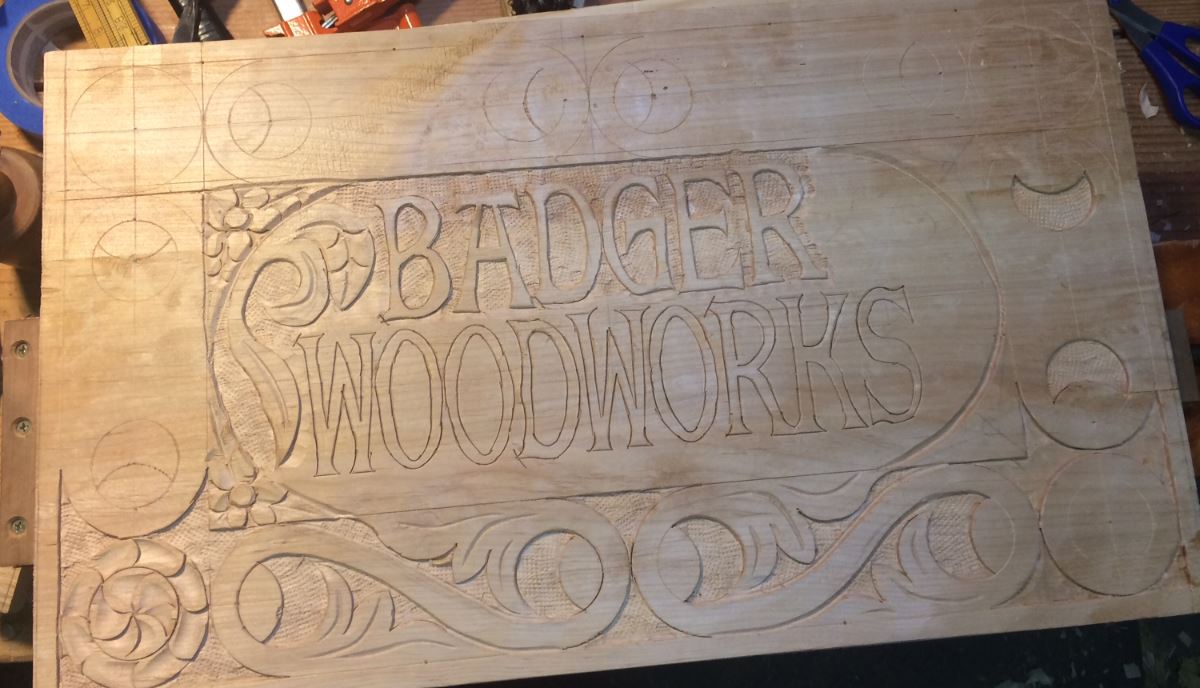
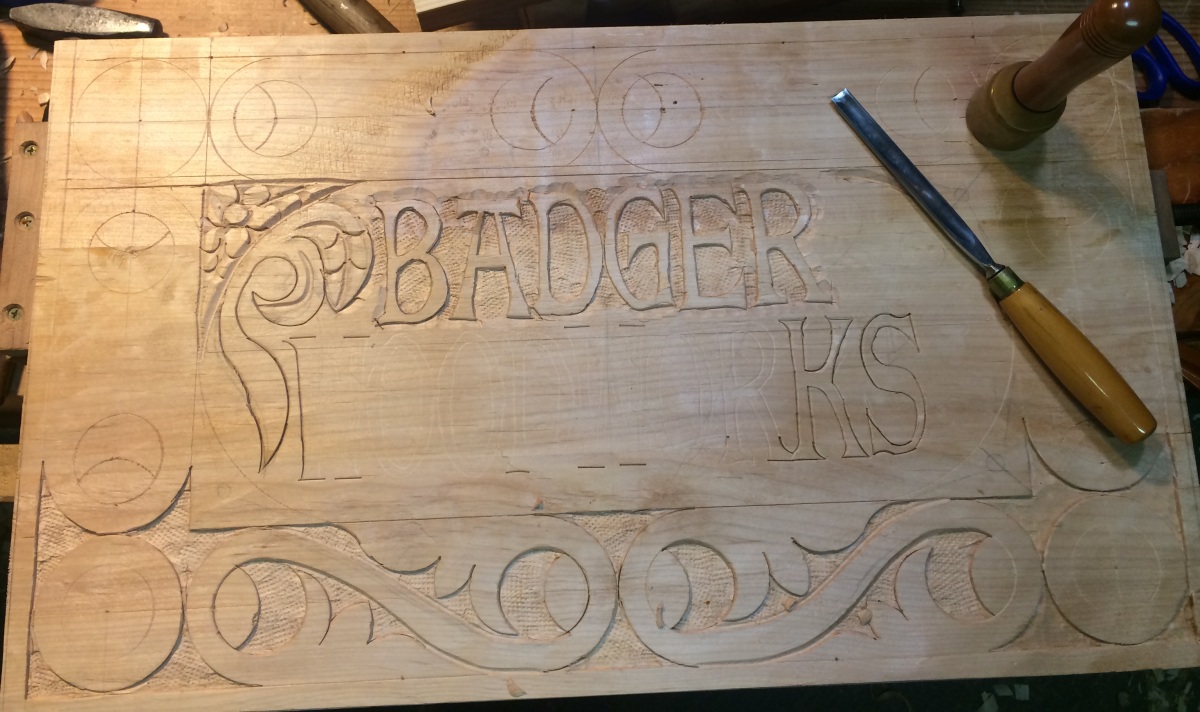
Letters outlined
Tonight I finished outlining the letters, and finished most of the major detail carving for the center area. Â Things I learned… Â Super glue is handy to have on hand, and thin letters in soft-ish wood is not necessarily a good idea. Â And yes those things are related.
The Alder is nice to carve, but it’s a bit soft and the thin legs on the letter had occasional problems when I slipped or pried even slightly off course. Â I had to replace four different chunks, and the S could not totally be repaired. Â Regardless I’m pretty happy with the result, and I’m going to be calling this a “Prototype” anyway.
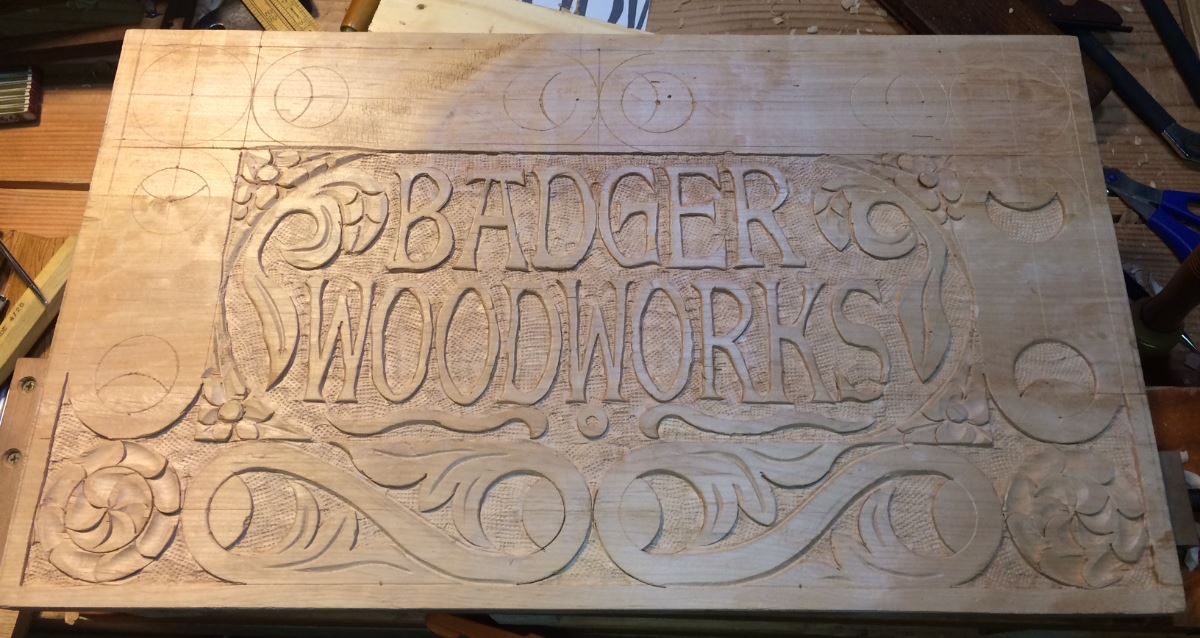
Majority of the letter work done.
I just need to finish up two of the round bits, and four S scrolls around the out side. Â A coat of Shellac should make it pop a bit, but over all it’s been a fun experiment. I definitely need to pay more attention to the general widths of the letter parts.
The outline of the letters was actually easier than I anticipated, and I did the bulk of the work with three chisels.
Flat chisel for straight areas.
Small medium curved gouge for the finials and bases on the letters, and some of the tighter inside curves.
Small flat-ish gouge (probably a #3) for outline the gentler curves.
I ended up using a fair number of other chisels because I had them, but I think I could have done almost everything with those three. Â It’s a case of using what you have to fit the outline you want.
I’m actually considering offering a one day class on letters both V-chisel incised Times New Roman, and a bolder font done like my sign above for bigger stuff. Â After I get through the relief carving class, I’ll see what Rockler wants to do in that area.
Badger
Shop Sign progress part 1
As I was preparing to teach my upcoming carving class, I realized I didn’t have a sign. Â So, I thought I’d warm up my carving muscles for my class and demo, and make a sign for Badger Woodworks at the same time.
I started with some the Alder I’ve posted about before which I’m running a little low on, and glued three sections together to make a larger panel. Â I used Hide Glue and a bunch of clamps, and it worked like a charm. Â The wood has some funky grain in a few spots, but otherwise seems carve-able.
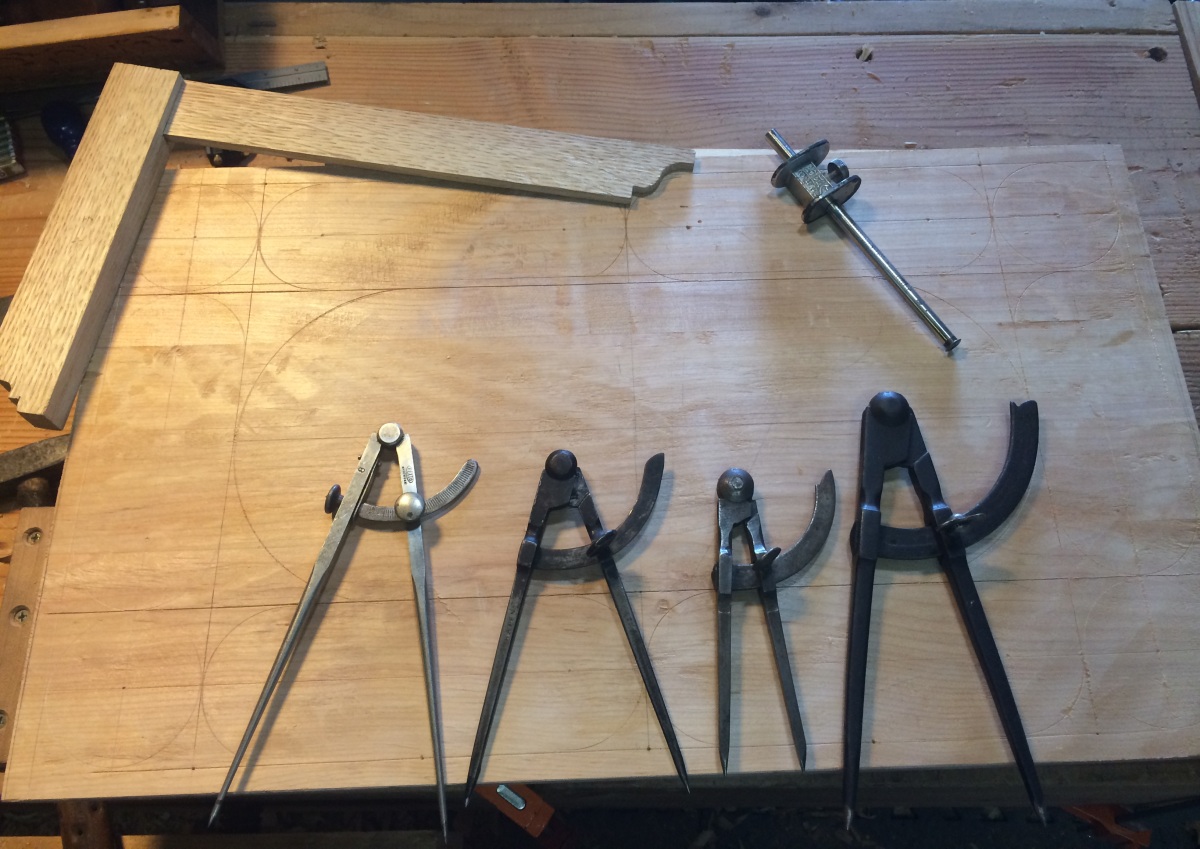
Staring the Layout
For this layout I started with a border around the edge, and set circles in the corners. I played around with proportions until I got something where I could put two S scrolls along the bottom, and a single one up the sides. Â Putting the roundel or circle in the corner made it easier to layout, and gives me lots of options for designs. Â I tried to do some strapwork based on the circles on a previous design and nearly drove myself mad trying to make it work with the proportions so I skipped that this time.
Since I knew I was going to put my shop name in the middle, I sub-divided my remaining space and used the center line to create two half circles at the ends to bound the middle space. I’ve seen a bunch of corner/triangular space filling designs in other chests and I thought this might be a good place to experiment with those.
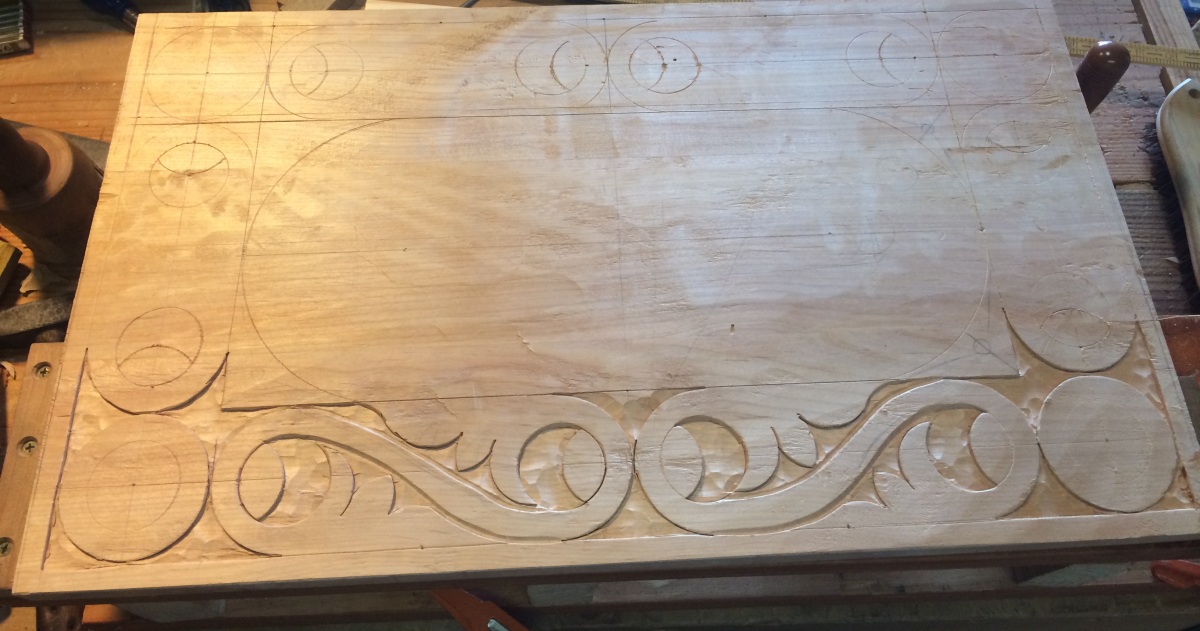
Carving the Scroll work
With the layout basically done, I started setting the scroll work, and relieving the background. Â I knew I had the carving demo coming up so I deliberately didn’t finish the outside edge so I could use it for examples in my demo. Â I experimented with a half button inside the loops, but I’m still not sure the design element works here.
Outline of the text and filling some space
For the text I went to my trusty word processor, picked a good font and started playing with layout. Â Once I felt I had something good, I started printing out samples and laying them on the wood. Â It took four tries to find the right spacing and layout. Â Once I had that I taped it down with blue tape, and went over the outlines with a pen directly on the paper pressing down HARD to make a dent in the wood below. Â This left a nice impression that I was able to follow later to make the letters.
I knew that “Woodworks would be much longer than “Badger” so I had to fill in some space as well. Â I tried free handing the design but I’m not sure it works as well as I was hoping, something I will need to practice some more.
To outline the letters I set in outline with 3 different chisels, a small medium curve gouge, a slight larger gentle curved gouge, and a straight/flat chisel. Â I was able to do almost every single curve with these two gouges. Â I had to be very careful on the thinner legs of the letters and already chipped one out which I had to glue the wood back in. Â Then it’s just a matter of relieving the outside, and texture punching the background.
More to come later as I finish the project.
You must be logged in to post a comment.