Posts Tagged: Dovetail Box
Dovetail Box Progress… and FAIL
So, fresh from the Roy Underhill teachings on dovetails, I wanted to do it myself at home to cement this knowledge into my head. I learn best by doing, and I did a successful dovetail in class, but then went on a week vacation. So today I thought I’d do another corner of the dovetail box I’ve been working on. It’s really just a practice box, since my first attempt was so terrible. I had decided to keep the box going, and cobble the bad section together, maybe with pins or something to remind me where I started.
I also put some time into figuring out a groove in the bottom using my Stanley #45, and a rabbeted bottom with my Fillister plane. Both of which were success, and I put a couple grooves in the bottom edge of two boards. I decided to ignore the “stopped groove” idea, and just have gaps in the corners. The #45 was fairly easy to set up, and I was making groovy grooves pretty quickly, despite all that I’ve read about how difficult it was to set up. I took a nice picture of the tools, and grooves in a still life. You can also see the cherry test board I rabbeted as a test fit into the groove.
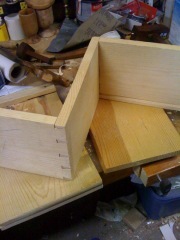
Next I got my hands dirty on some dove tails. I did the “Roy Underhill” way, setting everything from the width of a chisel blade, and working from there. Very little to no measuring, but accurate reproducible measuring. This is “old school” at it’s finest. I marked, I cut, I chopped and produced a very fine dovetail that fit very tight on my first fit with no extra trimming or shimming. I was pretty pleased with my self, until I realized that I had mixed up my face sides! The pins went the wrong way! Disaster…
Oh well, at least my dovetail joint is pretty sweet. I figured out how to save this box, but I’ll have to trim off the pins and the same amount on the other side to make my square box rectangular and slightly smaller. But at least I don’t have to redo the tails part, just cut new pins. This is how we learn right?
Badger


