
Making a new Saw Handle Instructions
 Matthew’s Blog at Workshop Heaven: Saw Handle Instructions.
A great set of details on how to make an fit a saw handle. I just made one for my old beat up Disston backsaw, so I know the steps and this page is one of the best set of instructions on doing the handle.
I really like the method he used for cutting the slot, I did mine free hand and it’s ever so slightly off line.
badger
A couple of keychains
I haven’t done any pen-kit style turning in a while, but I’ve been meaning to make these kits for a while. I got a handful of these on sale a while back and never got around to making them. I decided to make a present for my wife this afternoon, and turned these little guys out of the mystery wood offcuts from my saw handle. There is some really nice curl in the section I cut off, and I wanted to show it off. I finished them with my standard mix of Walnut Oil, and alternating coats of oil and superglue.

A couple of Keyrings
These key rings have a little bit of a secret. They look like standard key fobs, but the top screws off to reveal a small tube inside. Not very useful unless you want to have toothpicks with you always. I’m going to use mine to keep a couple of pills in, for just in case I forget in the morning before heading to work. The older you get, the more pills you have to take it seems. I’ve got one that I need take daily, and sometimes I miss it rushing to the bus. My stomach will not be happy with me if I skip it, so I thought I’ll keep a spare on me for rushed mornings.
Badger
Close up shots of the new Backsaw handle.
So, now that the oil finish had dried, I got a couple good close up shots of the handle from the last post. I realized that none of the shots really showed the wood (blame the lighting in there, terrible for photography).

Finished Handle

Finished Handle other side
Still not sure what the wood is, it was old and dusty from a pile that I salvaged. It has some really nice warm tones that Walnut doesn’t typically have, so it might Koa or some other tropical species. It does have some nice color to it though.
badger
Making a new backsaw handle
When I was working down in the garage last week I noticed that my Disston backsaw handle had cracked even further. I picked it up at a antique store a while back, rusty and beaten down (but not out). I had revived the blade, and it has become a staple in the shop for mid level sawing. Tonight I made a new handle for this saw, my bench top workhorse of a saw. In three hours no less!

Finished handle
Christopher Schwarz might say Medium in the Coarse Medium and Fine scale, at least I think that’s what it implies as I’ve not picked up the book yet. It’s a concept I get though once I thought about, grouping tools into ones that handle the coarse, the medium and the fine.
Anyway, I got a little time tonight to work in the shop and rather than work on the project I had started last week, I decided to pick up a new project. When I get time, I tend to go with the flow, almost Zenlike if you will, although I think Zen might require less swearing and dropped tools. I picked up the backsaw to move it out of my way, and noticed the handle split again.
I picked up a random piece of scrap wood I had salvaged from the 2nd Use store, Walnut I think, and traced my old handle on the board. I sketched the busted off bottom horn by putting on of my Disston handsaws down, and making it fit. Then I tweaked it a little to make the whole think look right.
To make the cut outs and make the inner curves I tried a trick I read on a blog somewhere, and used a number 12 and number 16 auger bit to make the really tight curves of the inner handle and under the horns in the back of the handle. I cranked these up in my brace and bit (is it just a brace?) and did one side till the lead screw poked out the other side, and then flipped it over to get a clean hole with no tear out.

Tracing the handle
Then I cut out whole thing using a coping saw mostly with some straight cuts with my crosscut or dovetail saw. (Coarse and Fine, but really it was whatever worked and was handy.) I tried to stay as close to my pencil lines as I could. The auger holes were a HUGE help and really made this much easier. I highly recommend this approach when making a saw handle like this.

Rough cut out saw handle
Then it was time for lots of file work. This is what took most of the three hours, mostly with a coarse toothed rasp that had a round and a flat side. I kept referring back to the original handle as to where to shape, and lots of test fitting to my hand and adjusting and filing, etc. I broke a pretty fair sweat on this part, but it was fun to have it becomes slowly become more and more comfortable in my hand. I tuned it up with a finer rasp, and finally some 120 grit sand paper to make it smooth. I didn’t go any smoother, because it was getting late, and it felt pretty good in my hand already.

Shaped and sanded
Once it felt right, I was really on a groove and didn’t take any more pictures of the rest of the build. I’ll do my best to describe the next steps. To make the slot for the blade I free-handed the line down the middle carefully. Checking it against the old handle a lit. Then I started the cut with my dovetail saw very slowly. Once I had a good line going, I grabbed the backsaw blade itself, and used it carefully with out the handle to make the rest of the cut. I took my time, one cut at a stroke, and checked my line frequently. It took a while, but this had to be right.
Then I took my smallest chisel, and cut out the notch at the top for the backsaw spine. This I also took very carefully, and carved it as best I could. Turns out I was a little too cautious here, as I had to go back to the notch twice to get the blade to fit with the screws lined up.
Once I had it close, I needed to drill the holes for the screws, and I had to use a powered tool (my beloved cordless drill) since I did not have the right sized auger bits. This is the only non human powered tool used in this whole build. I drilled the holes by clamping the old and new handle together, and drilling through the old holes as a guide. Then I fit the screws to the handle with a variety of twist drill bit sizes. This is where I had to tweak the handle quite a bit, to get this to all line up and fit right. The slot for the spine was too shallow, so it had to be adjusted.
All finished!
Once it all lined up, I screwed it together (it was getting late) and put a coat of walnut oil on the handle as a finish. I didn’t sink the screw heads yet, and I can feel a couple rough spots that will need to be tweaked, but over all it felt really good in my hand, and it was really nice to start something and finish it in the same night.
I feel like I’ve passed some hand tool rite of passage here, and I’ve read a lot of blogs online and sooner or later they all seem to make this step. I was also surprised at how EASY this was. I had been intimidated by the concept, but for some reason tonight it was a simple thing for me. See, rite of passage. It’s a Zen thing I think, once you are at a certain level or something.
Anyway, I need to get to bed, but I’m pretty pleased with tonight.
Badger
The simplicity of a planing stop
Tonight I discovered something, I’m sure the experienced hand tool wood workers out there already knew.
The simple ease of the planing stop.

Planing Stop in Action
A proper height bench, a good piece of wood and a sharp plane really helps, but the simple ease of a planing stop is pretty cool. Before my instincts would have been to clamp the crap out of it, but I tried something new tonight. I clamped a scrap piece of pine to the end of the bench, laid the wood down resting against the stop with no other clamping, and started planing. And it worked, like a dream. I even did the edge planing with nothing additional. Pretty neat.
The board in the background is what the board on the bench used to look like. The ECE Jack plane worked great for taking off that ugly finish, and flattening the edges. I even took an edge down from my first attempt at ripping with no problems (it needed a LOT of work.)
More later on the project I’m prepping the wood for.
Badger
New Workbench part 2
I didn’t get much time to work on it, but I did tack the legs of the new workbench on test out the height, and start working on the top. The legs are nice and solid, and add a nice character to my recycled materials “frankenbench”. When all is said and done it will probably have 3-4 different sources for the wood used in the bench including the bedframe, an old Southern Yellow Pine bunk bed a friend carted up here from the south, and left over build materials from my neighbor.
I wish Yellow Pine was easier to get up here, it’s a great wood and the white pine we get around these parts doesn’t hold a candle to the Southern Yellow Pine that Christopher Schwarz is always advocating for workbench construction. At first I discounted this, I mean, pine is pine right? Then I acquired this bunkbed frame, and realized what it was. I get it now, and that makes me all the more sad. Oh well, we must persevere.
Anyway, here is some shots of the legs being tacked on, and the bench standing up. I used a couple drywall screws to tack to the cross bracing, and it’s remarkably solid for what it is. I also spent a little time planing the top to get it a bit more flat, and discovered some terrible grain direction with awesome tear-out. Sigh. I knew it wasn’t going to be great, but it is annoying.

Tacking the legs on.

Testing for height and planing the top
Steps left to do:
- add stretchers to the leg, and shelf underneath
- carriage bolts for the legs (to make it able to break down)
- reinforce the top with addition thickness (for dog holds and weight)
- attach twin screw vise to the front (using screws from “book press”)
- attach quick release vise to end
- map out dog hole placement (line up with end vise)
- drill dog holes for hold fasts on the top and sides
- put some kind of finish on the top
But, I do like the top height, it’s low (31″) but I’m short, and it feels good with the wood jack plane at least. I might need to add some risers to the legs if it’s too short for metal bodied planes, but I’m going to go with this height to see if I like it or not.
Hopefully some day soon I will be able to MAKE something on my bench. Christmas time is coming, and I need to start planning out the family gifts.
badger
* Man, I need to do something about the lighting down there. Those pictures look TERRIBLE!
September PNTC Tool meeting
This weekend I got a chance to attend my second meeting of the Pacific Northwest Tool Collectors group, this time as a member rather than a visitor. I had a list this time, and I got most of what I was looking for actually, and a couple of interesting pieces.
My main goal was to look for some chisels, specifically gouges and mortise chisels. I got a fairly decent selection shown here.

Gouges and Mortise Chisels
I’m hoping to gather a selection of carving tools to do a variety of tasks, but eventually I’d like to try my hand at stuff like Peter does. that is a ways off, but I thought I’d start gathering a selection to start experimenting with. I paid an average of $12 each for them, which is a lot less than I can find similar tools new. I need to buy a V gouge though, that seems pretty integral, and I didn’t see any at this show. I also picked up a couple more mortise chisels. I now have 3.
A random little find was this collection of gimlet auger bits I found for $5. Screw hole starters essentially, could be useful.

Gimlet Bits for a Brace
My favorite find of the day was this Miller Falls #7 skew and rabbet block plane. This is a copy of the Stanley #140 block plane, down to the removable side. There was a beat up #140 there at another table, but it got so many bids on it during the morning it went to the auction portion. The #140 planes are getting very hard to find, and the collectors are snapping them up. I was happy to find the Miller Falls version, in good shape for $65 (I talked him down from $75) instead. They aren’t as collectible which is fine by me, since I’m interested in “user” tools.

Miller Falls #7 Skew Block Plane
While I was working on the work bench, I had a 2×4 that was a shade too long and the #7 made short work of that. Without even needing to be sharpened! I will spend a little time giving it a cleaning and sharpening later, but I was impressed with its utility right from the start.
The next PNTC Meeting up in Seattle is not till November, but I look forward to it. One of these days I might find my way down to one of the Portland gatherings. I also sort of volunteered to help with web stuff, lets see if they take me up on it.
badger
New Workbench part 1
OK, after much deliberating and wrangling of hands, I’ve decided to start in on building my new work bench. It’s been a pretty rough time trying to get this point, full of second guessing, changing plans, and lots (too much) research. I’m still quite new to the whole hand tool woodworking world, so I’m not as sure as I’d like to be that I’m going to build something that will work for what I want to do. Because I don’t entirely know what I want to do yet.
My design for the workbench as a couple of inspirations:
- Some left over 2×10 boards from my brothers old wheelchair ramp
- A salvaged teak veneer bed frame with 4×4 posts
- Height and clamping for hand tool work
- Chris Schwarz Workbench Book
- Bob Rozaieski’s Workbench build
I’ve opted to build something similar to the “Nicholson” workbench, an old English style bench that uses a torsion box style rather than a super thick benchtop. I’d love one with a 3″ thick solid maple top, but that is beyond my meager means, and time is a factor. I have some material already, so why not build the easier build first, learn the lessons of what I REALLY need on this bench, and build another one later. Plus, as I’ve learned so far, you need a bench to build a bench.
A recent project I completed has come in very handy so far. The sawbench!

Cutting on the Sawbench
Along with a couple wooden clamp, and the Disston crosscut saw I’m working my way through these boards quickly, and accurately. It makes a world of difference in my sawing, a task I used to fear more than anything. Now if I could just do something about the sore shoulder muscles.
For the legs I’m using these bed posts I got from a salvaged bed frame my friends Jason and Julie gave me after it got damaged during moving. It was all nice teak veneer, over mystery wood (likely “Ramin” hardwood). The posts are solid enough though for my purposes, and add a nice decorative element. Too bad I couldn’t work the carved finials into it some how.

Bed Posts for Bench Legs
After a hard days sawing, I had this to show for it. It’s just all balanced on top of the legs, to test the height.

Benchtop prototype
You can see the table-saw and router table I used to use all the time pushed to the back. I’ve been going more and more towards the hand tools of late. Much less noisy, and dusty. The only exceptions are my cordless drill, and the lathe.
All in all a good start.
More to come.
Making a Cheap Draw-bore Pin
Tonight I made a draw-bore pin from the Harbor Freight punch set I picked up a couple weeks ago. I picked up the idea from the Oldwolf blog that I sometimes read. I put a simple handle on it from some scrap Myrtle I had in the scrap bin. Not much to say that won’t be explained by a few pictures. I did put my saw bench to good use though, which you can see in the next picture. It’s becoming quite handy around the shop, especially as I build my workbench (more on that later).
Here is the punch set I picked up. It has at least three that can be used for a variety of sizes for cinching up the mortise, depending on the size of your holes drilled.

The Punch Set
I drilled a hole in the Myrtle wood using my #8 auger bit, clamping the piece in a screw clamp, and using the hold-fast in the saw-bench. Worked quick and easy. I did have to ream out the hole some with a #9 auger bit to get it go in partway.

Drilling the handle
Then I turned the handle on my Lathe (no pictures of that part). The lathe is pretty much the only power tool used in the shop these days, with the possible exception of the cordless drill. I’m enjoying listening to music (Black Sabbath, and Adema for tonight) instead of the table saw, and the lack of dust is a very nice thing.

Finished the Draw-bore Pin
The hole wasn’t exactly straight, so the handle is a little crooked but it’s not a big deal. And if it really bugs me I can always turn another one. The punch is simply pressure fit into the handle, I widened the 1/2″ whole slightly so it slid in most of the way, and then hammered it in the rest of the way.  In use it doesn’t get a lot of pressure, so this will be fine.
It took probably half an hour to make all told.
Now I just need to start chopping some mortises. :) Here I go again building things to make things instead of actually MAKING things. I guess I just have to build up the tools and techniques before I can get started. Something like learning to crawl before I can walk or something. Which my son did really quickly, and didn’t crawl for long at all. Maybe there is hope?
badger
A new Chris Schwarz workbench book…
Just saw a posting about a new book by Chris Schwarz workbenches.
And it’s on sale for pre-order plus free shipping.
Sounds like a must purchase to me. Mr. Schwarz is doing quite a lot to further woodworking as a craft, and research methods into the practical history. He’s starting to work his way into my list of favorite woodworking gurus who are advancing the craft. I just ordered my copy.
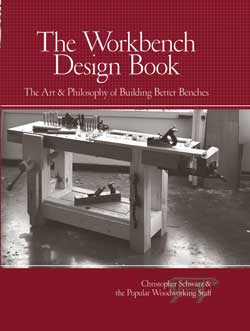
The Workbench Design Book - Chris Schwarz
I am hoping that this book might help me in my “workbench paralysis” that I’m in right now. There are lots of options, and many ways to go, but I am stuck trying to figure out whether to build or to buy. I don’t have a lot of time in the shop, but when I do I would like to be able to work on a thing rather than the stuff to make the thing. I’m spending my spare moments building stuff to make stuff, and while very fun and rewarding, is not making things. But then, a new work bench is VERY expensive and if I only spend a little time in the shop, is it worth it to spend that kind of money?
And around and around I go.
** Edited to fix mistake in spelling of Schwarz **
You must be logged in to post a comment.