Posts in Category: Uncategorized
The future and the past.
I find myself conflicted at times. Â I love history, and old things. Â I met my wife at a history re-enactor event, we collect old things, we study history and create things using old methods or designs (she loves all things fabric). Â However, I also look to the future, I love robots and technology, I have a 3D printer (two actually) and love science and science fiction.
What does this have to do with woodworking?
I have found an intersection between those halves of me. Â Or rather I have CREATED one. Â I’ve been exploring 3D printing applications for historical woodworking.
Three things so far that I’ve made, and share for everyone to try out (if you have a 3D printer).

3D Printed Dovetail marking Templates

3D Printed Bench Dog

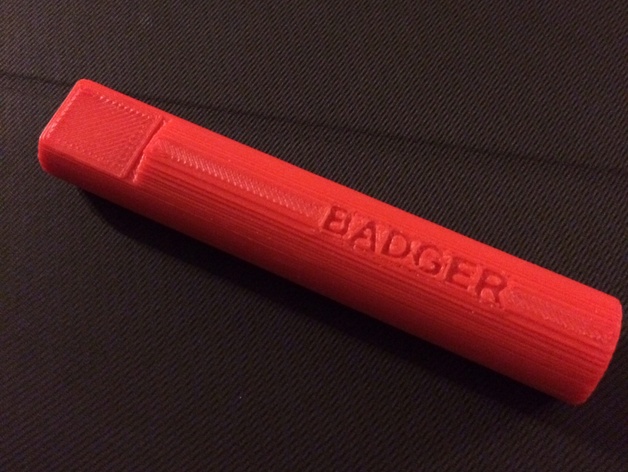
3D printed Marking Gauge
I’m kicking around a few other ideas as well, I think it would be possible to create things like planes and the like, but I am conflicted because they would be plastic which is just not as nice as wood. Â However, you could create custom profiles if you got the base design figured out. Â I’ve seen other creators doing other things, templates and the like. Â Pocket hole jigs (if you’re into that sort of thing) have been made. Â Dust collector adaptors, center finders, and even a sliding bevel.
I think that this could be a bridge between the old and the new, and help aspiring woodworkers dip their toes in for lower cost. Â Sure it’s plastic, and will probably not last as long but it’s a way to get in and get started, easing a ramp into a wonderful and fulfilling hobby.
Badger
A few updates: Class, Tool Rolls, and Good Press.
Class Notes:
Finished the second day of my two part class on Relief Carving at Rockler this weekend. Â Of the two people I had signed up, I had one no-show (she had to work apparently) so I spent some quality time with the other guy. Â This session we covered carving some S-Scroll pattern on some Alder. Â The wood was much better for the class, and I think I’m going to use it more frequently in teaching and in personal. Â The rack of wood up front had some other woods, but this was best straight grain stuff I could find.
I also have some news! Â I will be teaching two more carving classes at Rockler this year, in addition to the high likelihood of doing some demos as well.
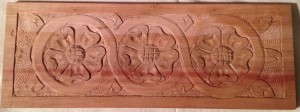
Based on the Medieval Rose panels I did for my mothers box, I’m going to do a single day session on how to carve this rose motif. Â I used the words “Tudor Rose” since I figure that they would be more commonly known by that name.
Class Name: Carve a Tudor Rose by Hand
Date: May 15th, 2014 Â 9:30 – 3:30
Price: $85
Learn to carve this stylized rose from history that is often called a “Tudor Rose”. The class will start with the basics and take your through each step to carve your own decorative rose. This project will show you all the elements of relief  carving and makes a great display piece on its own.
I’ll also be doing a class on Basic Letter Carving by Hand in the fall as well, it’s currently scheduled for August. Â Neither one is listed yet, but the Rose class will be up there soon as I’ve sent in the final details
Follow up on the Demo
The demo that I did back a month ago for the Northwest Woodworkers Association published their meeting notes for that meeting, with a really nice write up about the demo I gave. Â I’m not a huge fan of talking about my self, and self promotion but I think this article covers things pretty well.
Tool Rolls
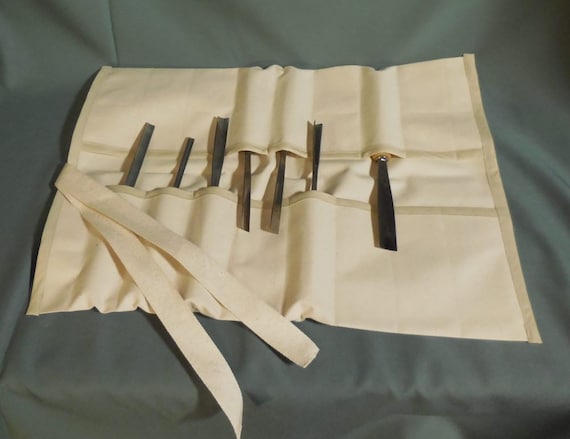
My wife finally put together her page on Etsy for selling those Tool Rolls I post about from time to time. Â You can find them for sale here on her page.
A Holiday Project starting
My son loves trains. LOVES trains. Like a lot. He also specifically loves Thomas the Tank Engine, and we’ve spoiled the crap out of him with lots of trains from the Thomas series. His birthday was last weekend, and he got a metric ton of new trains. Which reminded me that I needed to make him a rack for displaying some of his trains (so we can clear some off of the floor or something.)
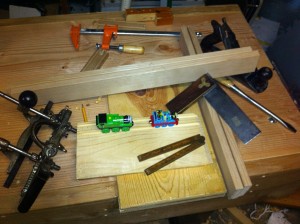
I got a start on it tonight, because Christmas is fast approaching. I’m going to use my Stanley #45 to cut the grooves to keep the trains from falling out, after trying to make a scratch stock that didn’t turn out so well (you can see it in the top of the picture below) but I didn’t expect a lot of it. I knew the #45 would work just fine. So far I’ve cut the sides and top/bottom of the rack, and I’m going to dovetail the case together and then measure out the shelves after I get that done.
Lets just hope I can finish by the 25th. 🙂


You must be logged in to post a comment.