Posts in Category: learning
Teaching Carving and Demo
This Saturday I taught my first woodworking class.
I’m just going to take a moment to dwell on that last sentence. Â It’s a big one for me. Â A sort of “Level Up” moment in my life. Â I’ve always been a guy who makes stuff, or fixes things, or takes things apart (sorry mom) and sometimes puts them back together. Â But being a “teacher” of woodworking is brain-stretcher for me.
This journey down the woodworking rabbit hole has been pretty interesting, and I look at people like Chris Schwarz and Peter Follansbee as teachers, guides, and generally cool people. Â (and sorry Chris, but I did model my teaching style on yours a little bit, I know that probably gives you a little heartburn but it fits well with my style.)
Saturday I did the first part of the class as it is a two parter, and we covered the basics while carving a single panel.
First we covered the gouge cut decoration along the top and bottom edge of a piece of oak. Â This showed how to hold the chisel, dividers, carving mallet. Â The repetition allowed them to build some muscle memory and get a feel for the motions and for the materials.
Then we did a simple repeated arc pattern in the center area. Â This showed them layout with dividers, and lots of practice with the V tool. Â As well as some design at the point of the tool for the floral decoration, and some punch work with the accents. Â One student finished, the other got at least the core design down. Â All in all it was successful for me as a teacher in that I got through what I wanted in somewhat the order I wanted to. Â I had gauged the right amount of work and discussion. Â They both felt more comfortable with the tools by the end, and their work was improving each step.
Things that I learned.
- Cover more about sharpening, and bring my sharpening equipment so I can fix a battered chisel.
- Get better wood than the Oak we used. Â It was case hardened, and had some wiggly grain which was a frustration.
- Make sure I have a anti-fatigue mat at my bench to ease my aching knees.
- The class itself was little too advanced for a first time class at this venue. Â I’m thinking of doing a simpler class on letter carving (which I already have one student signed up for if I do it.)
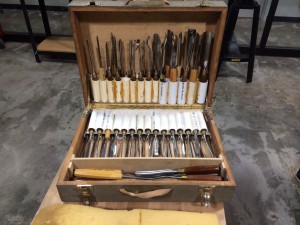
The students were very interesting. Â One lady brought her fathers tools, and a great story about how he used them and passed them to her. Â It was a beautiful set, I mean LOOK at these.
It was a great experience, and I’m glad I was able to help her connect with her past a little.
The other student was from Nepal and his home village there had a tradition of woodcarving. Â He wanted to learn some of it and he took my class to see if it was something that he could do. Â Both students seemed to enjoy the class, and I got a good compliment at the end saying I was a great teacher. Â I’m not great at taking praise, but I’m glad it went well for everyone.
In two weeks we’ll pick up where we left off (hopefully with better wood) and tackle some S Scroll carving.
Badger
Wood carving Demo at Rockler
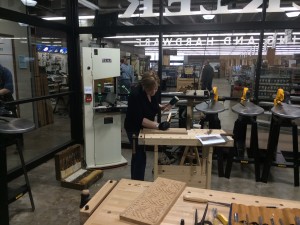
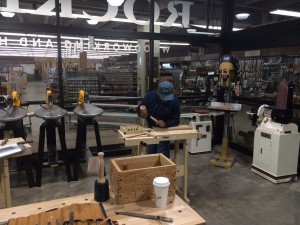
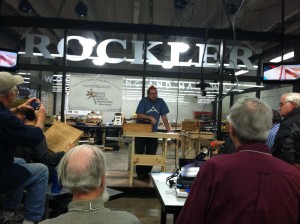
Well, I think I just passed some kind of milestone. Â I did my first woodworking demo tonight. Â The Northwest Woodworkers Association asked me to do a demo of my carving at their monthly meeting held at Rockler. Â I think it went all right, they seemed to like it and I got some good compliments from the guys afterwards. Â It was my very first demo, and I’m not what you’d call good at public speaking. Â I was super nervous, but it went all right.
I’m teaching a class on Flat Relief Carving in April at this store, if any one is interested and I think there are at least a couple spots still open. Â It’s a two day class, $100 for the whole thing and they are going to have tools available I think. This was a good warm up for the class that’s for sure.
http://www.rockler.com/retail/stores/wa/seattle-store/classes-store02
badger
Building a Tool Chest with Chris Schwarz
Last week I had the distinct pleasure of meeting Chris Schwarz and taking five days of his time to work with him and others to build a Tool Chest out of his “Anarchist’s Tool Chest” book.
In short: I had a blast, met some great people, and made most of a tool chest.
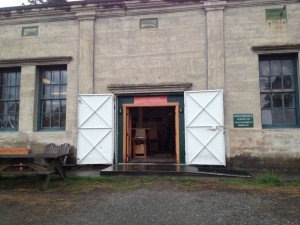
The class was held out in the awesome Port Townsend School of Woodworking where I’ve taken a few classes before. Â It’s always a wonderful trip out there, and the setting is amazing. Â Nestled in the back of the Fort Worden State Park, the shop where instruction is held is nice and open and well stocked with benches and tools if you don’t have your own.
This class had ten people who in the end were described as “off the hook wackos” and I agree. Â If by wackos you mean great guys, with quirky senses of humor who are willing to work hard and help each other, then yes. Â We’re wackos, and proud. 🙂
Chris was just the guy you read on online, smart, educated and willing to share what he’s learned. He’s also humble, and opinionated at the same time but willing to present his ideas in a way that allows for self exploration rather than dogmatic repetition of steps. Â He’s willing to teach, but willing to learn as well, which I find to be a admirable trait in a person. Â A lot of people on the internet love to hate him for having contrary opinions, but I think they’re misguided and close minded (On the internet? What? No way?!).
I had a lot of the skills I needed already to build this chest, but in this class I learned how to use those skills better and picked up some new tricks for things like dovetails, mortising, sawing and more. Â I made some great friends there, and got to know some I’ve met before (Rob, I’m looking at you) much better. Â All in all I had a great time, and was sad to leave the class.
Here are some pictures and posts that other people took:
Chris Schwarz @ Lost Art Press -Â http://blog.lostartpress.com/2013/09/08/photos-from-the-tool-chest-class-in-port-townsend/
Joiners Apprentice aka Rob -Â http://www.thejoinersapprentice.com/2013/09/anarchy-in-pt.html
Tim Lawson -Â http://timlawson.smugmug.com/PTSWPT/2013-Images/Build-a-Toolchest-Sep-2013/i-xTq8dmW
And here are some that I took:
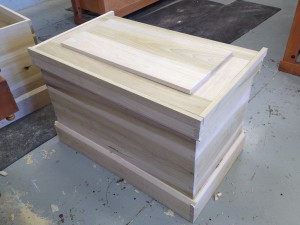
Here is what I managed to accomplish in five days of work with lots of help from Chris, Rob and the class. It’s really solid, and I’m pretty proud of it.

A picture of part of my drive. I commuted to the school from Seattle every day, which took about 2 hours each way and a ferry ride. I was called crazy, and insane for doing this, but it really wasn’t that bad.Â
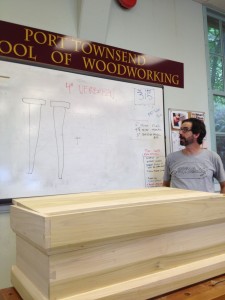
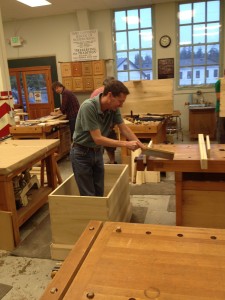
The class was a good mix of doing (lots of doing) and learning from Chris. It was very hands on and I learned a lot this way.
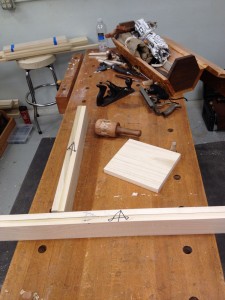
One of the single most important things I learned from this class was the “french” cabinet makers mark. Once I wrapped my head around it, I found it to be very useful.
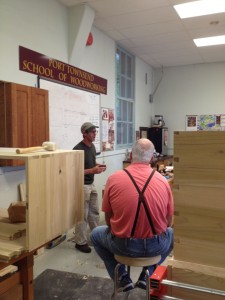
Jim Tolpin dropped by at lunch one day to give a bonus lecture on the “By Hand and By Eye” subject matter. I’ve decided that Jim Tolpin is kind of like Obi Wan Kenobi (from A New Hope naturally).
Review: Traditional Tool Chest in Two Days DVD
I recently picked this DVD up from Chris’s blog when he was blowing out his copies for blog readers, and wanted to throw up a quick review. Â By the way, if you’re wondering where I’ve been on the blog, it’s been a combination of really heavy work schedule and family summer vacations that have kept me out of the shop recently.
Short version: Well worth the pick up even if you’re not interested in power tool woodworking, and is a great starting point for hybrid woodworkers to dip their tow into the hand tool waters.
Longer version:
This 2.5 hour video starts out with a simple premise, to teach you how to build a traditional style tool chest in a short amount of time using a blend of hand tools and power tools with home center materials. Â And, in my opinion it does exactly what it says on the box. Â However, it also does something a bit more more than that. Â As a hand tool woodworker, I’m all about the traditional methods and sources. Â The value for me in this video is in the information he presents in addition to the construction details. Â He shows several old tool chests, and how they were constructed which was quite fascinating on it’s own. Â He also spends time talking about the choices he makes in construction which gives me great ideas on how I want to build my own. Â And at the end he shows off the “Dutch” tool chest, and talks about the benefits of both the traditional and “Dutch” style chests, including how to pack your tools and division of the insides. Â These bits alone are worth the price of the DVD for me with the information being presented well and easy to absorb.
The construction of the chest itself is well produced, and Chris and helper Ty do a good job of presenting the material. Â If you’re new to this stuff, it makes you want to build stuff and feel like you could actually do it. Â The really subversive part of the DVD comes in how he introduces some hand tools to the mix and starts you thinking down the path of how hand tools can be integrated into your shop.
All in all, worth price and worth picking up for the information and discussion on tool chest design.
Badger

DVD for review
Attention NW Woodworkers!
I read on Peter Follansbee’s blog that the attendance for his two classes at Port Townsend might get cancelled because not enough people are signed up!?!
“still hoping for students out west at the Port Townsend School of Woodworking. Right now, it sounds like we need 6 more students for each workshop. Otherwise, these 2 classes will get cancelled. One is a week-long “make a joint stool†class… the other a 2-day class in carving. It would be a shame it we have to scrap it, the school and I have dedicated the time slot and can’t really make it up if it falls through. I know time/money/logistics are all a concern for all of us. But I often get requests “When are you coming to X,Y, Z?†– I only get to come if we get students. I won’t harp about it again, just one last nudge if you know someone out that way, or wanting to visit out that way…dates are April 22-26 for the joinery class, and the 27th & 28th for the carving http://www.ptwoodschool.com/ “
Hey MWA folks and any other PNW woodworkers, you should think about these classes! Peter Follansbee is one of the most knowledgeable guys out there for 17th century carving. If you have any interest at all, it would be well worth the time and money to attend, as I doubt he’s going to make his way out here again.
I’ve already signed up ages ago, and will be majorly disappointed if this gets cancelled. Please spread the word! Tell your friends! I’ve been hoping to get a chance to meet Peter and learn from him since I started reading his blog. It started me down the path of carving, and is a major reason why I’ve been able to figure out the stuff I’ve done lately.
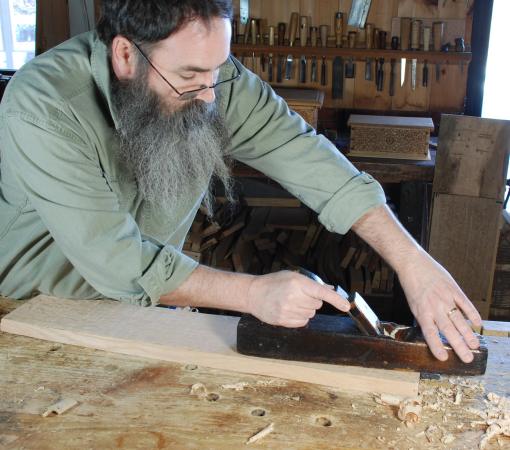
Peter Follansbee
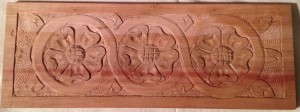
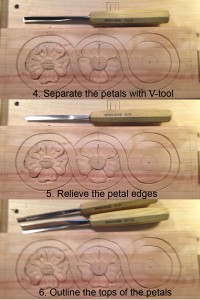
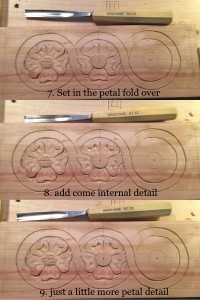
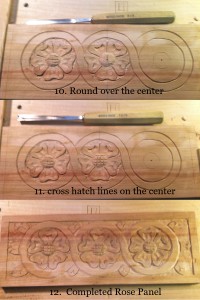
Carving some Heraldic Roses for a box
It’s been a bit since I’ve updated the blog due to a variety of reasons including a minor surgery that had a rough recovery. Â I have been working the wood in the shop, just not posting here. Â I have at least two other major posts I will be adding as I catch including one on my sons 6 board chest build, some finished carved boxes, and a couple shop made tools.
But for now, I want to share this bit of carving I did on Saturday which I think came out really nicely.
This is going to be the front panel of a traditional style nailed box, sometimes erroneously called a “bible box” that I’m making as a gift for someone.  The roses are modeled after heraldic roses from the Tudor period, and were new to me in terms of carving.  I studied a lot of period examples to get a sense of the form, and watched one of the recent videos from Chris Pye’s woodcarving workshop series in which he does a double-rose in a Gothic mirror.  (If you’re interested in learning carving, this is a very nice investment in your craft, Chris does a fantastic job of explaining and showing how to carve.)
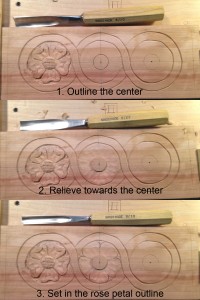
I also took some step by step shots of the progression as a demonstration of how easy it really was to do. Â As I worked on the first one I worked out the steps I needed and then captured a shot of the tool used to do each of the dozen or so steps to complete a single rose. Â Then I put them together “Kari Hultman Style“.
Some of the shots were blurry, sorry about that I was grabbing these quickly with my iPhone and getting back to work. Â If you have any questions about which tool or want to know more about a step I took let me know. I hope it’s somewhat self evident what each step is.
badger
Tools at the Royal BC Museum
This weekend the family indulged in a quick get-a-way to Victoria, BC for a quick vacation.  It’s only a few hours ride on the Victoria Clipper, and was nice and relaxing for us to get away from work and the messy house.  While we were traipsing around the Royal British Columbia Museum I ran across a few woodworking related displays and interesting tools I thought I would share.  Overall the Museum is a fun trip, especially with kids, as the displays are really well done and not at all boring.
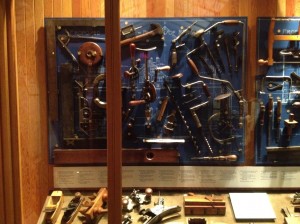
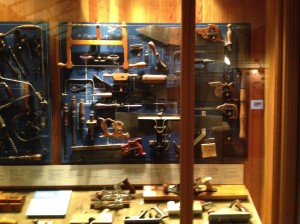
In one of the “through the periods of history” sections they have this great display of hand tools on the wall that any woodworker would love to have.
Some were more modern, but some were nice looking vintage pieces that would great additions to the toolbox.
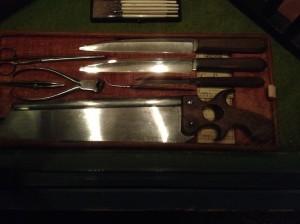
Further down the display they had an interesting saw in a kit for a surgeon. I snapped a picture because it looked like it would make a great handle design for a dovetail saw.
The over in the native peoples exhibit they had a nice display on how they made the bentwood and carved boxes out of Cedar.
We had a great time, and my son loved the undersea area which is done in a very steampunk, 20,000 leagues under the sea theme that is superb, and the giant Mammoth display. Â He ended up with a stuffed Mammoth to take home which he was quite happy with.
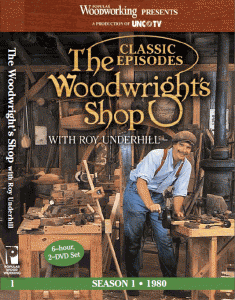
Quick Review: Woodwright’s Shop DVD 1,2
When I first heard the news that Popular Woodworking Magazine was going to be re-releasing the Woodwright’s Shop on DVD Â I had a number of reactions.
First and foremost my reaction was ABOUT DAMN TIME! I’ve been trying to record as many of them on my DVR as I could, but it’s a pain to save them to DVD-r and we had a equipment failure that wiped about 10 episodes. Â I’ve been watching Roy since I was young, and since I’ve gotten into the “hand tool” world, he’s become even more important. Â So the fact that these episodes were not available on DVD was a true crime.
My second thought was, oh man, there goes my bank account. Â No matter what the cost was, there are over 30 seasons of this show, and it was going to add up. Â This thought was quickly shut down by my wife, as she was having none of that argument. Â She accepted right away that we were buying ALL of them, no matter what. Â I love that woman.
My third thought was best described by quoting a comment on the thread for the original announcement by Megan Fitzpatrick.  “Shut up and take my money!”
Since then, I’ve managed to get three of the videos, and next paycheck will be season three. Â I’ve picked up seasons 20, 1, and 2 so far in that order. Â Here are my thoughts on the first two seasons.
Season 1
After having watched a lot of the most recent season, this first season was almost painful to watch. Â Roy is clearly new to doing this and has not found his groove yet. Â He’s a little stiff and appears almost nervous to start out, but his passion for the subject shines through like a beacon. Â You can see some of the standard Roy mannerisms in their infancy, and you get to see him developing the patter that he will use for years. Â Still it’s a little hard to watch him nervously careen around the shop as he presents the material.
Production quality of the disc is fine, although the source material’s age shows through at times with a few glitches here and there. Â The source material is in pretty good shape though for how old it is, and I am very thankful that it was preserved for us to watch these decades later. Â It’s almost comical to watch the “high tech” computer graphics used in the intro for PBS, and the university.
My favorite episode of this season is “Panel Frame and Dovetail” episode, followed by the “Timber Frame Construction” episode. Â Watching these episodes have me thinking about finding a blacksmith to make me a froe, and building myself a shaving horse.
Season 2
It’s amazing to watch the confidence building and his ease in front of the camera growing in each episode.  The skinny nervous woodworking zealot slowly transforms into a smooth talking trickster and educator, albeit a clumsy one.  His increasing confidence and experience in pacing himself over the material grew by leaps and bounds in one year.  You can more clearly see the Roy Underhill that we’ve grown used to in the later seasons really clearly.  The transformation is quite amazing, and very entertaining to watch.
My favorite episodes in this season are “In Yer Drawers” with the highlight of glue pot freezing on him at the last minute, and the “Saws” episode. Â I really hope they keep putting these out, and I’m looking forward to watching my through all of the seasons again and again. Â There is a tremendous amount of knowledge and inspiration contained in this show, and it makes me very happy to have them.
Thanks Popular Woodworking for bringing these to us, and thanks to Roy for… well… being Roy.
Badger
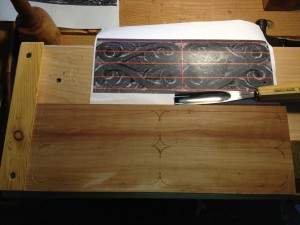
Carving S Scrolls step by step
I thought I’d do a post on carving, and show the process step by step.  The design I picked for this box front was taken from a carved chest image that I got from Peter Follansbee.  The bottom rail has a nice simple S Scroll pattern than I am using as the inspiration for this carving.  The original box  is a carved joined chest, dated 1676 that is attributed to Thomas Dennis of Ipswich Massachusetts.  The extant chest is housed at the Winterthur Museum and doesn’t appear to be pictured anywhere on the net.  There is a lot of patterns on this chest and I’ve already used a strapwork pattern from this chest for my tool box.  You can find examples of these carved chests all around the net, and Peter Follansbee does a lot of this kind of work on his blog which I highly recommend checking out if you’re interested in this type of historical carving.
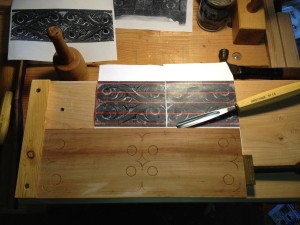
The wood I’m using here is Alder wood that I picked up, and resawed down to approximately 1/2″.  I think it’s kiln dried, but the grain is nice and tight so it carves pretty well.  I took a series of pictures as I went to show the step by step process of carving the scrolls with little measuring.  The layout started out with eyeballed edges scribed with a marking gauge.  I found the mid point with a pair of dividers, and scribed center lines to start out.
Chisel: Swiss made 8/20 Gouge
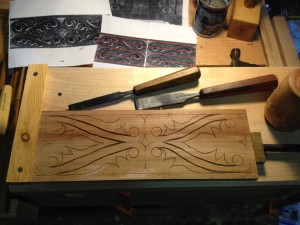
I start out bounding the curved scrolls by using a curved gouge that looked right, although in retrospect I think it might be too small. Â I probably should have used a compass here to draw out the circle at the ends to give my self a starting point. Â It didn’t turn out too badly, but I think it could be improved.
Chisel: Swiss made 8/13 Gouge
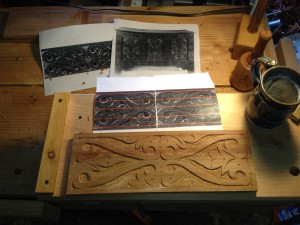
Here is where I made my first “mistake” but it was I was able to quickly pivot and move on. Â The center of the top curve of the S starts out as a circle, but if you notice, they are not directly on the center line. Â I did them opposite of the picture I was working from, but I was able to cut the picture in half and tape it back together (with duct tape, naturally) so that it matched where I was going. Â It helps to have the image in front of you, but it’s mostly for reference since I’m using the shape of the tools as the guide lines for the most part.
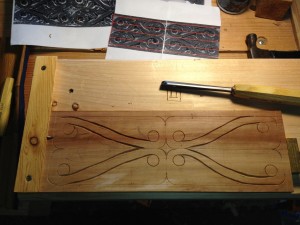
Chisel: Swiss made 12/8 V Tool
Now we need to connect the “Buttons” (which is the term that Peter Follansbee uses in his S Scrolls video. Â I used a V tool to connect the two of each, and to be sure I wasn’t screwing up I sketched it lightly with pencil first on one side. Â After I got it work out the other side was easy to follow and it’s quick work to outline the main body of the S in the S Scroll. Â the rest of the work is done with a variety of gouge shapes.
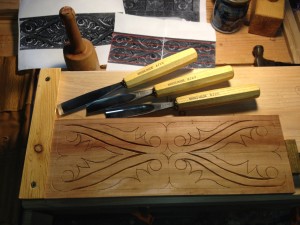
Chisel: Swiss made 4/20, 6/20, and 8/20 Gouges
Next comes the part that looks hard but really is the easiest.  With your pattern in front of you (or sketched out on the wood lightly) lay a variety of gouges down on the wood till you find the right curve that matches approximately the curve you need, and set it into the wood with a couple quick raps of the carving mallet.  Be sure to strike straight down so you don’t pop out the wood.  For this pattern I started on the circles and built out from there.  You’ll notice the center pattern is a mirror of the outer pattern.  If you look closely you can see that I’m not really that precise but the eye is very forgiving and will see the pattern for what it is.  I need to practice more to get more precision, but it is not a huge concern for me.
Chisel: Flat chisels
Next step is to take a flat edge chisel and outline any edges that don’t get cut in the main pattern. Â I reground a couple old flat chisels I got ages ago with a sharper angle and a double bevel for these two.
Chisel: Swiss made 5/12, and 5/8 Gouges
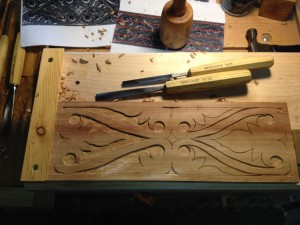
Taking a couple sizes of gouges with a flat curve to them, I start working out or relieving the background.  I find the #5 sweep to be perfect for this work, and I have a couple sizes for bigger removal or getting into tighter corners.  The best way to do this step is work towards on of your gouge cuts, and take a bit out at a time.  Grip is important, and control is desired so work slowly and carefully.  You’re looking for a nice crisp edge, but not necessarily a flat bottom.  It will somewhat faceted once you’re finished, and a roughly uniform depth is good.
Here is a shot of the relief work all complete prior to texturing the background. Â It’s useful to have a coarse stiff brush to get all the chips out. Â I also spend a little time going over the whole pattern in detail to find any missed spots, or areas that need a little clean up.
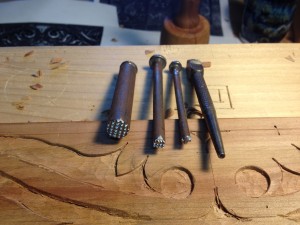
I thought I’d show you my home made text punches that will be used in the next step. Â The one on the far right is just a nail set which work perfectly for this, and makes a mark very accurate to the old examples. Â You probably have one in your tool box already. Â I also make a simple “maltese” cross punch for decoration from a nail, and some files. Â The two texture punches are made from round bar stock I got at the hardware store, and a big nail cut short. Â I just free handed the grid with a needle file.
I use the big punch where ever it fits into the background and tapping it with a metal hammer. Â You don’t have to fill the whole background precisely, just try to cover as much as you can. Â Any areas the big punch won’t fit, I hit with the smaller sized texture punch. Â I added a couple circles with the nail punch, and added a couple cross punches. Â I realized I should have set the sides in further on the design since I plan on nailing this together, and didn’t allow for that. Â The nail set punch decoration is straight out of the original pattern.
Chisel: Swiss made 8/13, 8/20 Gouges and 12/8 V Tool
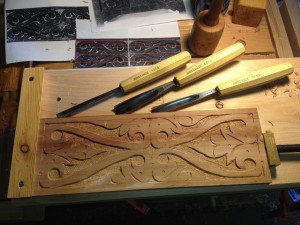
I used a couple of gouges to add some decorative “half moon” cuts to the leaves, as it was in the main pattern I am following. Â I also added a little V tool work as well to break up the flat spaces. Â Once thing I’ve noticed about the patterns of carved boxes from this period is that they really don’t leave much open space clear, either in the background or the surface level. Â I guess nature abhors a vacuum in the design, and I think it helps.
All finished with this box front.  I’m planning doing the sides of the box with a single length of the S, and maybe a different pattern for the back.  I am mostly just practicing my carving and design, as well as testing out this Alder wood for carving.  I don’t have regular access to the wonderful riven white Oak that Peter uses, but this might just be a good local substitute.  I like the color and grain, and I can pick it up fairly easily around here in the Pacific Northwest.
There you go, let me know what you think and I hope it helps understand this type of carving. Â It’s easier than it looks, is very forgiving and makes a great presentation.
Badger
Resawing a board by hand
It feels like it’s been a million years since I got down to the shop, but it’s really only been a couple months.  We had our annual family vacation road trip down to San Diego and back which we took three weeks for.  But right before that I’ve been having a lot of worse stress and dramatic changes there that set me back on my heels a bit.  Fortunately things are looking up  again, and I think it’s going to work out.
So, not much woodworking happened while I hunkered down mentally, and slogged through the hard times. Â So I know things are getting better because I made it down to the shop and cut a board in half. Â The long way. Â 🙂
A few months back I picked up some pieces of wood down in Portland, and I have been wanting to get some carving going again. Â I picked out a chunk of Alder, must be about 1″ thick or so, but I didn’t measure the thickness. Â In actual fact, I didn’t measure anything today as I eyeballed stuff or just used my dividers with standard proportions. Â The thick alder board was some nice wood and should be lots of fun to carve, but it was much too thick for making a box out. I don’t own a bandsaw that will do resawing, as the one I bought on sale at the home center is a pile of crap. Â I’ve never had any luck with this thing, and I’ve spent hours trying to get it cutting even remotely straight. Â Plus, it scares the crap out of me since I’m clumsy on a good day and I happen to like my fingers. Â (more on this later).
I’ve been thinking about making a frame saw, but I really wanted to spend some time working wood and not making yet another tool. Â When I do though, I think I’ll be using this as a guide: Â http://www.hyperkitten.com/woodworking/frame_saw.php3Â Josh is an amazing tool peddler, and apparently also works the wood too.
I have a 5 1/2 Point rip saw from Tools for Working Wood that I thought might do the trick, and I’d seen Roy Underhill do it on his show a few times so I jumped in and tried it.  And just like Roy I managed to nick my finger and draw a little blood.  Had I been using the Bandsaw, I’d probably be singing the Frodo the Nine Fingered ballad while I asked my wife to take me to the ER.  Anyway, back to woodworking shall we?
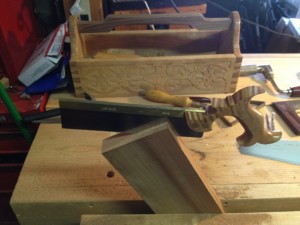
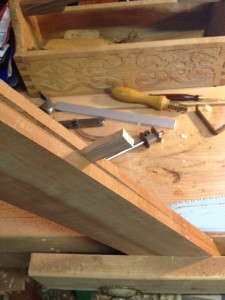
To get it started I sized the length of my board using dividers, cross cut it to length and found the middle line with marking gauge. Â Running the line around all four sides is essential, as we’ll be flipping this around a lot and we need to have that reference line. Â To start the cut, I clamped it up in my face vise at an angle, and used my dovetail saw (the only rip back saw I had handy) to carefully but quickly start the cut. Â I needed to create the first line for the saw to track into, and once I had the corner cut I followed up with the Rip hand saw. Â The trick I found was to let the saw and gravity do most of the work, as it will naturally follow the track left by the last saw, a trick we use through the whole board actually. Â Because once you cut through the corner you unclamp the board, reverse it in the vise retaining the same angle and cut down the other side. Â You keep flipping it back and forth like this because the front half of the saw is cutting wood, but the forward half is in the track of the last cut you made keeping it pretty much on the line you want to follow.
I kept flipping it back and forth until the vise wasn’t grabbing it firmly anymore and then flipped it end to end to start on the other side. Â This is why we needed to mark all four edges of the board. Â A couple of tricks I tried with excellent results are as follows:
– Waxing the sawblade kept it running smoothly in the cut. Â I have a block of beeswax I rub on it every time I switched the board.
– Angling the tip of the blade upwards a little helped the cut a lot, and prevented binding.
– I used a little wedge at the top of the board to open a little, which also helped keep the saw from binding.
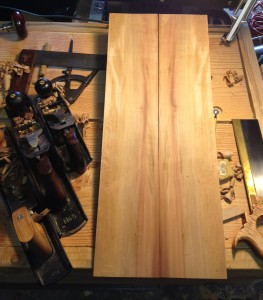
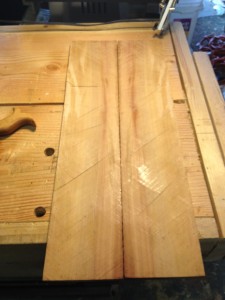
After my cuts met up from the other side, i was able to pop them apart and see what the inside looked like. Â It wasn’t that bad as I’d been able keep pretty much on my center line through the magic of tracking.
After that it was a pretty simple matter of planning down the saw marks, and cleaning up the edges with my Fore and Smooth planes. Â All in all, it took me about an hour to complete this including thinking it through, then marking, cutting and planing the board. Â If I had a fancy bandsaw it would be quicker I’m sure, but for me since I don’t own a decent band saw, this was a pretty good result for the effort. Â Plus, now I know how. Â I’m going to make a box out of this, probably carved on all four sides. Â Not sure what I’ll use for the lid, but I’ll deal with that later once I get through the carving.
Badger








You must be logged in to post a comment.