
Posts in Category: Tools
The future and the past.
I find myself conflicted at times. Â I love history, and old things. Â I met my wife at a history re-enactor event, we collect old things, we study history and create things using old methods or designs (she loves all things fabric). Â However, I also look to the future, I love robots and technology, I have a 3D printer (two actually) and love science and science fiction.
What does this have to do with woodworking?
I have found an intersection between those halves of me. Â Or rather I have CREATED one. Â I’ve been exploring 3D printing applications for historical woodworking.
Three things so far that I’ve made, and share for everyone to try out (if you have a 3D printer).

3D Printed Dovetail marking Templates
3D Printed Bench Dog

3D printed Marking Gauge
I’m kicking around a few other ideas as well, I think it would be possible to create things like planes and the like, but I am conflicted because they would be plastic which is just not as nice as wood. Â However, you could create custom profiles if you got the base design figured out. Â I’ve seen other creators doing other things, templates and the like. Â Pocket hole jigs (if you’re into that sort of thing) have been made. Â Dust collector adaptors, center finders, and even a sliding bevel.
I think that this could be a bridge between the old and the new, and help aspiring woodworkers dip their toes in for lower cost. Â Sure it’s plastic, and will probably not last as long but it’s a way to get in and get started, easing a ramp into a wonderful and fulfilling hobby.
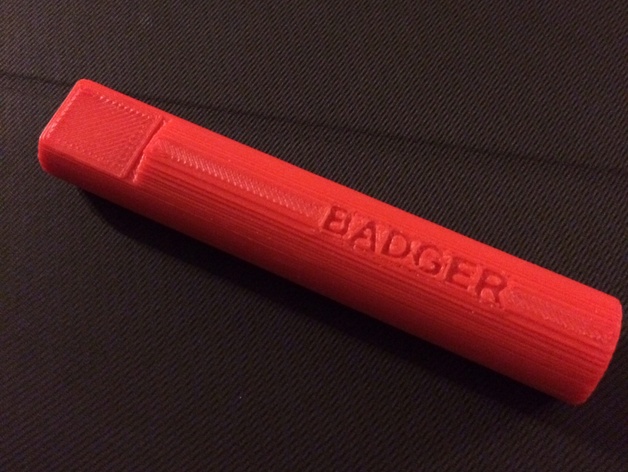
Badger
Travel box
I’m going to be travelling east in a week to take a carving class from Peter Follansbee!  It was pretty much a spur of the moment thing, and my family is coming with to visit some of the sites and hit New York for a day on the way back.  I needed to take some of my tools with me so I thought I’d whip together a box.  And of course I can’t NOT carve it… especially if I’m going to a carving class.  Gotta show off ya know.

Carved Travel Box
The box is made from Poplar because that’s what I had in the shop at the time. Â I wish I’d gotten some Alder or Walnut but IÂ didn’t have the money handy or the time. Â Luckily this was some harder Poplar that usual, and was consistent for the most part. Â It was also a nice wide board, so I was able to carve the top which I don’t typically do.
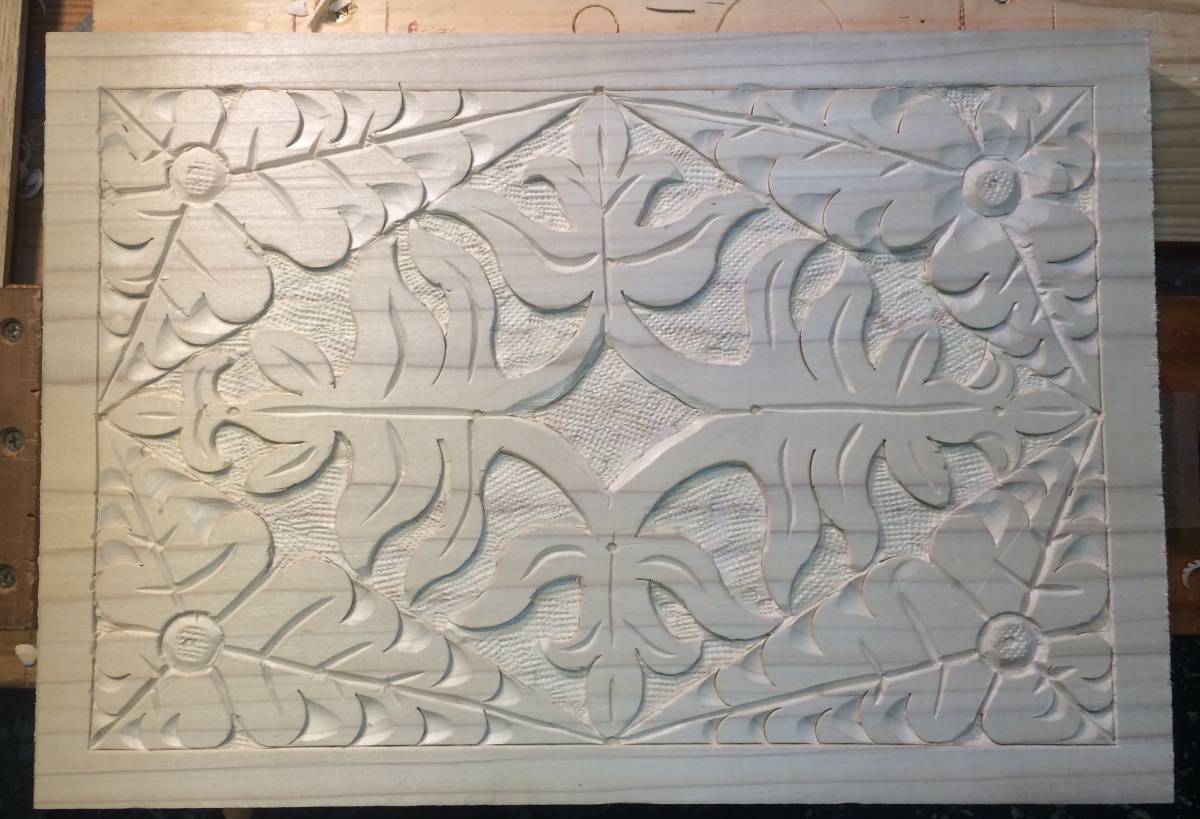
Top design for the Travel Box.
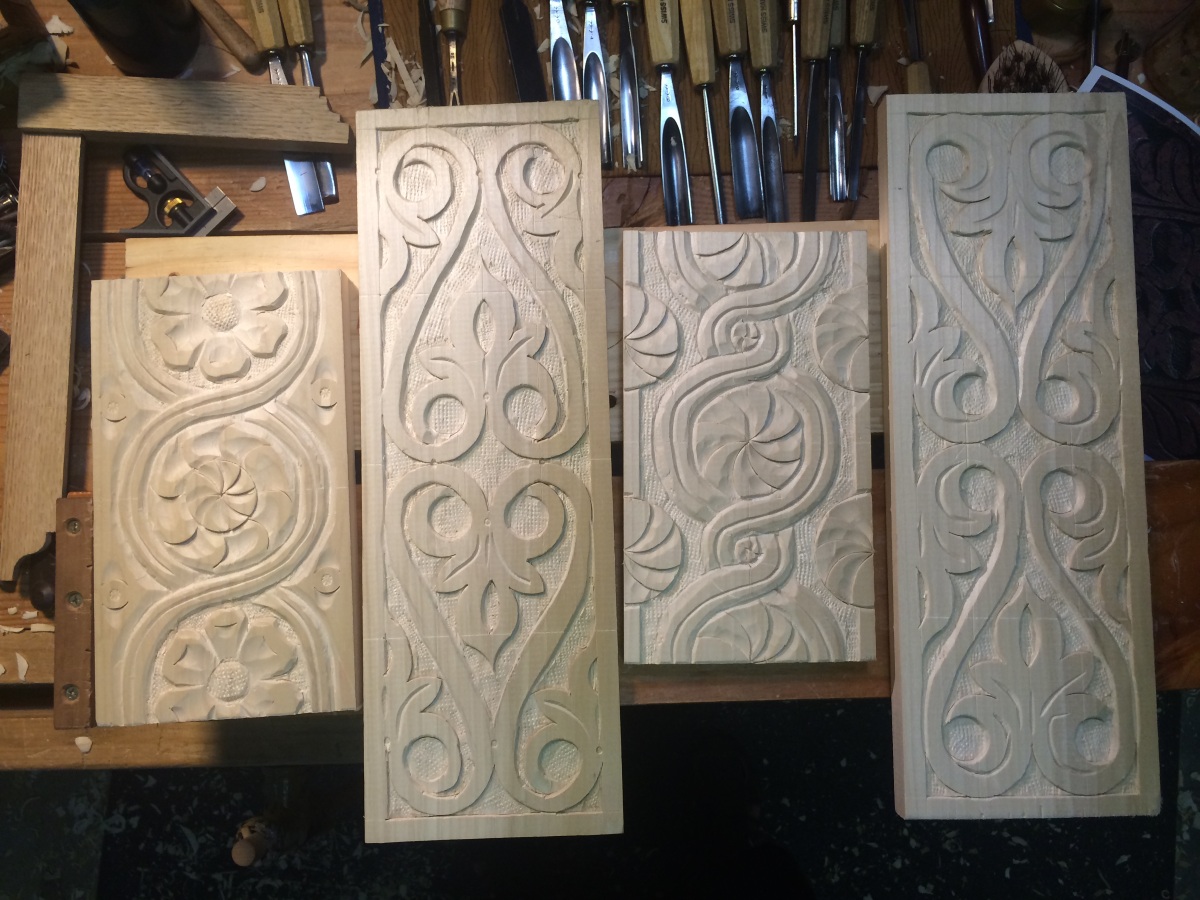
Carved box sides for the Travel Box.
For the front and back panels, I used S-Scrolls which I consider to be the swiss army knife of designs, and the sides were variations on the interlaced circles motif. Â Typically a box of the period would only have the front, and maybe the sides carved but I like to practice layout and carving so I did all surfaces.
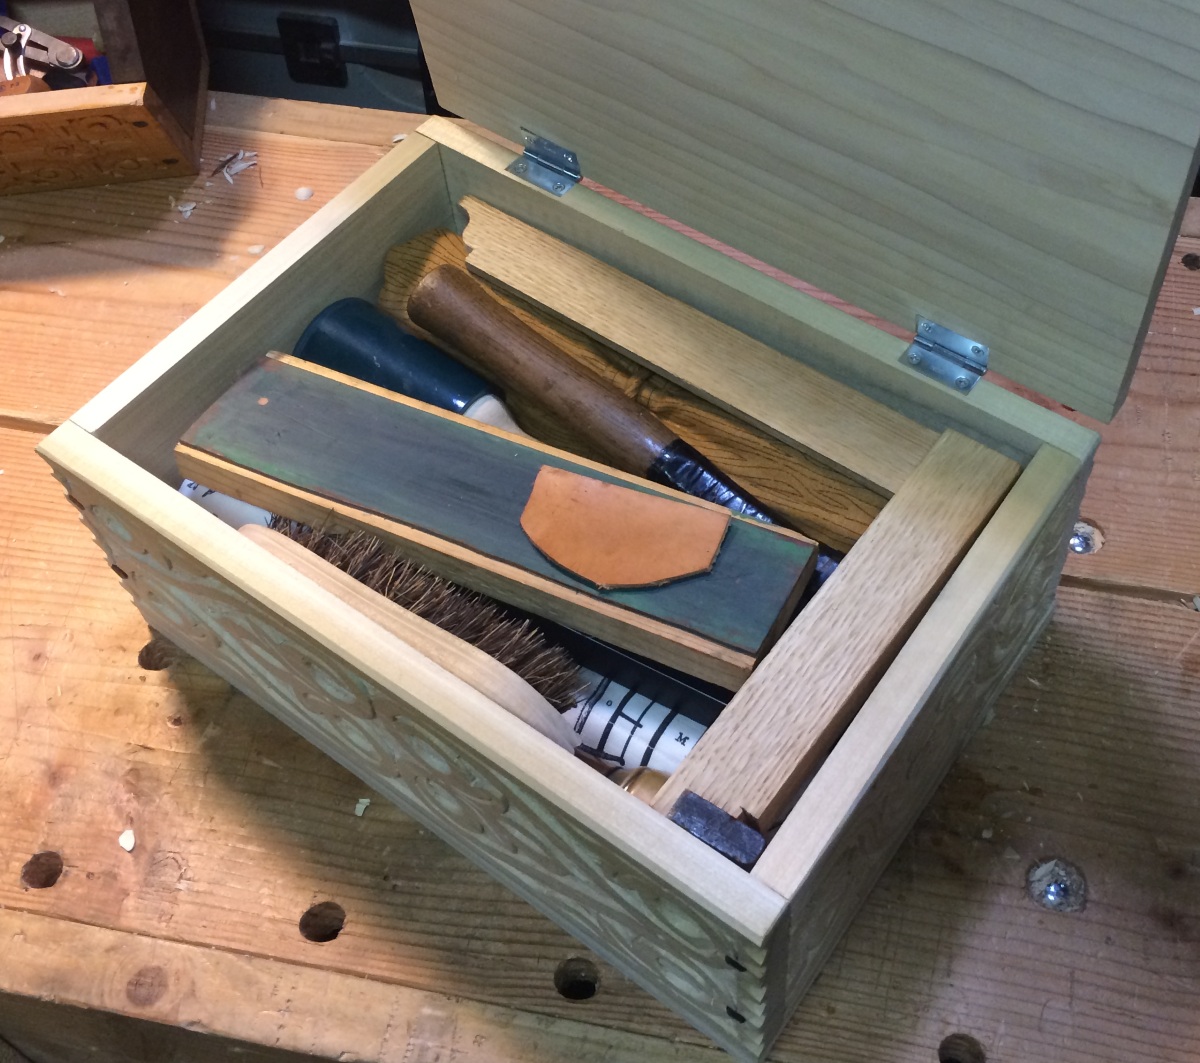
The Travel Box – Packed.

The tools!
I designed the size of the box to fit in my big suitcase, and to fit my tool rolls full of chisels.
I was able to cram the following in the box:
- 18 carving chisels
- 1/4″, 1/2″, 3/4″, 1″, 1 1/2″ bench chisels
- 5/16″ Mortise Chisel
- 2 carving mallets
- 3 compass
- Awl
- Marking knife
- 2 marking gauges
- metal hammer
- decorative punches (in the mint tin)
- 2Â squares
- Folding rules
- Pens/Pencils
- Stropping block
- Block Plane
- Carving Brush
I’m going to have borrow some tools when I get there, but I should be ok. Â The whole kit weighs 27 lbs.
I’m pleased with it, especially the top design because that’s a new layout for me.  The central design is based on a Thomas Dennis chest panel, and the outside edges I lifted from another panel of the period.  My only complaint is the wood, with that awful coloring. I can’t use my normal Shellac top coat without adjusting the color or bleaching the wood.  Which will have to wait till I get back.
Badger
My carving tool kit.
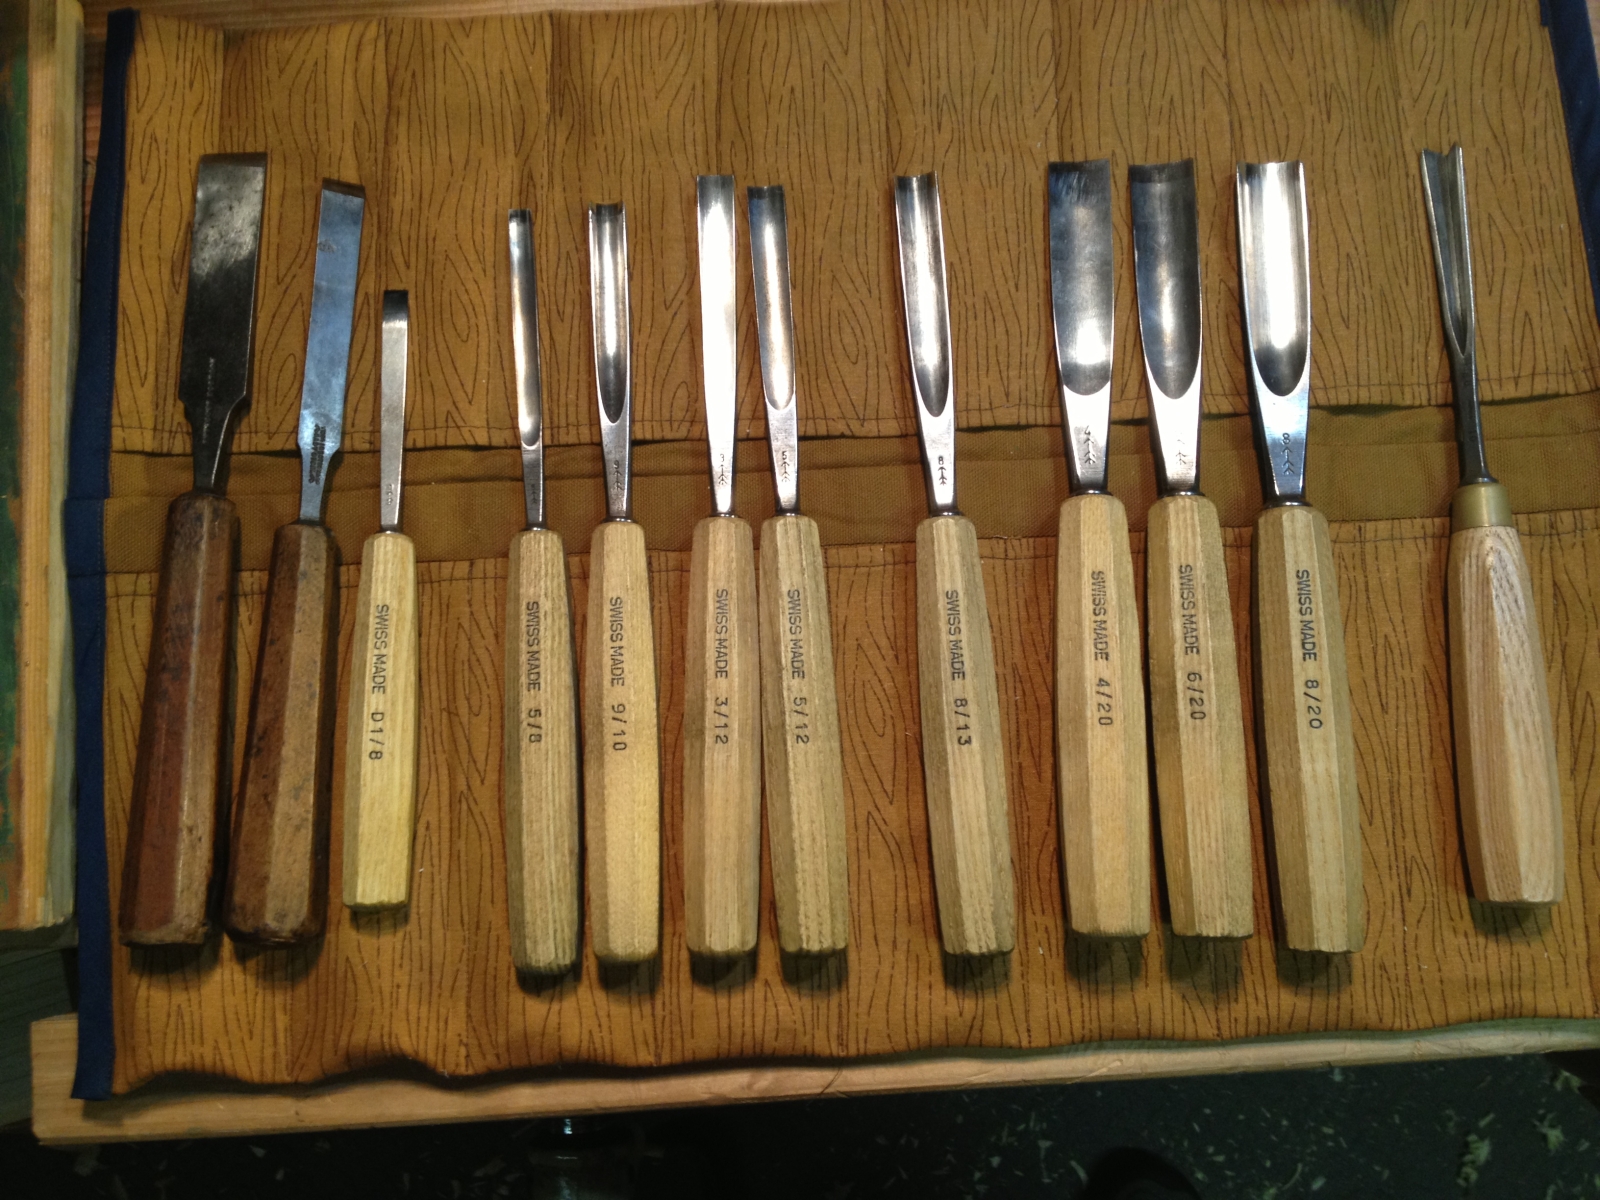
My current carving tools
As I was working on the carving for my tool chest lid, I was struck by how few chisels I actually use and how much I get from them. Â I’ve seen photos of carvers who have vast amounts of chisels in their arsenal, and I am always a little jealous of those people. Â However, at $35 – $50 a pop for mid range chisels, it’s hard to justify that kind of expenditure for my hobby.
I originally started with six chisels, and have added a few here and there. Â My initial purchase decisions were based on Peter Follansbee’s recommendations, and this gave me a very solid and flexible starting set. Â To this initial set, Â I’ve added a couple of straight chisels that I got in a lot of tools I picked up somewhere. Â They were straight sided and with decent steel so I reground them to be flat carving chisels. Â I usually only use them for outlining the outside of a pattern, so these aren’t must haves. In fact, I could probably get the same out of my bench chisels.
I also added a small flattish gouge for relieving the background, the 5/8 does a great job of getting into tighter spaces than the 12’s do for some of the patterns. Â I also added couple of different curved gouges to fill in some of the gaps, but they are not used as much as my core set.
I’ve also upgraded my V tool from the Pfeil to a Auriou version from the Chris Pye set that Lie Nielsen is selling now.  The V tool is very important, and the Auriou is very comfortable to hold and use.  If you want to get into it you can read a lot of good stuff from Chris Pye and Mary May on the V tool, it’s worth spending the time to understand this tool.  It’s also worth the time to practice A LOT with this tool to build the muscle memory and comfort level, something I’m still working on.
In the style of carving I do, you can get a lot of mileage out of a few curved gouges and it’s really hard to go wrong with Peter’s original suggestion and build from there. Â My next purchases will probably something in the 7/12 range to give me a smaller gouge for outlining.
Badger
Travelling Hexagon toolbox – Part 4
See Previous installments on this project here:
The deadline (self imposed) for this project is coming up, and I needed to make some serious progress this weekend. Â I’ve been busier than my normal level of insanely busy at work due to a “restructuring” that saw 50 people laid off, but my group got three additional people from other groups so I had to get them integrated and up to speed. Â So, extra levels of chaos at work and mental exhaustion means I didn’t get anything done last week like I wanted to.
Fortunately this weekend I had some clear space and an accommodating wife who sent me down to get it done. Â On Saturday I knocked out two complete panels as well started chamfering the edges for the hex shape.

All five panels finished.
Here is a shot of the finished panels and the the sixth panel will be the bottom, and won’t get decorated.  The order completed is first on the bottom with most recent at the top.  I got more comfortable as I went, and feel like my first panel was the worst in term of ease and final product.  Starting at the bottom, they are arranged in order of completion.
The one with my nickname on it will be on top, and presented a unique challenge, lettering. Â I have never done anything like that before, and didn’t have a clear idea on how to do it. Â But, I kind of made up my letters based on a mish mash of times new roman, and some letters I saw carved on a chest from the 16th century. Â Turned out ok, I suppose.
The top pattern is totally new to me, and is from a partial pattern of a wainscot chair back that I had in my photo collection that I believe came from museum shot from Peter’s Blog. Â The pattern was pretty simple to layout with three of my collection of dividers, and I like how it came out. Â It works pretty well in the relatively soft Alder I’m working in, since small details can be fragile in this wood.
Last night I had gotten the 30 degree bevel planed on three panels so far, but that was enough for one day. Â Today I got back to work on the bevels, and thankfully for my sore back learned a new lesson.

Don’t forget the old tools.
I was spending 30-40 strokes with the #5 fore plane set very aggressive. Â I was working up a serious sweat, and my back is sore from yesterday. Â I thought there has to be a better way, and then I remembered my old drawknife. I bought this back in the beginning of my woodworking adventure, and never really found a use for it. Â Today I learned the lesson, don’t forget the old tool. Â The drawknife takes aggressive cuts easily, and I was able to hog off the waste in a few dozen strokes with a lot less effort. Â Then a few passes of the #5 and #7 planes and done.
I think I can get this done in time to take it to the Tool Chest class out in Port Townsend. Â I’m hoping to use it to carry all or most of my tools I want to take to the class with me. Â We’ll see how many fit once I’ve actually got it together.
Travelling Hexagon toolbox – Part 3
See Previous installments on this project here:
Today saw the completion of the third panel for my toolbox project, which I am pretty pleased with. This pattern is based on the work of Peter Follansbee whom I owe a great debt of gratitude to for his blog, and his heavy emphasis on authenticity and style.  He has done a great video on this exact pattern, which I believe is based on a pattern from a William Savell box from sometime in his life 1590 – 1669 which you can see here: http://pfollansbee.wordpress.com/2009/04/30/seventeenth-century-carved-boxes/

Finished Carving – My version of the PF/Savell pattern.
I took some liberties with the pattern, making it my own which was partially dictated by the tools I have and width and characteristics of the Alder. Â Based on all the images I’ve pored over, comparing patterns by the same maker, or from the same shop I think this is pretty much how the period craftsman did it.
This pattern is laid on a square grid due to the arcs that are the basis for this pattern. Â To find this scale, I laid out the long center-line, and the short center-line as usual, and used my dividers to find a spacing that worked which took a few tries to get right. Â I started with one point in the center and put the other near the top in what looked like a decent border for the edge. Â The first attempt was somewhere in the neighborhood of 1/2″, and when I walked this down the length to the end. Â The first attempt ended up roughly halfway to the end, so I adjusted the arm a little bit, and did it again until I found a measurement that looked right at the end and the top margin.
Pricking the top and bottom margin first, I used my marking gauge to set these in with the scratch point. Â Then I walked this out again along the center-line, pricking the board deep enough to leave a mark. Â Finally I used my square and awl to scratch a line at each of these points to complete the layout.
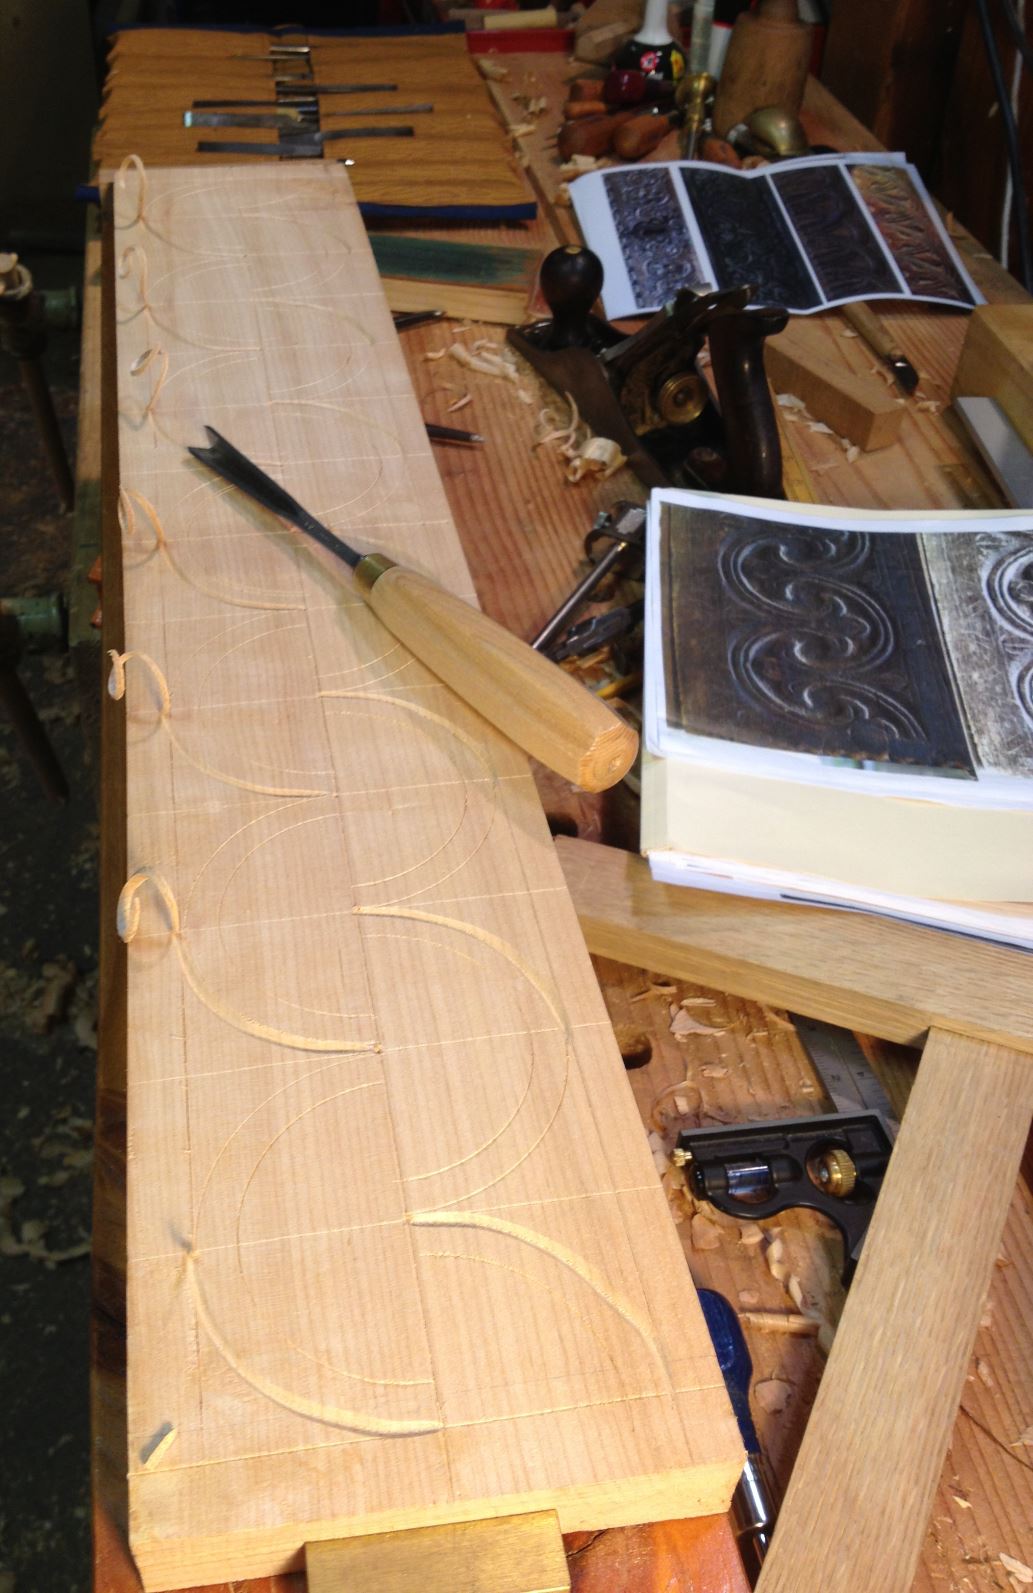
Layout, and first cuts with the V Tool
To create the arcs, I picked a point along the center and with my dividers scratched a half circle onto the top half. Â Leaving the point in the wood I scratched the bottom half, then repeat all the way down doing the top and bottom half. (Really, go by Follansbee’s video, he does a better job explaining this).
Then I pulled the arms in a little judging it by eye what would look good, and struck a series of arcs inside the first arc. Â This is my main outline for the circular bits which I followed the scratch lines with my V tool going down the line, stopping at the center line as seen above. (I snapped the picture showing the little pigtails that get left behind as I went down the line.)
Next it’s a simple matter to set in the fleur portion at the points where the half circles meet. I used small deep gouge first for the underside of the fleur, then followed by a bigger slightly less deep gouge to make the leaves. Â Remove the background with a small flat gouge, and bevel the outside of the top arc. Â Finish with the texture punch on the inside, and add come half moon gouge cuts to the top, followed by a nail punch accent just for kicks.
Here are the tools I used in this carving.

Tools used
Three more panels to go!
A few thoughts on Marking Knives
For some reason marking knives have bubbled up to the surface around the web.
I use two marking knives consistently,and a plain old scratch awl for most of my marking tasks.  They are indispensable to my work and are almost always on my bench top.  In fact to grab photos for this post, I just went through recent images to find ones with the marking knives in the background.
Which marking tool I grab depends on what action I’m doing.

My trusty Awl – used for “Third Class” marking
If it’s rough cross cut, called a “third class” saw cut I’ll just grab the awl and scratch away. Â My only concern is that I can see the line, and that it is straight, the rest I don’t care about. Â This is usually where I grab my big toothed cross cut saw and hit it hard and fast. Â I’m just breaking the stock down at this point or I know I’m going to be cleaning up the edge later on the shooting board.
I picked up a  handful of blue handled awls at Harbor Freight for use in the shop.  I’ve modified a couple of them into birdcage awls, and brad point awls, but I keep a couple unmodified close at hand as they are very useful.  They are great for laying out carving patterns for the 17th century stuff and you can often still see traces of scratched line layouts on old chests and boxes by the old carvers.

Workhorse marking knife
My workhorse marking knife for the longest time was this old chip carving knife I used originally for wood block carving. Â I use this for marking out cuts on the show faces. Â I lay my square on the line, and do several passes with the knife. Â The first pass is light and the focus is on dead nuts accuracy. Â Each successive pass adds more pressure making a deeper cut each time. Â I find with this type of knife I can really crank down on it, and get a nice deep clean cut on my third or fourth pass. Â I will also lay the knife into the leading and trailing edge of the cut and press down to sever the fibers a bit more where the saw enters and leaves the wood.
This is a “Second Class” type cut according to Robert Wearing from the Essential Woodworker and I usually will  add a “V” notch at the start of the cut to make sure my saw doesn’t jump out of the cut and ding the edge when I make my first cuts.

Blue Spruce spear point marking knife
For marking dovetails, or making really precise lines I’ve been using the Blue Spruce spear point marking knife. I got one for myself as a treat for my birthday last year and it’s a high class tool. Â The workmanship is top quality and it is a joy to hold in my hand. Â It wasn’t cheap and it is definitely a luxury. Â Chris Schwarz wrote about spear point knives a while back, and Popular Woodworking just re-posted the article to their blog. Â There is also a review of the new Lee Valley budget spear point marking knives out there too.
I’m still getting comfortable with this style of knife, as I find it a little delicate for my tastes.  But when it comes to marking dovetails (I’m a tails first kind of guy), this knife has no equal.  For a “first class” saw cut this knife also does well, although I’ve used both the previous knife and the spear point to good effect.  Start out the same way with light then increasingly deeper cuts keeping a clean edge.  I then follow up with the knife angled into the waste side to create  a trough or lopsided V notch for the saw to ride in.  Some people use a chisel to cut this but I usually just use the knife.  The creates a path for the saw to travel in as well a severing the fibers on the show side leaving a really clean edge where it matters.
Old Froe and some Black Friday shopping
I’ve been watching the old Woodwright’s Shop episodes on DVD.  It’s great fun but the first few seasons can be a bit dated feeling, as he pushed the really hard core folk craft stuff.  One of the tools he uses quite often (still does in the newer episodes, but he doesn’t make as big of a deal about it) is the Froe.  It’s also something that Peter Follansbee uses in his work with the Plymouth Plantation while recreating the 17th century joined work.  I have no real interest in using a froe, have no real need for one, nor do I have much call for it since I rarely every see logs that I can work with.  But after watching five seasons of Roy carrying on about his Froe, and reading Peter’s blog I felt compelled to have one.  No idea why, but I couldn’t fight it.

This is Roy at a WIA conference splitting logs on an escalator. He sure is nuts for his Froe! Â Photo used with permission (c) Peter Follansbee
Fast forward a little bit, we’re on the road (through the woods and over the hills to grandmothers house we go) for Thanksgiving and we stop in at a couple Antique store  along the way.  Of course what did I find?  An old beat up froe.  In fact there were two of them, but the second one was pretty bad.  I caved, I did I will admit it freely, I bought the froe  just to have it in my shop, as a sort of homage to Roy and all his work.  Plus, if I ever do run across a white oak straight grained log about six feet long, I’ll be set!  (The latter is very unlikely to happen out here on the West Coast in very urban Seattle, but you never know right?)

The Froe and a cute little oilcan I picked up for my oilstones.
On the way back, travelling on Black Friday towards home we stopped at a new Antique store in eastern Washington we’d discovered while stopping for gas and lunch. Â It was a great store and my wife found some good stuff, and I got what I consider to be my best find so far.
In a dark corner, I found a pile of rusty junk  that contained a beat up Stanley Number 7 whichlooked like it might be salvageable.  As mentioned in a previous post I needed a new blade for my Number 7. so I thought I might be able to use it for parts at least.  As I carried it around for a while and in some better lighting I got a really good look at it and discovered the blade was in good shape and the rust wasn’t that bad.  The real kicker was the price tag, $25.  And I even got 10% off that just for asking.
Fast forward again to tonight when I got some time down in the garage to see what was under the rust and grime. Â It was a veritable diamond in the rough because the rust was barely surface level and the grime scrubbed way to reveal a pretty solid user plane. Â I hit it with some light machine oil, sand paper and a wire brush and this is what came out.

My new #7 plane, all cleaned up
I had to completely regrind the blade because it looks like someone had planed some nails with it and a quick run through my Coarse, Medium, Fine India stones followed by Translucent Arkansas and stropping I have a blade that could shave hairs off my arm and cut wispy thin shavings.  There was grime deep in the works, and I had to totally disassemble it and give it a thorough cleaning.  There was paint splatters in all sorts of places including a big old dollop on the front knob.  I sanded the knob on my lathe and cleaned up the tote handle by hand followed by a light coat of walnut oil.
Best $25 I’ve ever spent.
Tools at the Royal BC Museum
This weekend the family indulged in a quick get-a-way to Victoria, BC for a quick vacation.  It’s only a few hours ride on the Victoria Clipper, and was nice and relaxing for us to get away from work and the messy house.  While we were traipsing around the Royal British Columbia Museum I ran across a few woodworking related displays and interesting tools I thought I would share.  Overall the Museum is a fun trip, especially with kids, as the displays are really well done and not at all boring.
In one of the “through the periods of history” sections they have this great display of hand tools on the wall that any woodworker would love to have.

Tools on DisplayÂ

Tools on Display
Some were more modern, but some were nice looking vintage pieces that would great additions to the toolbox.
Further down the display they had an interesting saw in a kit for a surgeon. I snapped a picture because it looked like it would make a great handle design for a dovetail saw.

Dovetail saw?
The over in the native peoples exhibit they had a nice display on how they made the bentwood and carved boxes out of Cedar.

Native Bent Wood box

Native Bent Wood box 2
We had a great time, and my son loved the undersea area which is done in a very steampunk, 20,000 leagues under the sea theme that is superb, and the giant Mammoth display. Â He ended up with a stuffed Mammoth to take home which he was quite happy with.

Mammoth!
Replacing the Blade on a Stanley #7
I dug out one of my rehab projects the other day, and did some more with it. Â I have this old Stanley #7 in need of some TLC. Â I took it apart to clean out the gunk, and flattened the surfaces where metal meets metal. Â Things were pretty rough, but cleaned up pretty well. Â All in all I was feeling pretty good about it, until I got to the blade.

Pitted Blade of the Number 7
Ugh. Â No amount of grinding on the stone is going to fix this blade. Â There is so much pitting on the back, I could sharpen for ages and it will have some nicks somewhere. Â I’m giving up on this one, and asking for advice how to upgrade this to a better blade.
Does anyone have any suggestions on a good replacement blade? Â I’ve always heard of Hock blades, but have never tried fitting a bigger blade in an old plane before. Â I’ve also seen a few new blades being offered from Woodcraft and Lee Valley that might be worth looking into.
Help?
Here is the rest of the body and parts.

Stanley #7 disassembled
I think this plane has a lot of life left, but that blade has to go.  I’m going to give the rest of the body a solid cleaning, and see what I can get out it.  The body is pretty solid, no cracks and a pretty flat sole.  It will be a solid user once I get a new blade.
Badger
Chisel Roll v2 – Now for sale!
The chisel roll that my wife made had garnered some interest and had a number of interested queries including one sale. She fine tuned it a little based on my feedback, including making the center gap smaller to reduce the chances of fingers grazing sharp edges. I put it to the test last night and I quite like it.
She is making these to order now, so please get in touch if you’d like one!

Chisel Roll version 2

Chisel Roll - Rolled up
You must be logged in to post a comment.