Posts in Category: Woodworking History
Tools at the Royal BC Museum
This weekend the family indulged in a quick get-a-way to Victoria, BC for a quick vacation.  It’s only a few hours ride on the Victoria Clipper, and was nice and relaxing for us to get away from work and the messy house.  While we were traipsing around the Royal British Columbia Museum I ran across a few woodworking related displays and interesting tools I thought I would share.  Overall the Museum is a fun trip, especially with kids, as the displays are really well done and not at all boring.
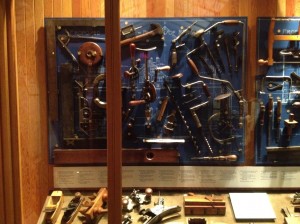
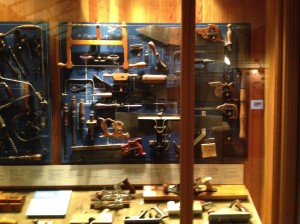
In one of the “through the periods of history” sections they have this great display of hand tools on the wall that any woodworker would love to have.
Some were more modern, but some were nice looking vintage pieces that would great additions to the toolbox.
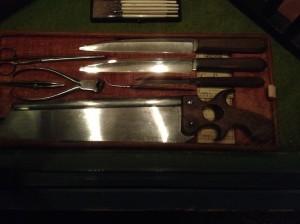
Further down the display they had an interesting saw in a kit for a surgeon. I snapped a picture because it looked like it would make a great handle design for a dovetail saw.
The over in the native peoples exhibit they had a nice display on how they made the bentwood and carved boxes out of Cedar.
We had a great time, and my son loved the undersea area which is done in a very steampunk, 20,000 leagues under the sea theme that is superb, and the giant Mammoth display. Â He ended up with a stuffed Mammoth to take home which he was quite happy with.
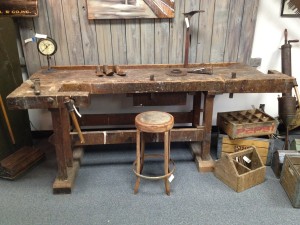
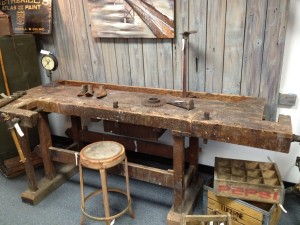
Old German Workbench
My wife and were out Antique store browsing, and I ran across this interesting piece of work.
It’s supposedly from the 1800’s, and was German in origin. The plate for the shoulder vise was missing, but otherwise it was complete. It was very well worn, and had seen a lot of use in it’s day. I couldn’t afford it, or had any space for it, but it was pretty cool to check out.
Stuff like this is pretty rare out here on the West Coast. I’m sure those East Coast people are all like “whatever dude, I see five of those every time I turn around”. Heh.
Badger
Rules for Work from the Boys Own Workshop.
The boy’s own workshop – Jacob Abbott – Google Books.
Discussion about this book is making the rounds of the blogs right now, and I wanted to call it out as well. I read this on my Kindle while on vacation and it was a great read, that I learned some fun stuff about hand tool woodworking, and more to the point I learned some things about how to approach the craft as well. I highly recommend reading this book, and if I had any idea how to do it I would reprint this book in a nice bound format to put on my shelf next to my Lost Art books.
“Rules for Work
It was late on Saturday afternoon when the boys completed the work of procuring and laying in their stock and their tools; and several days elapsed after this before John had an opportunity to commence his work. Ebenezer advised him, if he really wished to learn to do anything with tools, to consider it work, and not play; and not to undertake any operations until he had ample time for them, and then to proceed step by step, in the most deliberate and cautious manner. He must never act in a hurry, he said, in order to finish something at a particular time, or attempt to work with a tool that was dull or out of order, or to use a poor or unsuitable piece of wood because he had no proper piece at hand. Such management as that, Ebenezer said, only led to disappointment, worrying, vexation, and failure. “Â — Boy’s Own Workshop by Jacob Abbot
I am interpreting this as the following Rules for Work:
1. Work Deliberately. I tend to rush when I get close to the end of a project. And usually screw things up by doing something stupid. Now I am taking the time to think through each step, and find the simplest solution, not the first thing that comes to mind.
2. Use the right tool for the job. Sometimes when I rush, I’ll grab whatever is handy and try to force it work the way I want, and sometimes this ends badly.
3. Work with Sharp Tools. I sometimes want to get right to work, but I’m making myself stop and make sure my tools are ready to go before I start. Even if this means that is all I get to that night in the shop.
4. Work in discrete chunks. I am trying to work in stages, and only tackle a project that I can finish in the time I have. This way I feel successful at the end of each section, and I start each session with a starting point and an end point.
I’m still working on these rules, and feeling out how it works in the shop, but I feel good about this so far. Work Deliberately seems to be encompass a lot of the idea. My first project with these rules in mind went much better than previous ones. The end result just simple felt better, and I felt like I actually knew what I was doing. It’s a good feeling.
Badger
More on punches with examples
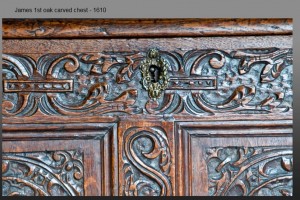
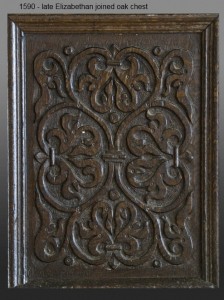
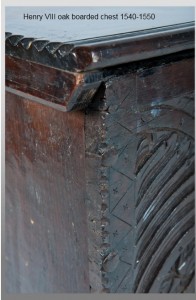
I’ve been scanning the internet for examples of the punch marks used in period carving work. And when I say the Internet, I really mean Marham Church Antiques, and Peter Follansbee’s Blog. If you’re in to 16th – 17th century woodworking and carving then both of those sites should be in your favorites. The first on is not a wood working site per se, but it’s filled with wonderful pictures of antique wood chests, furniture and more. It’s well worth a browse for inspiration, carving patterns, and if you’ve got extra money you can purchase some of them. I’ve been tempted on a few occasions, but we have a big travel vacation planned this summer that I need to save for. Peter’s blog I’ve gone on and on about, so I won’t reprise that.
I was able to find a nice set of punched decorative marks on the Marham site, and I’ll show them here. My next step is to make a set of these, so watch for that post later. I’ll be documenting my steps as I go, so hopefully that will help out a little.
The last two are from Peter’s Blog, and the rest are all from the Marham Antiques site. The last one has THREE different punches used in the decoration. I’ve been using a nail set as a small circle punch in my carving so far, and it’s super easy. I’ll be posting the finished box later, which shows two different punches used, the nail set, and a nail I carved into a cross pattern with small needle files.
Once you start looking for them, you can find them in all kinds of places. Once you start using them, it’s hard to stop. It’s a simple way to add a little flair to your carving, and just as “nature abhors a vacuum” so does 17th century carving. I’ve noticed that the carvings generally have very little in the way of flat open blank space.
Badger
My first 17th century carving attempt
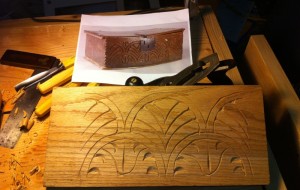
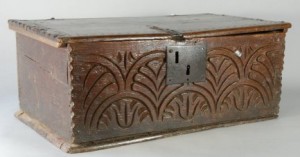
The last month or so has been a whirlwind of stress at work, as well as being very cold in the shop so I haven’t been able to get down there as much as I wanted. But finally I got a little time to work on this carving that I wanted to work on since I got my Peter Follansbee set of carving chisels. I’d been admiring this particular pattern on a 17th century box he’d posted in his blog a few times, and I thought it might be a good place to start working from. The reason I chose it to start was because it was mostly V tool work, and I could visualize almost every step in my head. Plus it looks very cool, which is always a plus. I’m going to be making a bible box in the near future as a present, and this was one thought for the carving I wanted to add to the box. So, I cut up some flatsawn Oak stock and gave it a whirl, and it came out pretty good for my first attempt really even if I can’t get any riven partially green stock like PF uses.
To achieve this carving, I started with a simple grid layout of 3″ squares centered on the front. I did multiple sketches on paper first to work out the details, and this was the easiest way to start the layout process. Once I had the grid lightly marked into the wood, I got out the compass and made a series of arcs along the top and bottom rows, alternating the starting points to get them offset. I made one big mistake here, and didn’t count out the grid exactly right and as such, my design was short one set of arcs/grid squares, but it works out because the design looks good on any number of repeats.
Once I had my first set of arcs down (I penciled them in above to make them clearer in the photo) I eyeballed a good looking distance and carved another set of arcs inside the first set of arcs.  This could have been a little bigger I think, but overall it didn’t look too bad to my eye.
And that was the extent of the actual layout for this design.  I did most of the rest of the design freehand with what looked good, trying to follow with traditional carving techniques as I’ve learned of then in PF’s blog. He shows numerous examples of symmetry being off for our modern eyes and numerous things we would call “mistakes”. Once you look at it as a whole though, it all looks good. The major mistakes I made doing this were the bottom U shaped cuts, I need to actually lay those out next time, as going from either side was difficult to reproduce, and my half moons in the lower arc were chipping out a lot which could be wood, or technique issues.
But overall, for a first practice piece I felt pretty good about it, and it was good to finally get to practice what I’d been reading about on PF’s Blog, and watching his DVD.
Badger
Tools from History, 1427
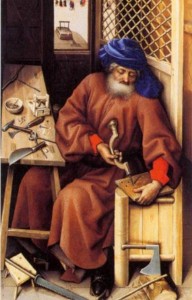
Another classic tools painting, this time from 1427 from a painter known as “Master of Flémalle” which I found on the ever so handy site Web Gallery of Art. In this painting you can clearly see Joseph working in his carpenters shop (this is the right side of a larger painting) and the artist put great detail into the tools. In this scene you can see the following:
- Spoon bit auger
- Hammer
- Chisel (fishtail)
- Pincers and Nails
- Interesting shaped knife
- Brace and spoon bit
- Axe
- Saw with straight handle
Nothing too unusual, expect the brace is clearly displayed and in use. I had wondered how far back the brace went, and this shows in in use back as far as 1427. The Mastermyr find had a number of spoon auger bits that dated the use back to roughly 1000 AD, but the wood bits all rotted away on that particular find and we don’t know what sort of mechanism was used to turn them. I would presume it’s something like the one show here.
The other odd thing was the saw handle. It’s a straight rod, which does seem a bit uncomfortable. The teeth look to be cut on the push as well, but it’s hard to be certain that the artists painted this aspect exactly as it was seen. There is some good detail in all the tools that leads me to believe that he was painting from real life tools, but it’s hard to be certain on small details like saw teeth. Just something to scratch your head at I suppose.
Badger
A Wooden C Clamp
Today the family and I went out to check out an antique mall we’d heard about down south. Very little in the way of tools, but I did pick up this one item for $20 because it intrigued me. I’d seen a wood C clamp in an old painting a while back, and was curious as to what kind of joint could be used for that. Well, now I know what one joint might be used.
I have no idea how old this is, there wasn’t anything I could to date it. The only marking is “HERRBURGER SCHWANDER” stamped in a couple places on the side. Probably an owners stamp. I would guess in the last 50-100 years for this.
Any help in identifying it?
Here is a picture of the old painting depicting a wooden C clamp in use:
A mystery solved
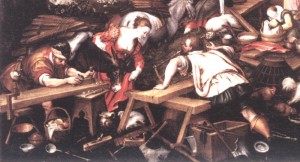
A while back I posted about a odd looking plane I’d found in an old painting by Jacopo from 1574. Recently I posted about a painting of building the Ark by Kaspar Memberger the Elder that had some great shots of workmen and tools. Yesterday I found another painting by Jacopo that I hadn’t seen before that showed nearly the same exact scene that Kaspar had painted, but with different tools. One of the paintings is a copy of the other for sure, but I wasn’t able to find much on the painting itself. The newly discovered Jacopo painting looks like it had been damaged either by cutting or folding, which might explain why it’s much less popular than the other ark painting he did.
The really cool thing about this new painting though, is that it shows one of the workmen clearly demonstrating how that strange looking plane with the roman style handle in front of the blade, rather than behind, is used. The fellow is clearly pulling the plane! And there are a couple other planes in the foreground as well.
It’s a little mystery solved, phew! It’s odd though, most European planes were designed to be pushed. The roman style handles are very rarely found due to ravages of time, but there are few examples still around due to volcanic action (Pompeii has a few). The cut out style was seen in the known examples as both ends of the plane, or behind the iron as seen below in these scans from Goodmans book on History of Woodworking Tools.
Interesting stuff. One of these days I’d love to make a reconstruction of these planes to see how they work, but I think I have a few more challenges to get through first.
Badger
More tools in paintings, 1588
I’ve been sifting through old paintings looking for tools from pre-1600 and I found another good one. I use this site, the Web Gallery of Art, to find all these paintings by the way, if you’re looking for a way to burn a few hours on the internet, this place is great. I had an idea to search on Noah’s Ark pictures, since they frequently depict the building of the Ark using tools of the day. This one is a great example.
The original image can be found here: I pulled the section with the tools, zoomed it a little, and lightened it up to get more details on the tools. This painting is by
Painting Details:
Painter: Kaspar Memberger the Elder (1555-1618)
Title of Painting: Noah’s Ark Cycle: 1. Building of the Ark
Date: 1588
There are a couple of really interesting things in this one that I liked.
First the tools:
- Adze
- Wood bodied planes. The handled ones look like the Melancholia plane in Albrecht Dürer’s famous print.
- T handled augers
- Two axes
- Workbench, and Saw Bench
- Pair of Compasses
- Bow Saw
- Chisels
- Screw clamp
That last one is the most intriguing to me, as I’ve not seen a screw clamp in a pre-1600 context before. I haven’t really gone out of my way to look for it either, but it’s interesting nonetheless. I wonder what kind of joint they used to make the C on that. I’m assuming that it’s a jointed clamp, because otherwise it would just snap along the grain I would imagine. After the holidays I’m going to be ordering a couple screw box sets from Highland Woodworking and I might try making a couple of these just for kicks.
It’s also a great scene of “job site woodworking” where they have a couple benches and box of tools and getting down to work. The benches look pretty similar to the sawbench idea that floats around the internet, and you can clearly make construction details on one of them. There are three different styles of bench shown here. On the left it looks like the legs are either set into mortices or bored holes. The middle one is a much nicer bench with what looks like Gothic styling, and some decorative carving. The one one the right has the legs set into the side of the top, with cross braces much like the sawbench I build a while back based on a Chris Schwarz design.
Fun stuff.
A 1510 Joiners Tool Set
Details on Painting:
Artist: Jean Bourdichon b. 1457, d. 1521 Tours, France
Title: The Four Social Conditions- Work
Date of painting: 1510 (from “The history of woodworking tools” by W. L Goodman)
I ran across this great picture of a painting dated to 1510 of a Joiner in his workshop. I love these old pictures, because you can get a glimpse of the work and tools from a distant past.
A lot of discussion has happened about tools and work from the 17th century, due to a number of excellent books available in reprint these days, but there really isn’t a lot of resources available for pre-1600’s woodworking.
Here is one of the rare instances that I’ve seen that shows things so very clearly. It also shows a snapshot of life back then. The child on the floor collecting shavings for use in the fireplace presumably, the wife working on something, maybe weaving? But for me the really great part is the tools.
You can clearly see the following tools:
- Jointer or Try Plane
- Smoothing Plane
- Chisels of several types
- Mallet
- Square
- Compass
- Small axe
- Bowsaw
- Piercer or Brace
That’s a pretty solid set of tools. In the foreground you can see a linenfold carved chest, and the background you can see a gothic style carved chest. What little research I’ve done on this time period says that this is the transition period between those two styles of carving.
Interesting stuff.
Badger











You must be logged in to post a comment.