Posts By Badger
A few thoughts on Marking Knives
For some reason marking knives have bubbled up to the surface around the web.
I use two marking knives consistently,and a plain old scratch awl for most of my marking tasks.  They are indispensable to my work and are almost always on my bench top.  In fact to grab photos for this post, I just went through recent images to find ones with the marking knives in the background.
Which marking tool I grab depends on what action I’m doing.
If it’s rough cross cut, called a “third class” saw cut I’ll just grab the awl and scratch away. Â My only concern is that I can see the line, and that it is straight, the rest I don’t care about. Â This is usually where I grab my big toothed cross cut saw and hit it hard and fast. Â I’m just breaking the stock down at this point or I know I’m going to be cleaning up the edge later on the shooting board.
I picked up a  handful of blue handled awls at Harbor Freight for use in the shop.  I’ve modified a couple of them into birdcage awls, and brad point awls, but I keep a couple unmodified close at hand as they are very useful.  They are great for laying out carving patterns for the 17th century stuff and you can often still see traces of scratched line layouts on old chests and boxes by the old carvers.
My workhorse marking knife for the longest time was this old chip carving knife I used originally for wood block carving. Â I use this for marking out cuts on the show faces. Â I lay my square on the line, and do several passes with the knife. Â The first pass is light and the focus is on dead nuts accuracy. Â Each successive pass adds more pressure making a deeper cut each time. Â I find with this type of knife I can really crank down on it, and get a nice deep clean cut on my third or fourth pass. Â I will also lay the knife into the leading and trailing edge of the cut and press down to sever the fibers a bit more where the saw enters and leaves the wood.
This is a “Second Class” type cut according to Robert Wearing from the Essential Woodworker and I usually will  add a “V” notch at the start of the cut to make sure my saw doesn’t jump out of the cut and ding the edge when I make my first cuts.
For marking dovetails, or making really precise lines I’ve been using the Blue Spruce spear point marking knife. I got one for myself as a treat for my birthday last year and it’s a high class tool. Â The workmanship is top quality and it is a joy to hold in my hand. Â It wasn’t cheap and it is definitely a luxury. Â Chris Schwarz wrote about spear point knives a while back, and Popular Woodworking just re-posted the article to their blog. Â There is also a review of the new Lee Valley budget spear point marking knives out there too.
I’m still getting comfortable with this style of knife, as I find it a little delicate for my tastes.  But when it comes to marking dovetails (I’m a tails first kind of guy), this knife has no equal.  For a “first class” saw cut this knife also does well, although I’ve used both the previous knife and the spear point to good effect.  Start out the same way with light then increasingly deeper cuts keeping a clean edge.  I then follow up with the knife angled into the waste side to create  a trough or lopsided V notch for the saw to ride in.  Some people use a chisel to cut this but I usually just use the knife.  The creates a path for the saw to travel in as well a severing the fibers on the show side leaving a really clean edge where it matters.
Old Froe and some Black Friday shopping
I’ve been watching the old Woodwright’s Shop episodes on DVD.  It’s great fun but the first few seasons can be a bit dated feeling, as he pushed the really hard core folk craft stuff.  One of the tools he uses quite often (still does in the newer episodes, but he doesn’t make as big of a deal about it) is the Froe.  It’s also something that Peter Follansbee uses in his work with the Plymouth Plantation while recreating the 17th century joined work.  I have no real interest in using a froe, have no real need for one, nor do I have much call for it since I rarely every see logs that I can work with.  But after watching five seasons of Roy carrying on about his Froe, and reading Peter’s blog I felt compelled to have one.  No idea why, but I couldn’t fight it.
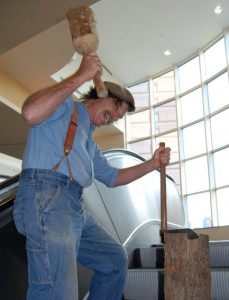
This is Roy at a WIA conference splitting logs on an escalator. He sure is nuts for his Froe! Â Photo used with permission (c) Peter Follansbee
Fast forward a little bit, we’re on the road (through the woods and over the hills to grandmothers house we go) for Thanksgiving and we stop in at a couple Antique store  along the way.  Of course what did I find?  An old beat up froe.  In fact there were two of them, but the second one was pretty bad.  I caved, I did I will admit it freely, I bought the froe  just to have it in my shop, as a sort of homage to Roy and all his work.  Plus, if I ever do run across a white oak straight grained log about six feet long, I’ll be set!  (The latter is very unlikely to happen out here on the West Coast in very urban Seattle, but you never know right?)
On the way back, travelling on Black Friday towards home we stopped at a new Antique store in eastern Washington we’d discovered while stopping for gas and lunch. Â It was a great store and my wife found some good stuff, and I got what I consider to be my best find so far.
In a dark corner, I found a pile of rusty junk  that contained a beat up Stanley Number 7 whichlooked like it might be salvageable.  As mentioned in a previous post I needed a new blade for my Number 7. so I thought I might be able to use it for parts at least.  As I carried it around for a while and in some better lighting I got a really good look at it and discovered the blade was in good shape and the rust wasn’t that bad.  The real kicker was the price tag, $25.  And I even got 10% off that just for asking.
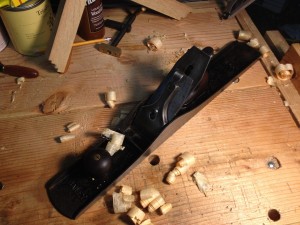
Fast forward again to tonight when I got some time down in the garage to see what was under the rust and grime. Â It was a veritable diamond in the rough because the rust was barely surface level and the grime scrubbed way to reveal a pretty solid user plane. Â I hit it with some light machine oil, sand paper and a wire brush and this is what came out.
I had to completely regrind the blade because it looks like someone had planed some nails with it and a quick run through my Coarse, Medium, Fine India stones followed by Translucent Arkansas and stropping I have a blade that could shave hairs off my arm and cut wispy thin shavings.  There was grime deep in the works, and I had to totally disassemble it and give it a thorough cleaning.  There was paint splatters in all sorts of places including a big old dollop on the front knob.  I sanded the knob on my lathe and cleaned up the tote handle by hand followed by a light coat of walnut oil.
Best $25 I’ve ever spent.
Tools at the Royal BC Museum
This weekend the family indulged in a quick get-a-way to Victoria, BC for a quick vacation.  It’s only a few hours ride on the Victoria Clipper, and was nice and relaxing for us to get away from work and the messy house.  While we were traipsing around the Royal British Columbia Museum I ran across a few woodworking related displays and interesting tools I thought I would share.  Overall the Museum is a fun trip, especially with kids, as the displays are really well done and not at all boring.
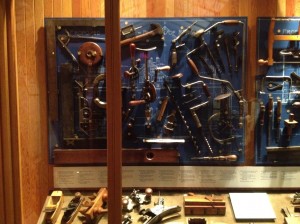
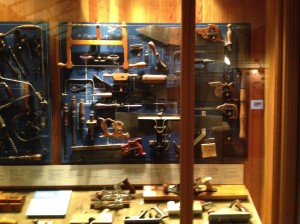
In one of the “through the periods of history” sections they have this great display of hand tools on the wall that any woodworker would love to have.
Some were more modern, but some were nice looking vintage pieces that would great additions to the toolbox.
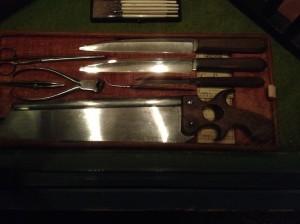
Further down the display they had an interesting saw in a kit for a surgeon. I snapped a picture because it looked like it would make a great handle design for a dovetail saw.
The over in the native peoples exhibit they had a nice display on how they made the bentwood and carved boxes out of Cedar.
We had a great time, and my son loved the undersea area which is done in a very steampunk, 20,000 leagues under the sea theme that is superb, and the giant Mammoth display. Â He ended up with a stuffed Mammoth to take home which he was quite happy with.
Replacing the Blade on a Stanley #7
I dug out one of my rehab projects the other day, and did some more with it. Â I have this old Stanley #7 in need of some TLC. Â I took it apart to clean out the gunk, and flattened the surfaces where metal meets metal. Â Things were pretty rough, but cleaned up pretty well. Â All in all I was feeling pretty good about it, until I got to the blade.
Ugh. Â No amount of grinding on the stone is going to fix this blade. Â There is so much pitting on the back, I could sharpen for ages and it will have some nicks somewhere. Â I’m giving up on this one, and asking for advice how to upgrade this to a better blade.
Does anyone have any suggestions on a good replacement blade? Â I’ve always heard of Hock blades, but have never tried fitting a bigger blade in an old plane before. Â I’ve also seen a few new blades being offered from Woodcraft and Lee Valley that might be worth looking into.
Help?
Here is the rest of the body and parts.
I think this plane has a lot of life left, but that blade has to go.  I’m going to give the rest of the body a solid cleaning, and see what I can get out it.  The body is pretty solid, no cracks and a pretty flat sole.  It will be a solid user once I get a new blade.
Badger
Finished the panels for the S-Scroll box
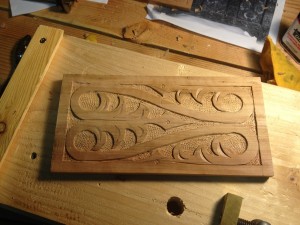
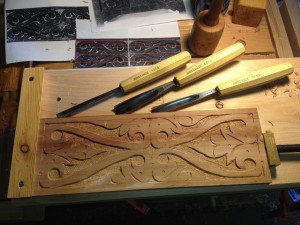
Just a quick update to show off the last of the panels I completed this weekend.
I repeated the same pattern as the first long panel, but this time attempted to stay a little truer to the original design. Â I’d gotten a comment on the first carving in relation to the original about too much open space, so I concentrated on reducing the amount of background visible. Â I think it came out pretty nicely actually, and I see what he was talking about. Â He should know, as he’s studied the original.
Changing the layout slightly and focusing on filling the space made it so that I didn’t really need the punchwork to level the background.  I spent a little more time on the “facets” of the background, to get a pleasing look and quickly found a groove that worked well.
Next step it to turn this into a box with a top and bottom. Â I’m going to nail it together with cut nails from Tremont, with a rabbet on the front and back. Â Â Not sure yet if I’m going to carve the top, or leave it plain with a simple molded edge or not.
All in all, I’m very pleased with how this is going.
badger
More Carved S-Scroll box progress
A little more carving done this weekend, in two different snatches of time in the garage. Â These two panels are going to be the sides of the box I started carving last week. Â The front can been seen in a previous post on S Scroll carving step by step. Â I’m playing around with different layout choices for these sides, trying to get more practice and experimenting with different ideas as I go.
The first side I was experimenting with simply stretching the S out a bit to fit the shape, as well as putting the center circle or button in the same plane line rather than offsetting them a little. Â Overall I’m not sure about this one, something seems a little “Off” about it, but I can’t really put my finger on it.
The second side I tried a new trick with crossing the S shapes in the center, which visually fills the space a little more pleasingly to my eye.  I did struggle a little with some grain tear out as I tried something new to me in the top and bottom spaces.  I need a  lot more practice to get some of these muscle memories established.
Over all I can feel myself getting a little more comfortable with chisels, and the body motions on each panel. Â This is sort of the point of this box project, practicing and developing my skills in this area. Â That and trying different designs and layouts to see what I enjoy carving, and what looks good.
Next up is the back panel, which I’m going to layout in pencil this evening. Â I’m probably going to try the front design again, but I might change my mind.
Badger
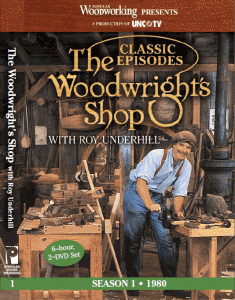
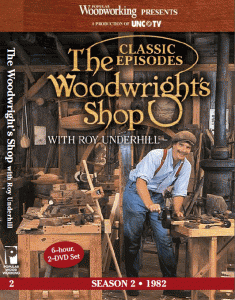
Quick Review: Woodwright’s Shop DVD 1,2
When I first heard the news that Popular Woodworking Magazine was going to be re-releasing the Woodwright’s Shop on DVD Â I had a number of reactions.
First and foremost my reaction was ABOUT DAMN TIME! I’ve been trying to record as many of them on my DVR as I could, but it’s a pain to save them to DVD-r and we had a equipment failure that wiped about 10 episodes. Â I’ve been watching Roy since I was young, and since I’ve gotten into the “hand tool” world, he’s become even more important. Â So the fact that these episodes were not available on DVD was a true crime.
My second thought was, oh man, there goes my bank account. Â No matter what the cost was, there are over 30 seasons of this show, and it was going to add up. Â This thought was quickly shut down by my wife, as she was having none of that argument. Â She accepted right away that we were buying ALL of them, no matter what. Â I love that woman.
My third thought was best described by quoting a comment on the thread for the original announcement by Megan Fitzpatrick.  “Shut up and take my money!”
Since then, I’ve managed to get three of the videos, and next paycheck will be season three. Â I’ve picked up seasons 20, 1, and 2 so far in that order. Â Here are my thoughts on the first two seasons.
Season 1
After having watched a lot of the most recent season, this first season was almost painful to watch. Â Roy is clearly new to doing this and has not found his groove yet. Â He’s a little stiff and appears almost nervous to start out, but his passion for the subject shines through like a beacon. Â You can see some of the standard Roy mannerisms in their infancy, and you get to see him developing the patter that he will use for years. Â Still it’s a little hard to watch him nervously careen around the shop as he presents the material.
Production quality of the disc is fine, although the source material’s age shows through at times with a few glitches here and there. Â The source material is in pretty good shape though for how old it is, and I am very thankful that it was preserved for us to watch these decades later. Â It’s almost comical to watch the “high tech” computer graphics used in the intro for PBS, and the university.
My favorite episode of this season is “Panel Frame and Dovetail” episode, followed by the “Timber Frame Construction” episode. Â Watching these episodes have me thinking about finding a blacksmith to make me a froe, and building myself a shaving horse.
Season 2
It’s amazing to watch the confidence building and his ease in front of the camera growing in each episode.  The skinny nervous woodworking zealot slowly transforms into a smooth talking trickster and educator, albeit a clumsy one.  His increasing confidence and experience in pacing himself over the material grew by leaps and bounds in one year.  You can more clearly see the Roy Underhill that we’ve grown used to in the later seasons really clearly.  The transformation is quite amazing, and very entertaining to watch.
My favorite episodes in this season are “In Yer Drawers” with the highlight of glue pot freezing on him at the last minute, and the “Saws” episode. Â I really hope they keep putting these out, and I’m looking forward to watching my through all of the seasons again and again. Â There is a tremendous amount of knowledge and inspiration contained in this show, and it makes me very happy to have them.
Thanks Popular Woodworking for bringing these to us, and thanks to Roy for… well… being Roy.
Badger
Carving S Scrolls step by step
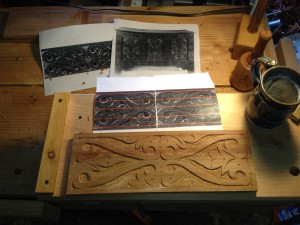
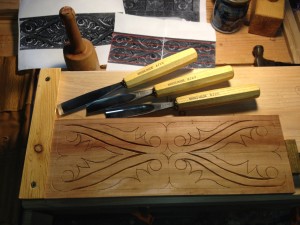
I thought I’d do a post on carving, and show the process step by step.  The design I picked for this box front was taken from a carved chest image that I got from Peter Follansbee.  The bottom rail has a nice simple S Scroll pattern than I am using as the inspiration for this carving.  The original box  is a carved joined chest, dated 1676 that is attributed to Thomas Dennis of Ipswich Massachusetts.  The extant chest is housed at the Winterthur Museum and doesn’t appear to be pictured anywhere on the net.  There is a lot of patterns on this chest and I’ve already used a strapwork pattern from this chest for my tool box.  You can find examples of these carved chests all around the net, and Peter Follansbee does a lot of this kind of work on his blog which I highly recommend checking out if you’re interested in this type of historical carving.
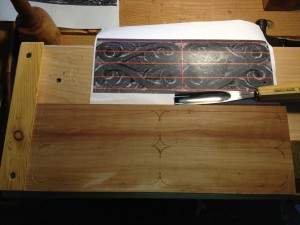
The wood I’m using here is Alder wood that I picked up, and resawed down to approximately 1/2″.  I think it’s kiln dried, but the grain is nice and tight so it carves pretty well.  I took a series of pictures as I went to show the step by step process of carving the scrolls with little measuring.  The layout started out with eyeballed edges scribed with a marking gauge.  I found the mid point with a pair of dividers, and scribed center lines to start out.
Chisel: Swiss made 8/20 Gouge
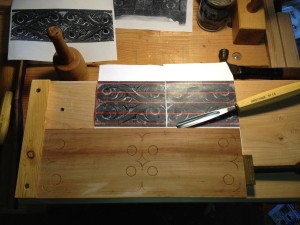
I start out bounding the curved scrolls by using a curved gouge that looked right, although in retrospect I think it might be too small. Â I probably should have used a compass here to draw out the circle at the ends to give my self a starting point. Â It didn’t turn out too badly, but I think it could be improved.
Chisel: Swiss made 8/13 Gouge
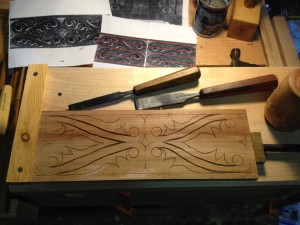
Here is where I made my first “mistake” but it was I was able to quickly pivot and move on. Â The center of the top curve of the S starts out as a circle, but if you notice, they are not directly on the center line. Â I did them opposite of the picture I was working from, but I was able to cut the picture in half and tape it back together (with duct tape, naturally) so that it matched where I was going. Â It helps to have the image in front of you, but it’s mostly for reference since I’m using the shape of the tools as the guide lines for the most part.
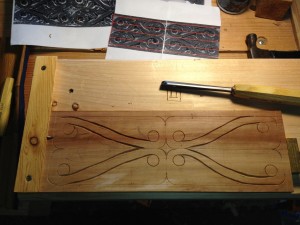
Chisel: Swiss made 12/8 V Tool
Now we need to connect the “Buttons” (which is the term that Peter Follansbee uses in his S Scrolls video. Â I used a V tool to connect the two of each, and to be sure I wasn’t screwing up I sketched it lightly with pencil first on one side. Â After I got it work out the other side was easy to follow and it’s quick work to outline the main body of the S in the S Scroll. Â the rest of the work is done with a variety of gouge shapes.
Chisel: Swiss made 4/20, 6/20, and 8/20 Gouges
Next comes the part that looks hard but really is the easiest.  With your pattern in front of you (or sketched out on the wood lightly) lay a variety of gouges down on the wood till you find the right curve that matches approximately the curve you need, and set it into the wood with a couple quick raps of the carving mallet.  Be sure to strike straight down so you don’t pop out the wood.  For this pattern I started on the circles and built out from there.  You’ll notice the center pattern is a mirror of the outer pattern.  If you look closely you can see that I’m not really that precise but the eye is very forgiving and will see the pattern for what it is.  I need to practice more to get more precision, but it is not a huge concern for me.
Chisel: Flat chisels
Next step is to take a flat edge chisel and outline any edges that don’t get cut in the main pattern. Â I reground a couple old flat chisels I got ages ago with a sharper angle and a double bevel for these two.
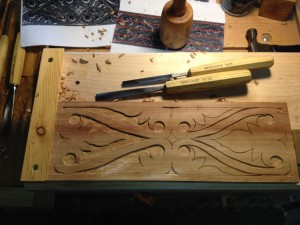
Chisel: Swiss made 5/12, and 5/8 Gouges
Taking a couple sizes of gouges with a flat curve to them, I start working out or relieving the background.  I find the #5 sweep to be perfect for this work, and I have a couple sizes for bigger removal or getting into tighter corners.  The best way to do this step is work towards on of your gouge cuts, and take a bit out at a time.  Grip is important, and control is desired so work slowly and carefully.  You’re looking for a nice crisp edge, but not necessarily a flat bottom.  It will somewhat faceted once you’re finished, and a roughly uniform depth is good.
Here is a shot of the relief work all complete prior to texturing the background. Â It’s useful to have a coarse stiff brush to get all the chips out. Â I also spend a little time going over the whole pattern in detail to find any missed spots, or areas that need a little clean up.
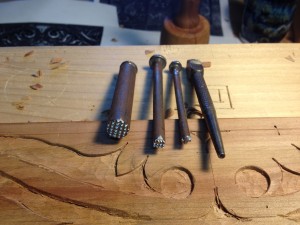
I thought I’d show you my home made text punches that will be used in the next step. Â The one on the far right is just a nail set which work perfectly for this, and makes a mark very accurate to the old examples. Â You probably have one in your tool box already. Â I also make a simple “maltese” cross punch for decoration from a nail, and some files. Â The two texture punches are made from round bar stock I got at the hardware store, and a big nail cut short. Â I just free handed the grid with a needle file.
I use the big punch where ever it fits into the background and tapping it with a metal hammer. Â You don’t have to fill the whole background precisely, just try to cover as much as you can. Â Any areas the big punch won’t fit, I hit with the smaller sized texture punch. Â I added a couple circles with the nail punch, and added a couple cross punches. Â I realized I should have set the sides in further on the design since I plan on nailing this together, and didn’t allow for that. Â The nail set punch decoration is straight out of the original pattern.
Chisel: Swiss made 8/13, 8/20 Gouges and 12/8 V Tool
I used a couple of gouges to add some decorative “half moon” cuts to the leaves, as it was in the main pattern I am following. Â I also added a little V tool work as well to break up the flat spaces. Â Once thing I’ve noticed about the patterns of carved boxes from this period is that they really don’t leave much open space clear, either in the background or the surface level. Â I guess nature abhors a vacuum in the design, and I think it helps.
All finished with this box front.  I’m planning doing the sides of the box with a single length of the S, and maybe a different pattern for the back.  I am mostly just practicing my carving and design, as well as testing out this Alder wood for carving.  I don’t have regular access to the wonderful riven white Oak that Peter uses, but this might just be a good local substitute.  I like the color and grain, and I can pick it up fairly easily around here in the Pacific Northwest.
There you go, let me know what you think and I hope it helps understand this type of carving. Â It’s easier than it looks, is very forgiving and makes a great presentation.
Badger
Resawing a board by hand
It feels like it’s been a million years since I got down to the shop, but it’s really only been a couple months.  We had our annual family vacation road trip down to San Diego and back which we took three weeks for.  But right before that I’ve been having a lot of worse stress and dramatic changes there that set me back on my heels a bit.  Fortunately things are looking up  again, and I think it’s going to work out.
So, not much woodworking happened while I hunkered down mentally, and slogged through the hard times. Â So I know things are getting better because I made it down to the shop and cut a board in half. Â The long way. Â 🙂
A few months back I picked up some pieces of wood down in Portland, and I have been wanting to get some carving going again. Â I picked out a chunk of Alder, must be about 1″ thick or so, but I didn’t measure the thickness. Â In actual fact, I didn’t measure anything today as I eyeballed stuff or just used my dividers with standard proportions. Â The thick alder board was some nice wood and should be lots of fun to carve, but it was much too thick for making a box out. I don’t own a bandsaw that will do resawing, as the one I bought on sale at the home center is a pile of crap. Â I’ve never had any luck with this thing, and I’ve spent hours trying to get it cutting even remotely straight. Â Plus, it scares the crap out of me since I’m clumsy on a good day and I happen to like my fingers. Â (more on this later).
I’ve been thinking about making a frame saw, but I really wanted to spend some time working wood and not making yet another tool. Â When I do though, I think I’ll be using this as a guide: Â http://www.hyperkitten.com/woodworking/frame_saw.php3Â Josh is an amazing tool peddler, and apparently also works the wood too.
I have a 5 1/2 Point rip saw from Tools for Working Wood that I thought might do the trick, and I’d seen Roy Underhill do it on his show a few times so I jumped in and tried it.  And just like Roy I managed to nick my finger and draw a little blood.  Had I been using the Bandsaw, I’d probably be singing the Frodo the Nine Fingered ballad while I asked my wife to take me to the ER.  Anyway, back to woodworking shall we?
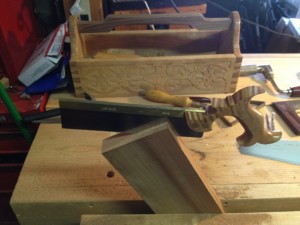
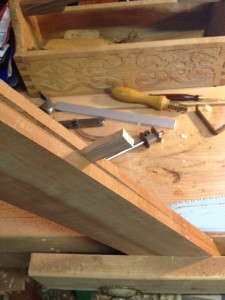
To get it started I sized the length of my board using dividers, cross cut it to length and found the middle line with marking gauge. Â Running the line around all four sides is essential, as we’ll be flipping this around a lot and we need to have that reference line. Â To start the cut, I clamped it up in my face vise at an angle, and used my dovetail saw (the only rip back saw I had handy) to carefully but quickly start the cut. Â I needed to create the first line for the saw to track into, and once I had the corner cut I followed up with the Rip hand saw. Â The trick I found was to let the saw and gravity do most of the work, as it will naturally follow the track left by the last saw, a trick we use through the whole board actually. Â Because once you cut through the corner you unclamp the board, reverse it in the vise retaining the same angle and cut down the other side. Â You keep flipping it back and forth like this because the front half of the saw is cutting wood, but the forward half is in the track of the last cut you made keeping it pretty much on the line you want to follow.
I kept flipping it back and forth until the vise wasn’t grabbing it firmly anymore and then flipped it end to end to start on the other side. Â This is why we needed to mark all four edges of the board. Â A couple of tricks I tried with excellent results are as follows:
– Waxing the sawblade kept it running smoothly in the cut. Â I have a block of beeswax I rub on it every time I switched the board.
– Angling the tip of the blade upwards a little helped the cut a lot, and prevented binding.
– I used a little wedge at the top of the board to open a little, which also helped keep the saw from binding.
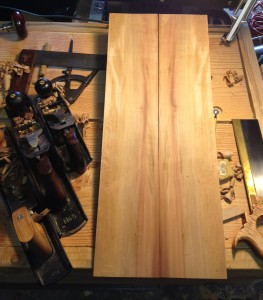
After my cuts met up from the other side, i was able to pop them apart and see what the inside looked like. Â It wasn’t that bad as I’d been able keep pretty much on my center line through the magic of tracking.
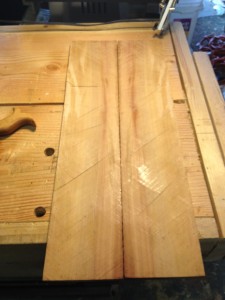
After that it was a pretty simple matter of planning down the saw marks, and cleaning up the edges with my Fore and Smooth planes. Â All in all, it took me about an hour to complete this including thinking it through, then marking, cutting and planing the board. Â If I had a fancy bandsaw it would be quicker I’m sure, but for me since I don’t own a decent band saw, this was a pretty good result for the effort. Â Plus, now I know how. Â I’m going to make a box out of this, probably carved on all four sides. Â Not sure what I’ll use for the lid, but I’ll deal with that later once I get through the carving.
Badger
Chisel Roll v2 – Now for sale!
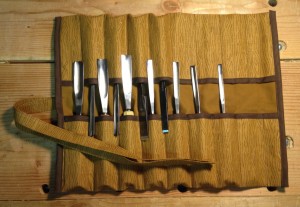
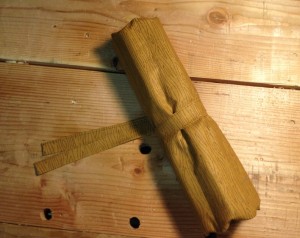
The chisel roll that my wife made had garnered some interest and had a number of interested queries including one sale. She fine tuned it a little based on my feedback, including making the center gap smaller to reduce the chances of fingers grazing sharp edges. I put it to the test last night and I quite like it.
She is making these to order now, so please get in touch if you’d like one!








You must be logged in to post a comment.