Posts in Category: carving
Some new carved work…
This evening I spent some time with my son on a carving project. He’s three years old, and is just starting to get excited about Halloween, and understand some of the traditions we typically do. This year I found this great goofy looking pumpkin that was all lopsided, and I found the perfect face to put on it. He is a big fan of Cat in the Hat, so I carved it for him using my chip carving knife, which turns out a is a great tool for carving lines into pumpkins. And how I stretch the definition of woodworking post… See I used a woodworking tool, it’s carving right?!
He drew the other one, and I carved it for him following his lines, and he had to help take the guts of the pumpkin out. He was quite excited, and we had a good time. Happy Halloween everyone!
Badger
Carved Utility Box
We recently got back from a summer family road trip which was refreshing and tons of fun.  While I was on the road I had a lot of time to think, which you might expect when you put 2950 miles on  your brand new (to us) Subaru Outback. Of the thoughts that looped through my head as we ate up the miles on our Big Adventure (that’s how we pitched it to the three year old in the back seat) was about woodworking.  I also had some time to explore some of the Redwood forest and the carvers that ply their wares by the road side.  Needless to say when we got back, I wanted to get back to the shop and work.
Here is what I got done this nice and sunny afternoon.
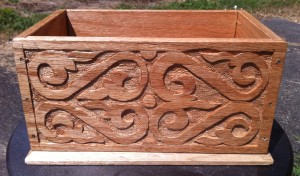
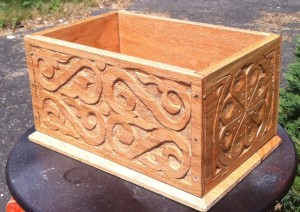
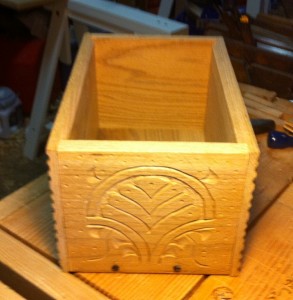
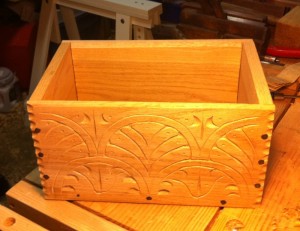
This is made from some really crappy Big Box oak, which I will never buy again unless I need small crap boxes. Â I tried to carve it and it splintered, and chipped, and generally sucked all the fun out of carving. Â However, I decided to make it into something I could use around the shop to hold tools and assorted sundries which my shop desperately needs. Â So I tried some more free hand carving designs on the sides just for fun, and nailed this together. Â It’s sitting outside and drying the coat of spray shellac I just put on it before I snapped these photos.
It doesn’t look half bad in the pictures, but if you got a closer look at it you’d see the quality (or lack thereof) and the terrible job I did nailing it together. For some reason I had some real problems with the nails, and I think I rushed it too much. Â Something I need to stop doing when I work. Â I need to take my time and focus on the task at hand, not the end product. Â It makes me make mistakes, which affect my over all interest in the craft.
But I did learn a lot from this box, and I will continue to grow my skills (on some better wood thank you very much). Â It will serve a purpose in the shop holding chisels, and reminding me to slow down and work thoughtfully.
Plus it felt good to MAKE something. Â I have a very people oriented job, managing a number of teams which makes the physical labor of craft so much more appealing to me.
Now to plan out my next project for this Quartersawn Oak I picked up. Â Maybe another box? Â Maybe a portable tool carrier? I know it will be carved, so I can continue to practice.
Badger
Scroll panel Layout example
I was contemplating the S Scroll carving that I had recently finished, and looking forward to trying a different technique on the next set. The question in my head was, do you do the outline with ALL chisels, all V-Tool work, or a combination of both. The answer according to Peter Follansbee is “All of the Above”. I did the most recent panel with all chisel outlining only. I’m going to do the next panel with V-tool outlining with some chisel work to outline the leaves. I also had a couple of lingering questions on how much layout did I do to before starting, and how much is free hand, etc. etc.
Checking on PF’s blog he posted just recently about tool marks present on extant 17th pieces. He did a close up of some marks on a Scrolled panel like I’m working on figuring out. It showed some marks left visible from whatever craftsman made it the first place, which helped me understand some of the layout tricks they used.
I did some work with a Paint program to highlight some of the visible marks. I also modified the original image with “emboss” filter to show the lines better, which accentuates the V tool lines.
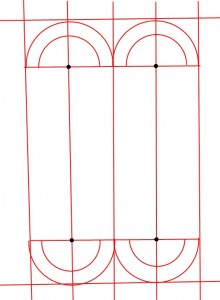
Then I took the background away to show just what the layout lines would look like when starting from scratch.
Which makes it much easier to understand the starting point of the design. You layout just this part, and you can probably do the rest of the design with just tools with a little practice. I found that to be true after only four of the Scrolls on my previous panel, and I could see how after you do a bunch of them it would become second nature. The half-circles would make it easier for the whole design to be visually consistent, especially if you were doing a whole bunch of these in a row. You could do all the similar markings on one setting of the compass, and then set the smaller diameter and do them all in a row.
Remember these were production houses and working gentlemen making these, and if it was easy to repeat and you could get more efficient with a few tricks, then they probably did it.  I’m looking forward to trying this on my next panel…
Badger
First Scroll panel complete
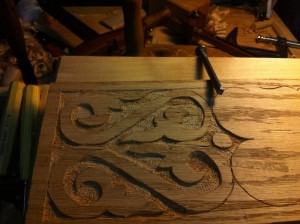
Here is my first S scroll panel completed for the box I am working on. The second half of the Scrolls went alternatively better and worse. Better because I had more awareness of what I doing, and it went more easily. Worse in the sense that the wood is pretty crappy and it crumbled in a couple of spots resulting in my having to change my design dramatically in a couple places.
From a distance it looks ok, but it’s got some rough edges that should be crisp, and the design varies quite a bit in places. But over all I’m pleased with it as a learning exercise.  It has served it’s purpose on that front well enough, and will make a decent enough box in the end. It will probably end up holding tools or some such in the shop.
Now on to the next side, and deciding what pattern to use for the sides. Practice makes perfect, or in this case helps me learn the physical motions necessary, as well as how the wood behaves, grain direction and all kinds of things you can’t learn entirely from reading a book.
Badger
More Scroll work and my new Carving Bench
I snuck down to the shop after I got my kiddo to sleep to continue work on the S Scroll box face. I got a second scroll complete, and some of the outline of the other two. I’ve also learned a few things about crappy hardware store wood along the way. The open porous grain of this oak causes some serious issues when carving, and it’s difficult to get a nice clean surface (not flat, just clean) because the would just disintegrates as I try to carve it out. It also is weaker than the solid parts (fairly obvious really) and causes some splintering on the areas where it shouldn’t. I’ll have to fix those later once I’ve gotten this all done, or maybe I can plane it down, not sure.
I did modify the design here and there to accommodate sections of weakness to good effect, but I have a couple spots that are going to be a problem. I see a little more clearly now though why some of the designs I’ve looked at, and PF has discussed as well are not totally symmetrical.
I also am learning a lot about what I need to learn. Sounds awkward, but it means I’ve learning some of the things that I will have to simply practice a lot to get better at. You can feel it when it works right, it just… Makes Sense. In a Zen sort of way, it feels right. And the converse is true. You can really feel it when it’s not at all right. I’m trying to learn to take a deep breath, slow down and think those areas through rather than my natural reaction which is to panic and push harder or move faster. Which usually doesn’t work so well, as you might imagine.
I also snapped a picture of my new “carving bench” or maybe it’s a “bench on a bench” or something. I’ve seen a few blog posts around the woodworking blogs about these, and I decided it was probably the best thing for my aching back after a long session of carving. Night and Day! I just screwed together some pieces of left over construction grade lumber, and clamped it between the bench dogs and vice to hold it down. Nothing fancy either to hold the work. I have visions of using some of those fancy Wonder Dogs, or whatever they call them from Lee Valley, but that was too complicated and I didn’t have them anyway. Clamps work great and the board is not going anywhere.
Off to bed, with visions of S Scrolls dancing in my head.
Badger
Starting Some S Scrolls
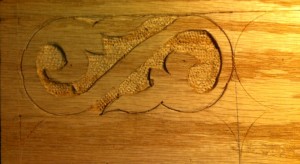
I put my sketching from my previous post into practice tonight. Once I get a few more of these done I’ll document the process, but I wanted to show off my first attempt. It’s some half inch hardware store flatsawn Oak which is what it is, and I wish I could get better stuff but it’s what I can get in the City, and with my available time to track down the green stuff at almost nil, it will have to do.
I outlined the whole thing with various curves of chisels from my basic kit of chisels, and I was able to do pretty much everything with that set. (See previous post on interpreting PF’s carving set into “Swiss Made” brand chisels.)
Once I had the outline set in, I took out the background where it made sense. I was only doing one S tonight, and not the full set of four that will make the box front for this project. I’m going to do four on the front, and repeat the motif on the back for the practice. I might do something else on the side, probably something floral, or maybe just repeating the S Scroll motif if I feel like it.
I did make a new texture punch tonight as well, using a big nail I found at the hardware store. It’s a smaller profile than my previous punch I made, and could fit into tighter corners. Using both I was textured the background just to see how it looks, and I quite like the contrast it gives.
Anyway, off to bed, for I have to get up early for work tomorrow.
badger
Practicing S Scroll for carving
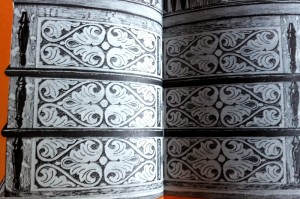
Example of S Scrolls on 17th Century Furniture. Original Cupboard is at Yale University, made in New Haven or Guilford CT c. 1640-1680. Image from “Treasury of American Design and Antiques – Clarence Hornungâ€.
Today I spent some time practicing a bit of carving… with a pencil. I recently read in a book recommended by The Village Carpenter (Kari Hultman) on her blog. I’ve been reading it since I got into the hand tool woodworking, and it’s been an inspiration. The book “How to Carve Wood” by Richard Butz recommended practicing some of the carving details on paper before putting chisel to wood, and I’ve been wanting to try some of the S Scroll type carving in the near future. So I set out to try it today, and now that I have I highly recommend this practice for figuring out complex patterns. I’ve been staring at the S Scrolls on period pieces, and it’s a bit hard to figure out where to start. I know the theory, but the practice sort of intimidated me.
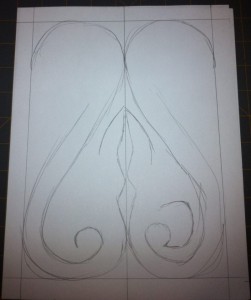
So I started out by laying out the layout lines I would use on the wood.
Then I made rough half circles for the tops of the S, which in the wood I would probably do with a pair of dividers.
Next I extend the middle of the S lines in a diagonal fashion, forming the middle of the S, paying attention to the thickness of the line I am forming.
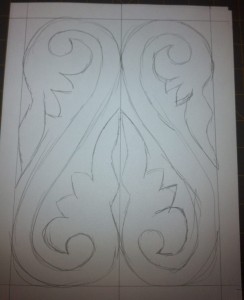
Once I’ve formed the S, I then start working on the floral inspired stuff that fills the space. I found it very helpful to take the bottom of the S and form a small circle, and extend that into a leaf to fill some of the space in the bottom loop. Same with the side leaves, extending up the middle guide lines with some curves that will become leaf shapes.
Next I bring the leaf shapes of the middle, and bottom and fill in two leaf shapes between them, trying to form them using shapes of a chisel, since that is how I’ll outline these. Then I just did the same thing up sides with the top leaves. The basic outline is done at this point. It helps to look at the negative space, to see how much is left, since you’ll have to carve this away. Keeping it even is good too, but not totally required.
Next I add some “veining” that I would do with the V tool, and play with some of the open space, to see if maybe leaving some moon shapes would look good. It’s pretty free form at this point.
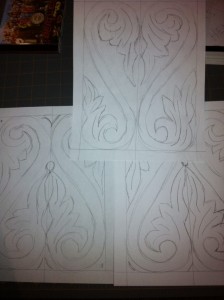
That’s pretty much a complete S scroll pattern. It can be repeated endlessly, and it can be scaled up or down to fit nearly any rectangle shape. You find them with back to back S scrolls like I did here, or you see them as a single S alternating as a border. I spent a few pieces of paper getting some of these sketched out, and I feel a lot more confident setting chisel to wood now. I’m sure it won’t be as simple as sketching, but at least I now have a concept of how to lay it out.
My next step is to apply this treatment to some Oak I’m going to turn into a saw box.
Badger
Carved Box finished!
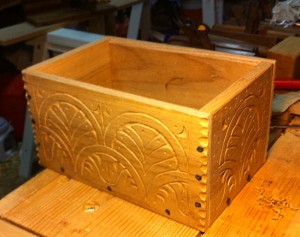
As chronicled in the following posts one, two, three, I’ve been working on a carved box in the style of a 17th century pattern. Inspired by Peter Folansbee, and his blog I’ve gone down a pretty deep rabbit hole, and I’ve been having a blast with it. I’m planning to continue the practice carving starting with my next project, possibly a saw till, and keep at it. While I am happy with what I put together, it only showed me how much I had to learn. I’ve been doing lots of research, and as usual buying books. I still can’t find Chinnery, but I do have it on loan from the library right now, and it’s a gold mine of pictures and information.
Picking up where I last left off with the carved sides and ends, I now had to put together these carved boards into a box of some kind. I started by trimming the boards to their final size, which took some work to figure out as I didn’t have any good wide boards for the bottom or a possible lid. I had to rethink my design quite a bit, and finally settled on a shape. It had been going to be a box with a lid and molding around the bottom edge, but instead I opted to simplify things quite a bit. It’s now going to be for my carving tools which I’ve started gathering a number of.
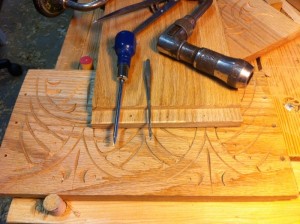
After I had the sides trimmed, I used my moving fillister plane and a rabbet plane to make some rabbets, a simple procedure I nonetheless made more complicated that it needed to be. My fillister plane needs a bit of adjusting I think, so I had to do a lot of clean up with the rabbet plane. It’s something I need to do a few more of before I feel comfortable doing it. Next I needed to make some holes for my nails. I decided to try something I’d read about, and use a “birdcage” awl. I took a cheap ice pick I’d gotten from Harbor Freight, and using a grinder made the tip a four sided pyramid instead a rounded point.  Using this I twisted it back and forth in one spot, and it made a rather nice hole. It’s a old trick apparently, but it’s not too common from what I’ve around the blog-o-sphere. I also tried out my gimlet bits that I picked up ages ago at a tool show. Those worked well enough, but took a long time to get started, so I finally settled on a combination of awl and gimlet bit which was fairly quick, especially when I did a whole series of holes.
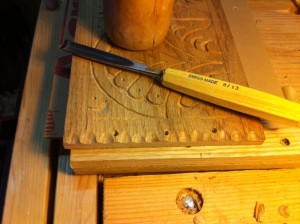
Once all the wholes were bored, I put some finishing touches on the edges with a gouge. I’ve seen this done on quite a number of 17th century boxes, and it was quick and easy to do. So now I had my bottom board cut, sides trimmed, and everything prepped. I nailed it together with some Wrought Head Nails I ordered from Rockler. They gave it a nice touch. I’m not sure if they are accurate, but my box isn’t really going for full period anyway.
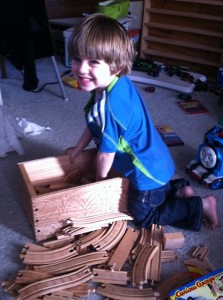
After I finished I brought it up to show the family. My son immediately put it to it’s proper use, putting wooden train tracks into.
More on punches with examples
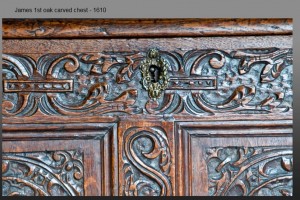
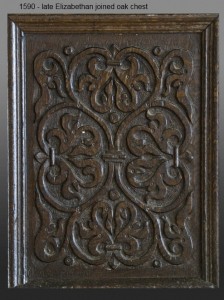
I’ve been scanning the internet for examples of the punch marks used in period carving work. And when I say the Internet, I really mean Marham Church Antiques, and Peter Follansbee’s Blog. If you’re in to 16th – 17th century woodworking and carving then both of those sites should be in your favorites. The first on is not a wood working site per se, but it’s filled with wonderful pictures of antique wood chests, furniture and more. It’s well worth a browse for inspiration, carving patterns, and if you’ve got extra money you can purchase some of them. I’ve been tempted on a few occasions, but we have a big travel vacation planned this summer that I need to save for. Peter’s blog I’ve gone on and on about, so I won’t reprise that.
I was able to find a nice set of punched decorative marks on the Marham site, and I’ll show them here. My next step is to make a set of these, so watch for that post later. I’ll be documenting my steps as I go, so hopefully that will help out a little.
The last two are from Peter’s Blog, and the rest are all from the Marham Antiques site. The last one has THREE different punches used in the decoration. I’ve been using a nail set as a small circle punch in my carving so far, and it’s super easy. I’ll be posting the finished box later, which shows two different punches used, the nail set, and a nail I carved into a cross pattern with small needle files.
Once you start looking for them, you can find them in all kinds of places. Once you start using them, it’s hard to stop. It’s a simple way to add a little flair to your carving, and just as “nature abhors a vacuum” so does 17th century carving. I’ve noticed that the carvings generally have very little in the way of flat open blank space.
Badger
Carved box progress
I managed to finish the end panels this afternoon while the kiddo was sleeping. I’m taking my practice panels and making them into a box, because I’m pretty happy with the carving.  I’m going to rabbet the ends, nail it together with some wrought iron head nails I got from Rockler. For the carving on the end panels, I picked one fan tail design for each panel, just to carry the theme around. I even went back to my first panel, and fixed it up to be more in line with the other panels, since I’d improved on my skills a bit in the subsequent panels.
Just some trimming, and nailing to do to make the box sides, now to get some wood for a top and bottom for the box, since I don’t have anything big enough in the shop. Speaking of trimming…
Look what my lovely wife bought for me for my birthday! It was earlier this month, but she knew the Lie Nielson hand tool event was coming to town, so she let me buy something there. I have a dovetail marker coming too, something she’d wanted to get me for my Christmas stocking, but they were out of stock.
It’s a thing of beauty, as all the LN tools are, and it cuts well, and is a comfortable fit in the hand. I’ve got some rip back saws, mostly antique store rusty treasure finds. Just need to get them sharpened, or take another whack at it myself.
Badger


